Table of Contents
How to free up space in my Outlook Mailbox?
To free up some space on your Outlook Mailbox, you can utilize a built-in feature known as AutoArchive inside of Outlook.
What is AutoArchive?
A feature to automatically scan through the mailbox every N amount of days/weeks/months and the mails that has passed the period will be automatically moved into an archive folder that is in the form of a Outlook Data File(.pst). The .pst file will be automatically created and old mails will slowly accumulate there.
Am I able to pick a specific folder where the AutoArchive will work on?
Yes, you may. In this FAQ guide, the first part will demonstrate how to set AutoArchive that can be applied to all folders in the mailbox, while the next part of the guide outlines on how you can select which folder to apply AutoArchive on. You can also customize the duration period to your liking. In an essence, the AutoArchive feature has a two-step process. First, you turn on the AutoArchive feature. Second, you set the properties for the AutoArchive feature for each folder that you want archived.
To configure settings on the AutoArchive
1. Go to File(top left) → Options(middle).

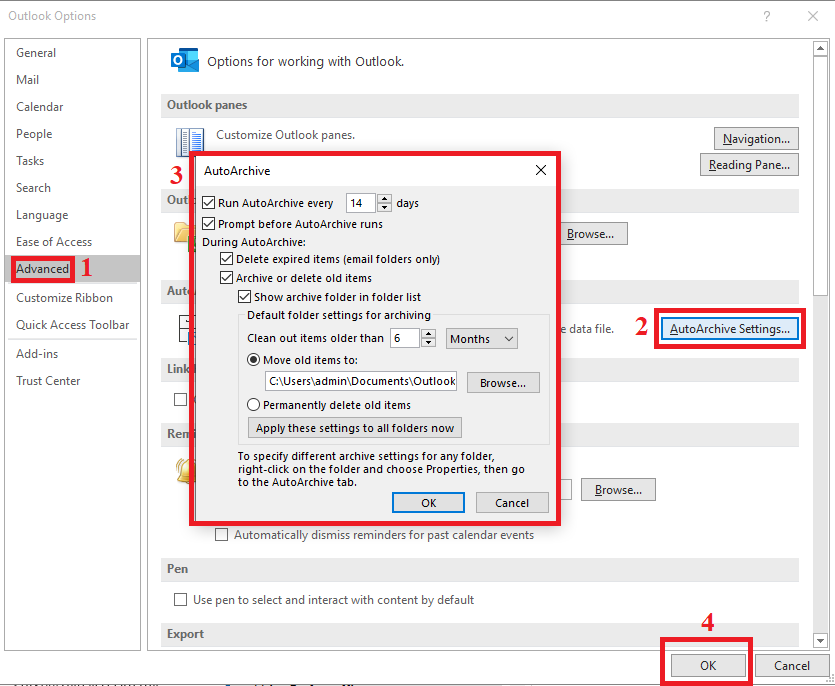
2. On the Options, locate Advanced(1) then AutoArchive Settings(2).
3. On this page(3), you can set your preferred time to let AutoArchive run, aging periods for certain mail items and also which (.pst) file the items will be moved into.
4. Once done, do remember to click OK on each pop-up to make sure the settings are saved.
5. From this point, any folder that has AutoArchive enabled will apply these settings that you have just made.
To select a specific folder
For this example, let us assume that we wish to only apply AutoArchive on the Inbox folder.
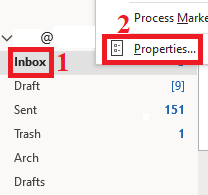
1. Firstly, right-click once on the folder(1) that you want(Inbox in this case).
2. Then, select Properties(2).
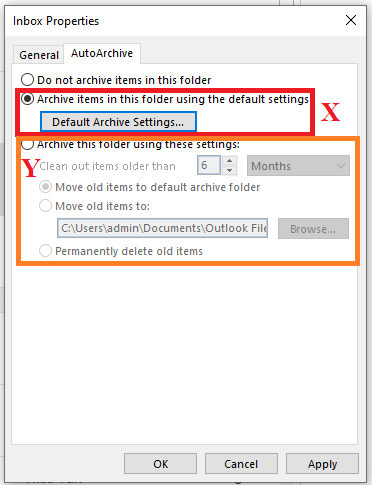
3. On this page, you have three choices to select.
-X, the settings here will be the same as the one you've done earlier(or default).
-Y, you can make your own settings. This enables you to make different settings for different folders based on your own preference.
-Or, you can just disable AutoArchive for the specific folder.

