faq:email:mail_setup_win_live_mail_imap
Email Setup Guide for Windows Live Mail (IMAP)
Open your Windows Live Mail and follow the steps below to setup your email on Windows Live Mail with IMAP.
Example:
Name: Demo
Email Address: demo@lookafter.com
Type: IMAP
Steps:
- If you are launching Windows Live Mail for the first time, you will be directly prompted to create a new email account. You can skip to step 3 from here.
Otherwise, go to the [Accounts] tab.
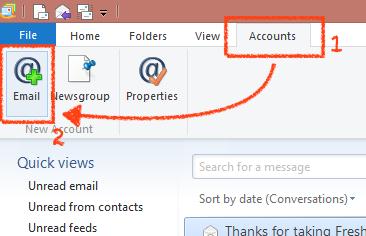
- Click [Email].
- On “Add your email accounts”, enter your email address on [Email address:].
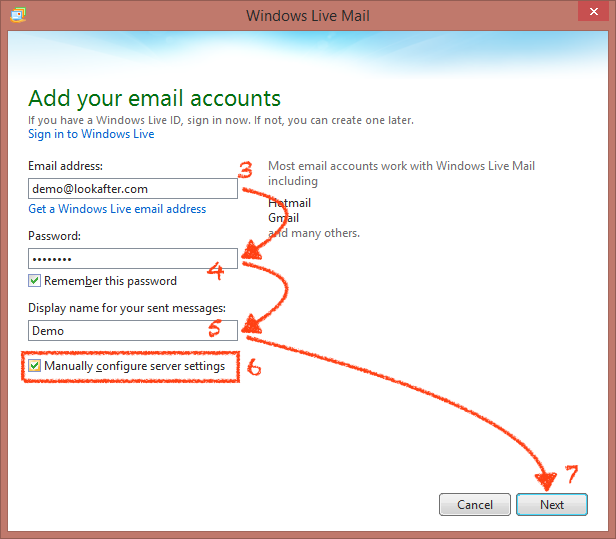
- Key in your email account password on [Password:]. Make sure that the [Remember this password] option is selected.
- Then, enter your name in the [Display name for your sent messages:] field.
- Check the [Manually configure server settings] checkbox.
- Click [Next] to continue.
- On the incoming server information (on the left column), select IMAP for the [Server type:].
- On [Server address:], key in your mail server, which is mail.yourdomain.com.
Make sure that the port number is 143 and do not check the [Requires a secure connection SSL] option.
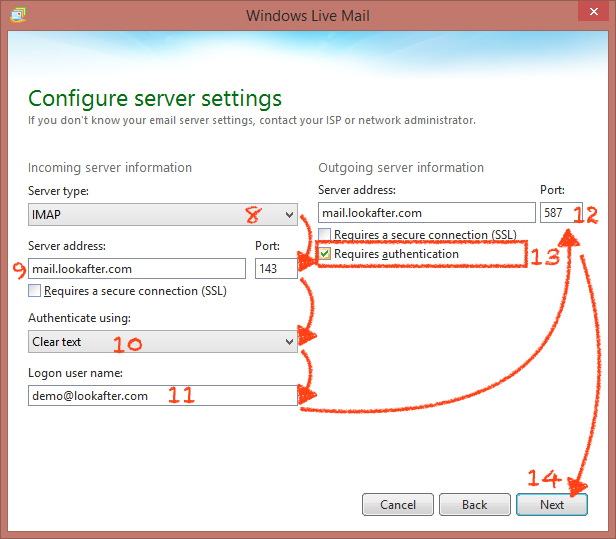
- Select Clear text for [Authenticate using:].
- Key in your full email address on [Logon user name:].
- On the outgoing server information (on the right column), key in your mail server on [Server address:], which is mail.yourdomain.com.
Key in 587 for its [Port]. - Check the [Requires authentication] checkbox.
- Click [Next] to proceed.
- Your email account has been successfully added. Click [Finish] to close the window.
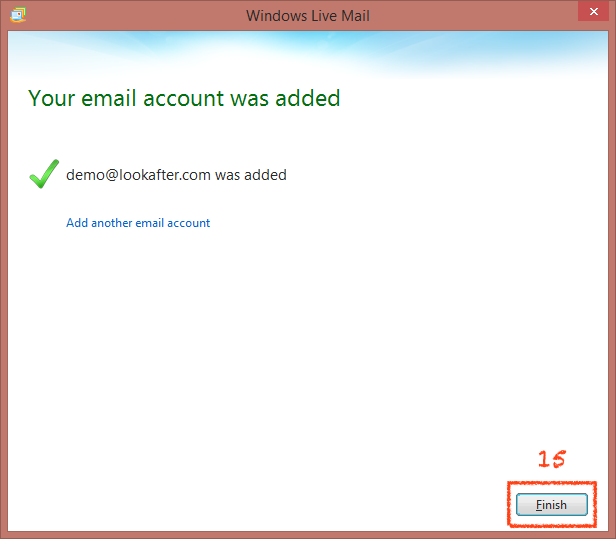


Now, you can access your emails from your Windows Live Mail.

faq/email/mail_setup_win_live_mail_imap.txt · Last modified: 2015/08/04 10:50 by vikki
Except where otherwise noted, content on this wiki is licensed under the following license: CC Attribution-Share Alike 4.0 International
