Home > FAQ > Email > Email Clients & Mobile > Mail Setup Guides for Desktop PC/Laptop > Setting Up IMAP in Microsoft Outlook (Manual Setup)
Setting Up IMAP in Microsoft Outlook (Manual Setup)
While newer versions of Microsoft Outlook provide a simpler email setup process with less fields to input, sometimes they may not able to fetch the accurate email server settings.
This document illustrates the manual steps of setting up IMAP in Microsoft Outlook, where we can define all server and email settings directly. If you prefer to follow the new setup process, please refer here.
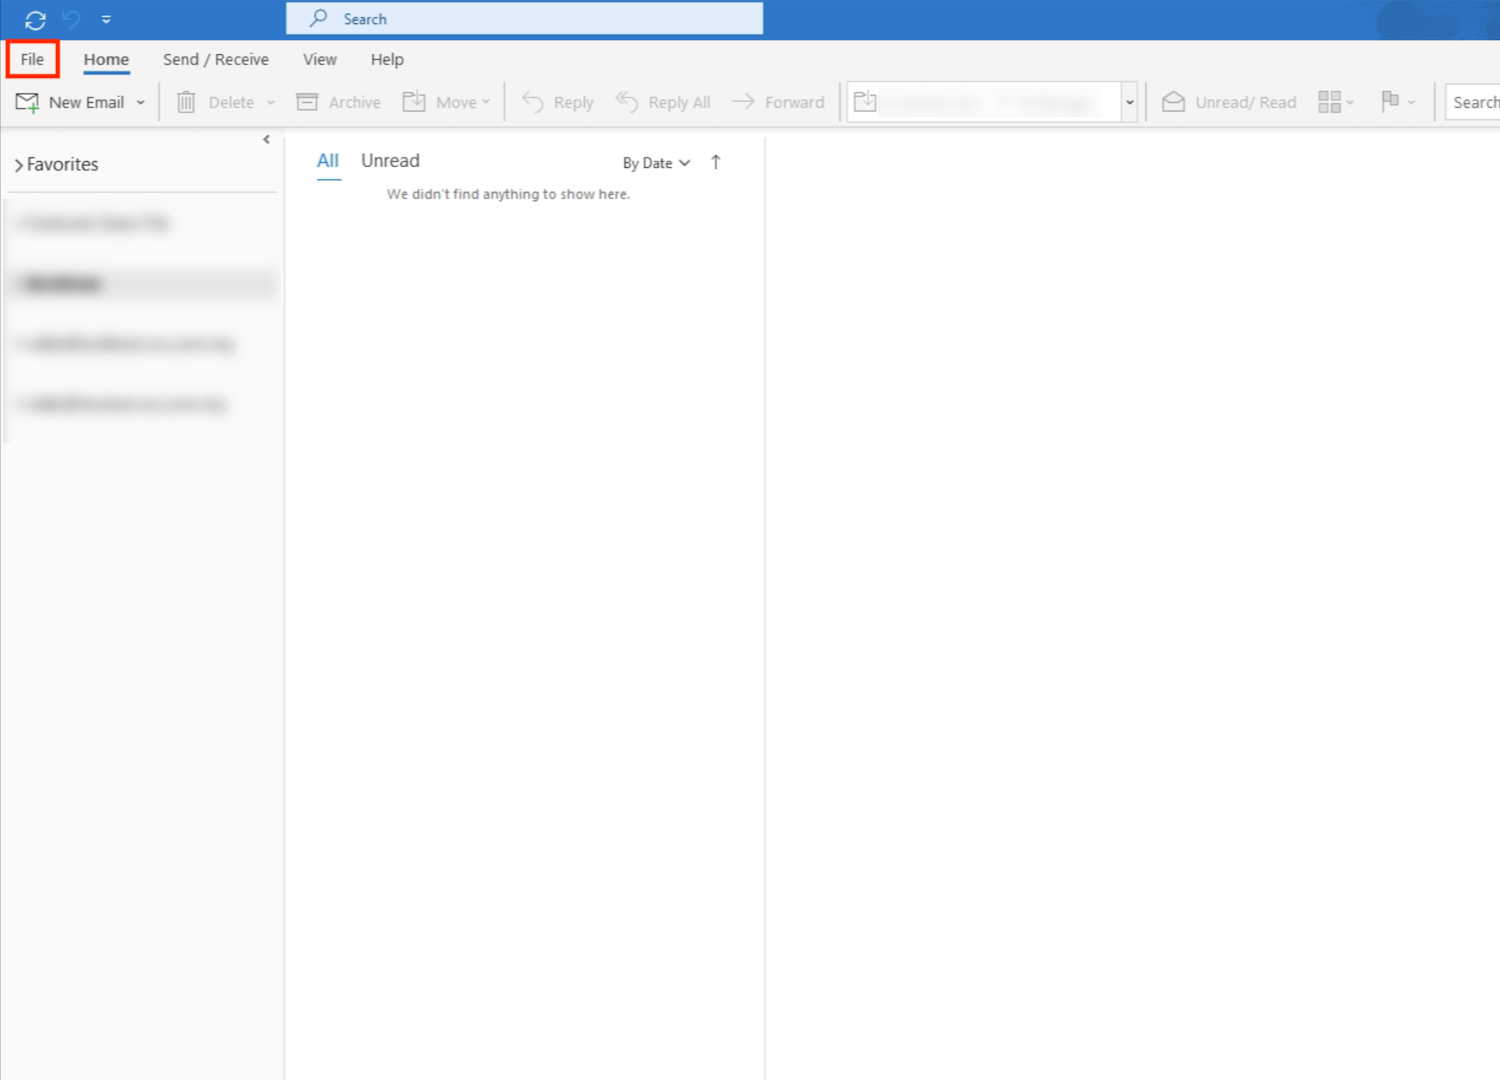
1. On Ms Outlook, click File.
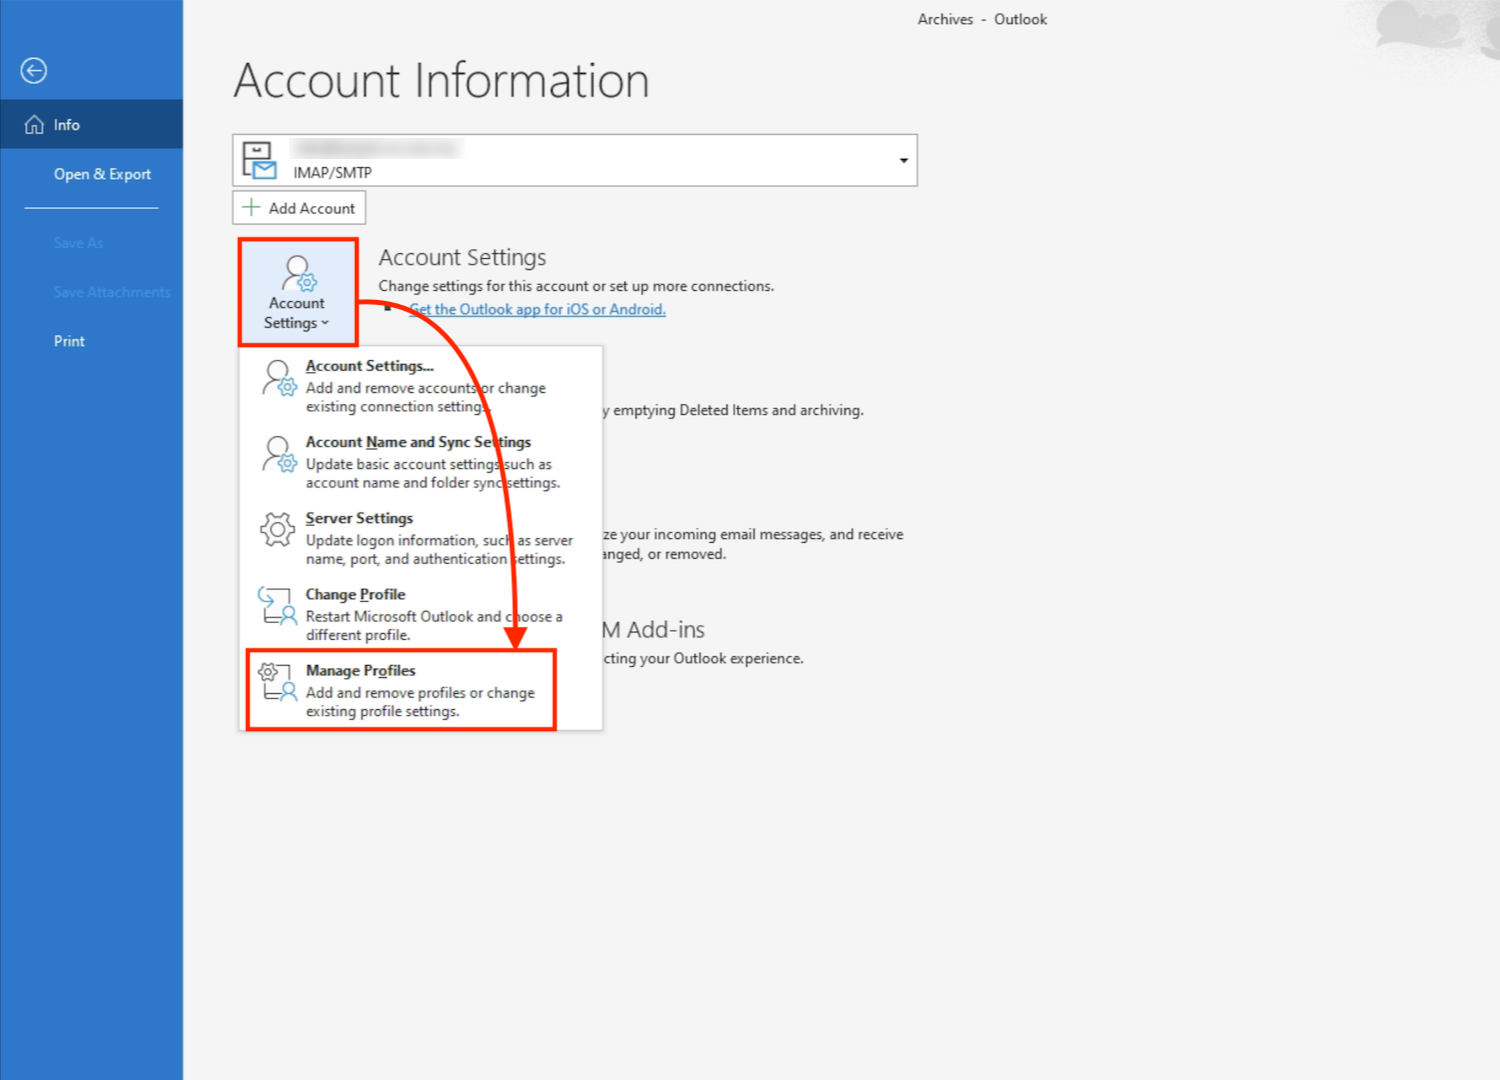
2. Next, click Account Settings > Manage Profiles.
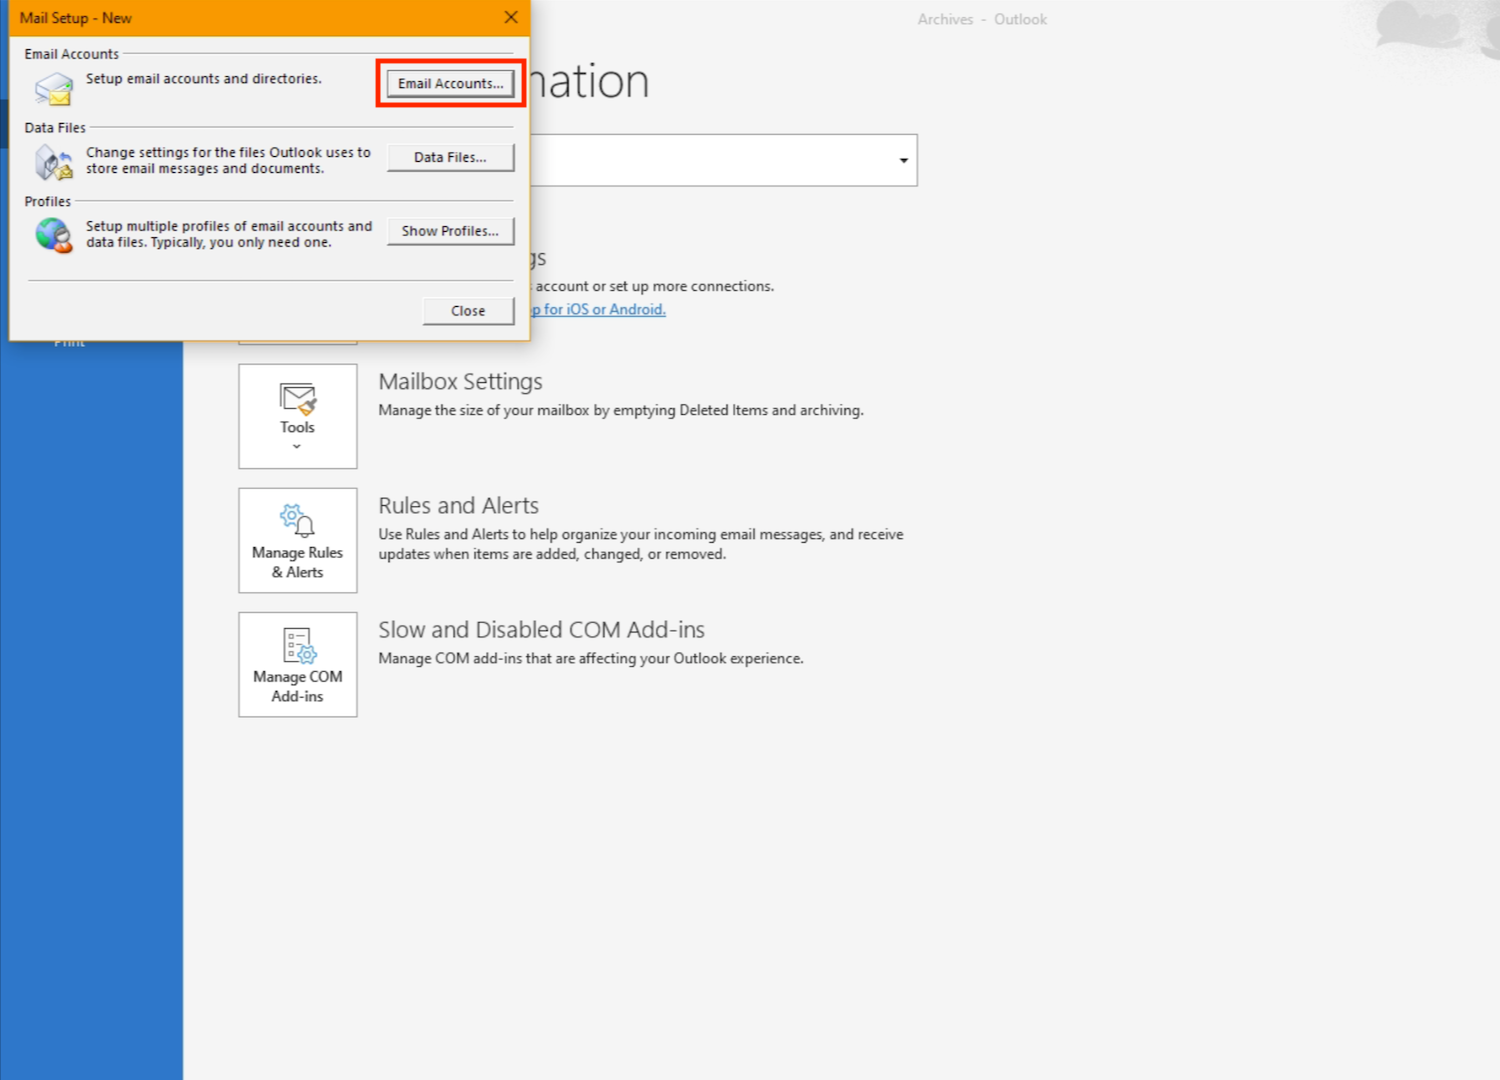
3. Select Email Accounts….
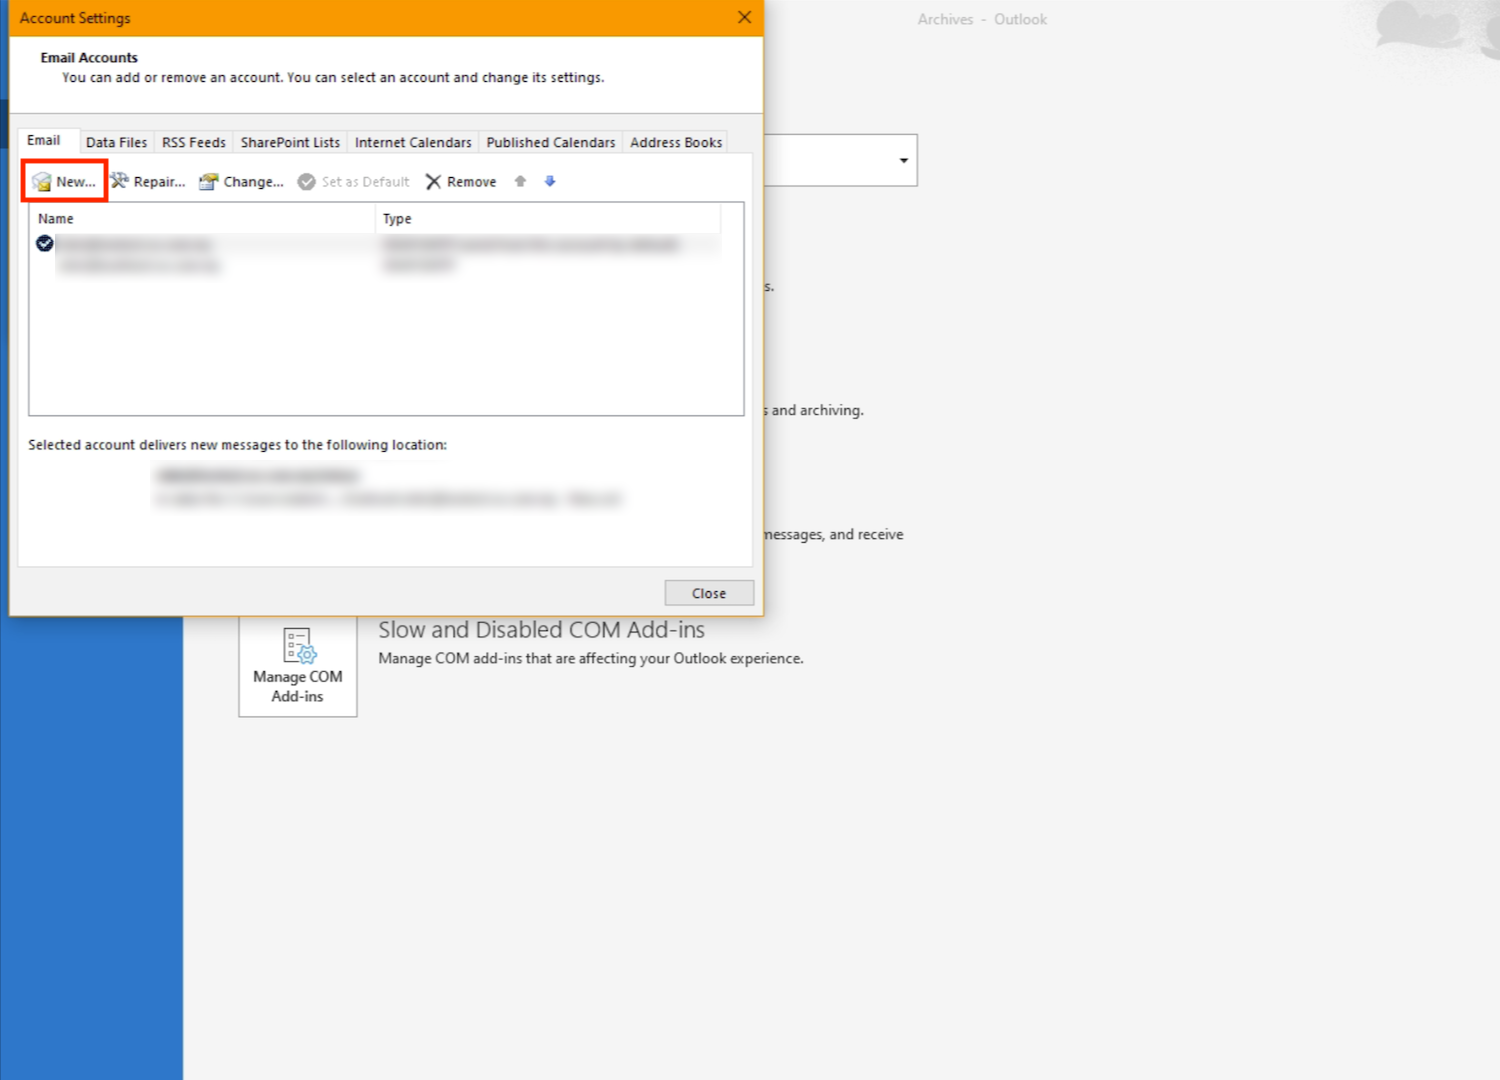
4. Click New….
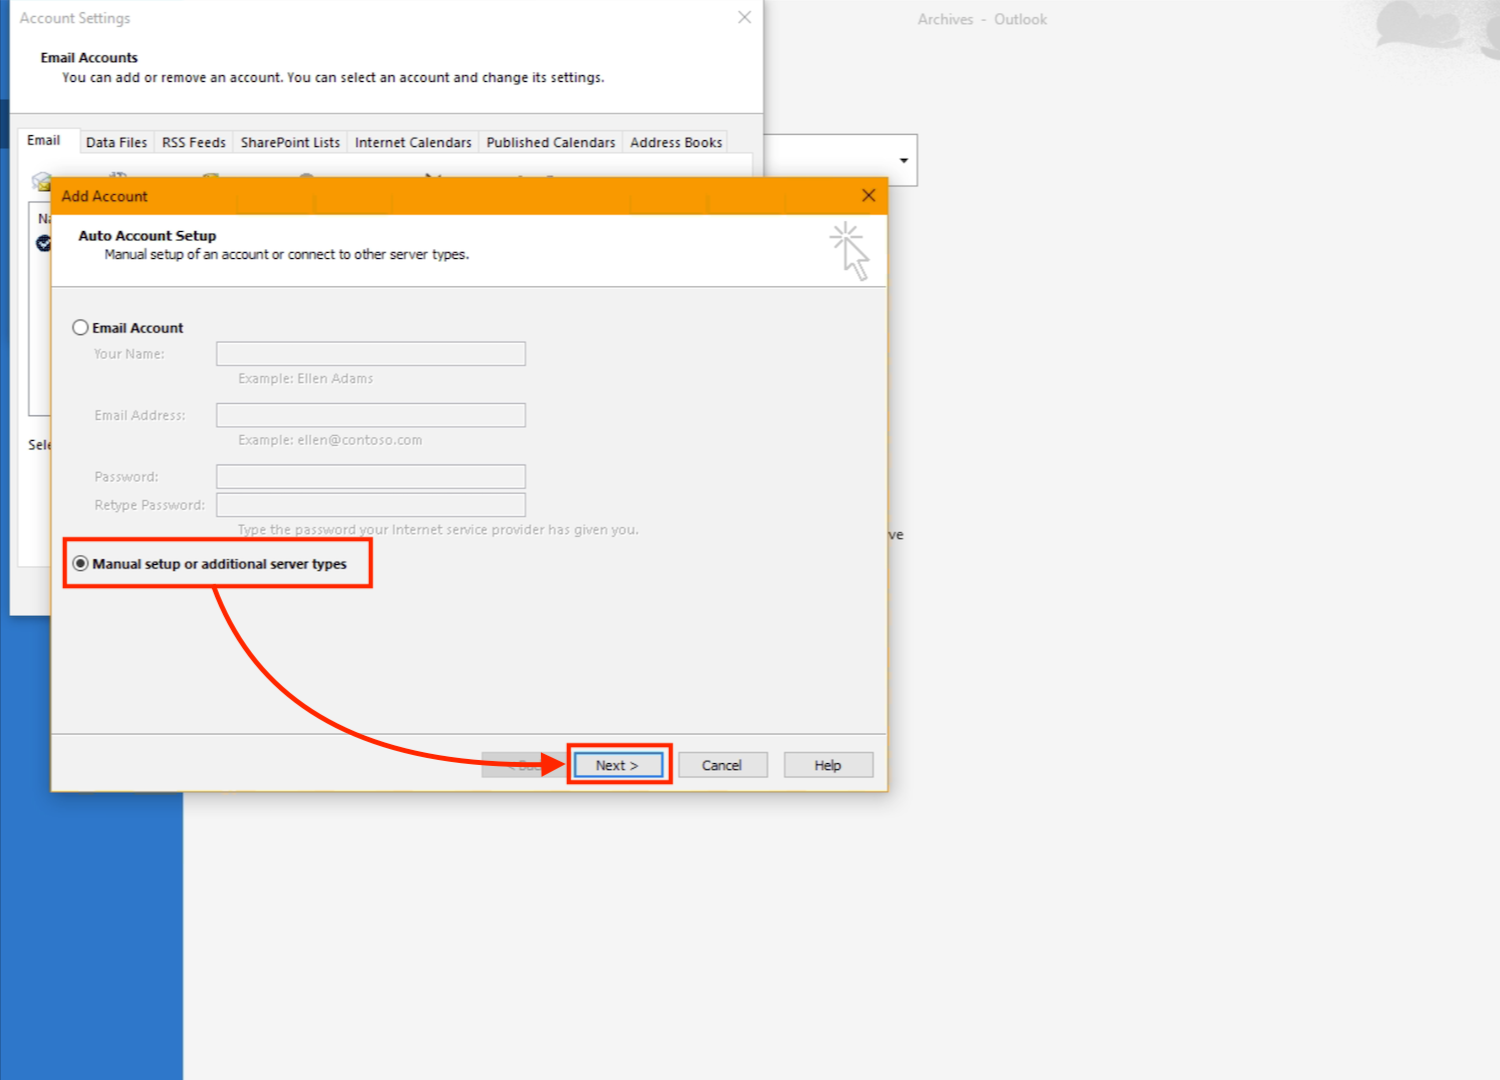
5. Choose “Manual setup or additional server types” and click Next.
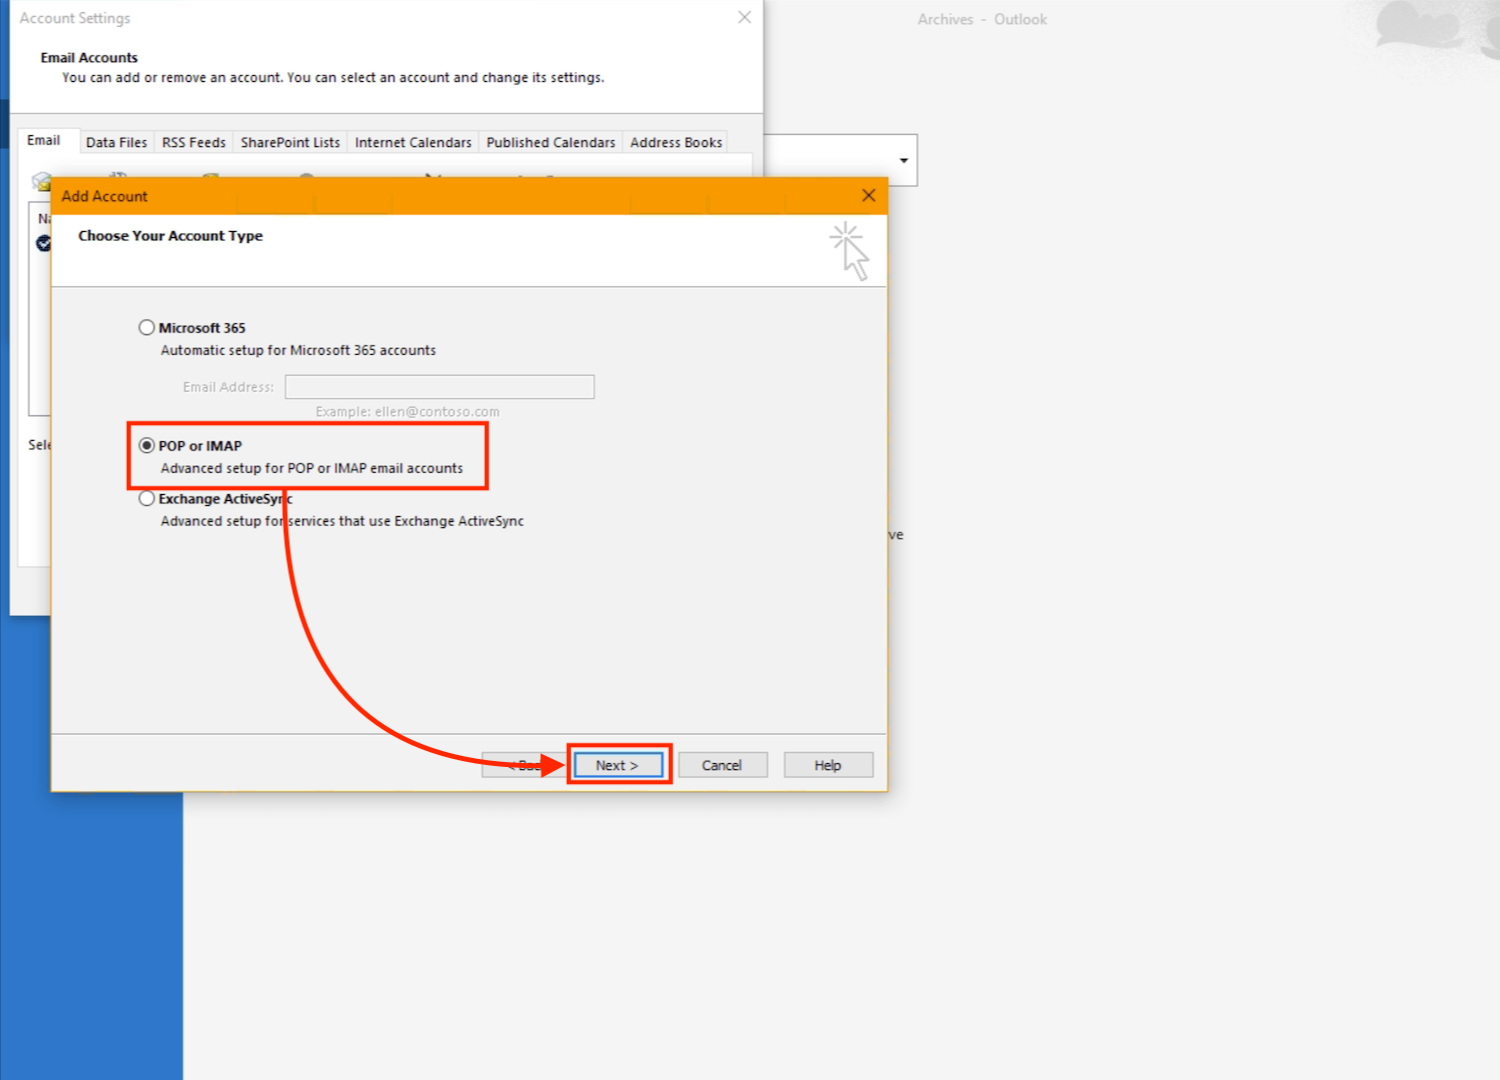
6. Select POP or IMAP, and click Next.
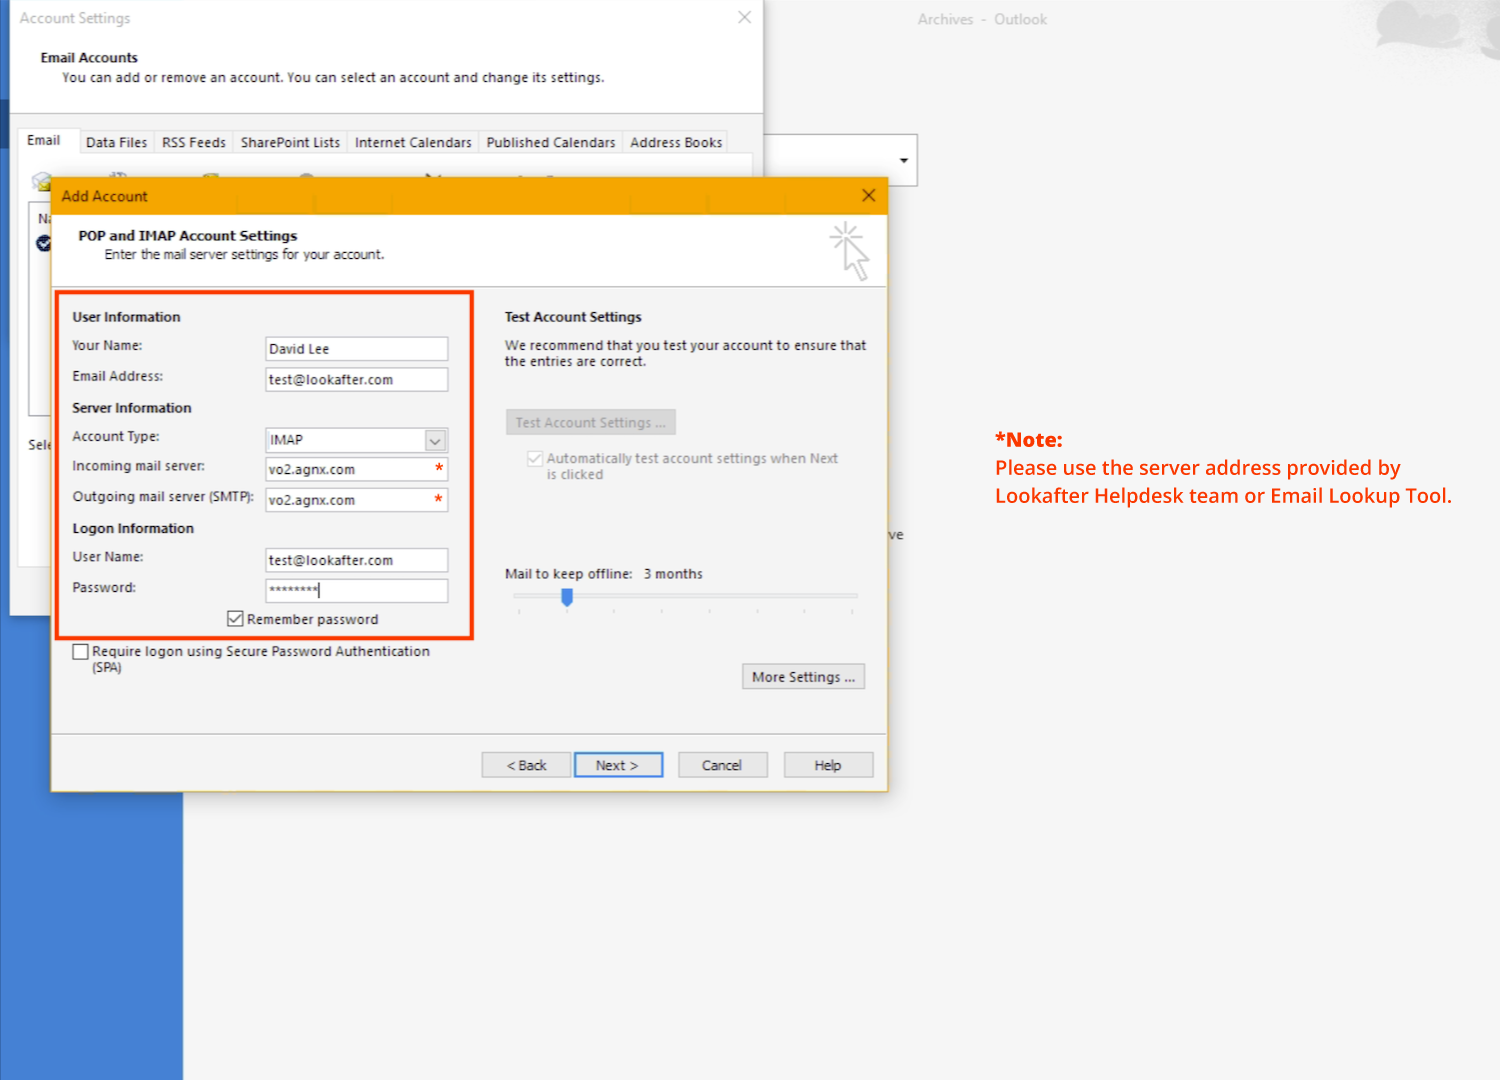
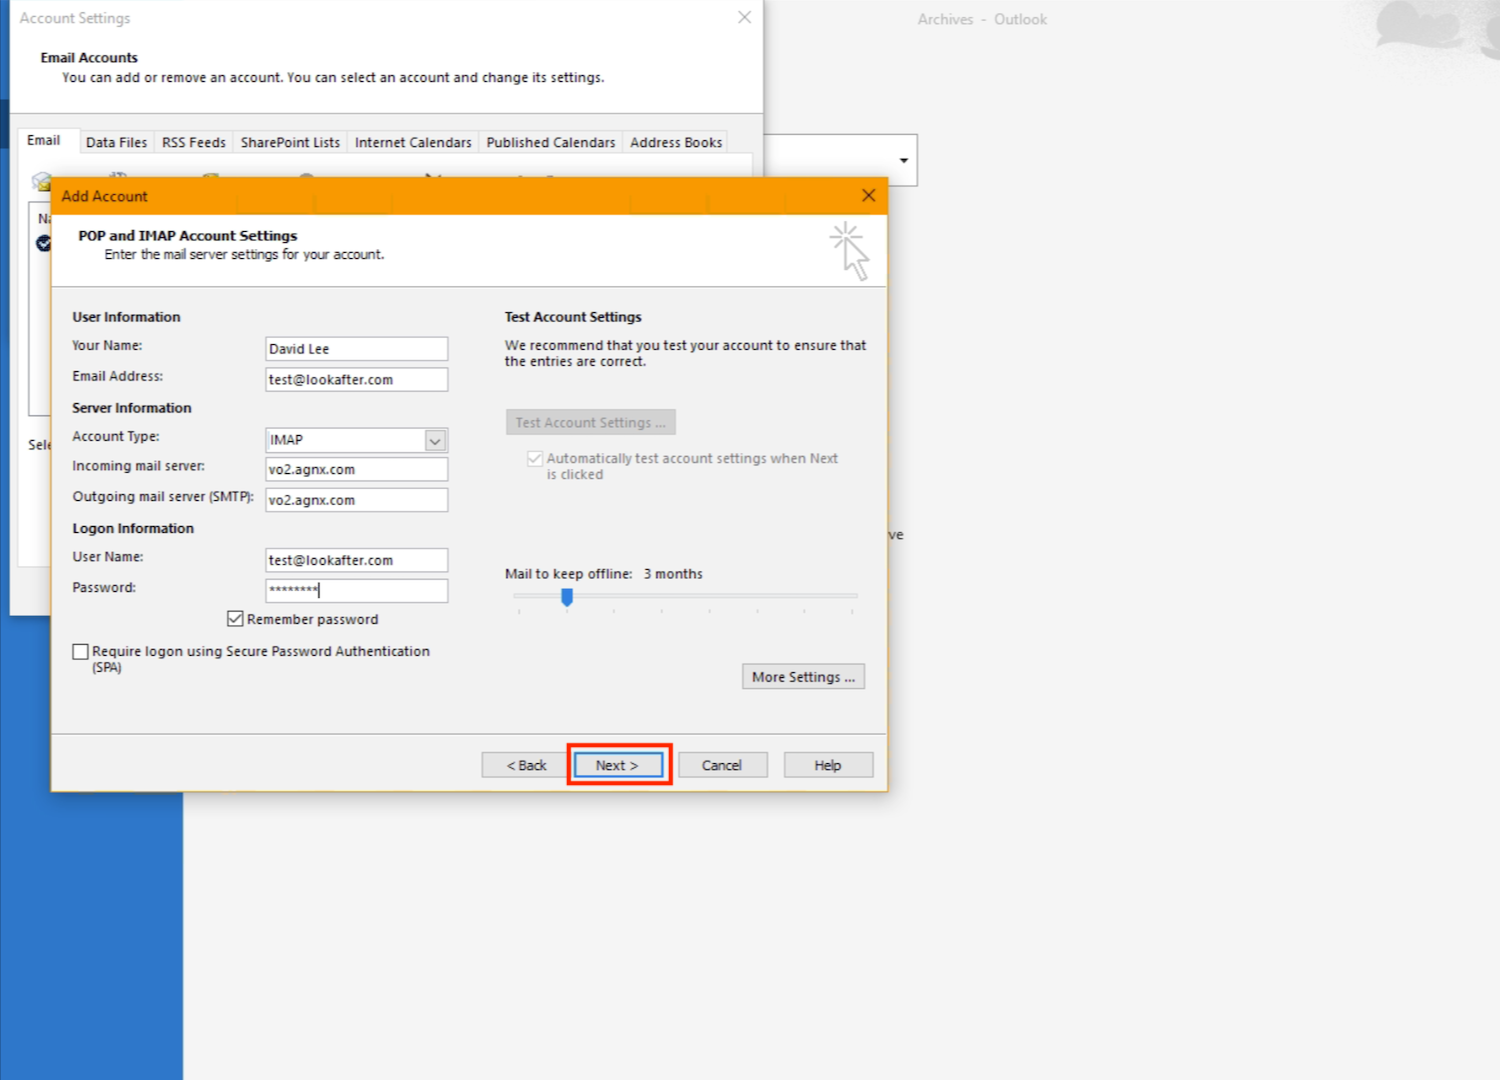
7. Then, enter the following details:
| Your Name: | (Enter your name, e.g. David Lee) |
|---|---|
| Email Address: | (Enter your email address, e.g. test@lookafter.com) |
| Account Type: | IMAP |
| Incoming mail server: | vo1.agnx.com / vo2.agnx.com / g1.agnx.com IMPORTANT: To confirm which server to be used for your domain, please use the Email Lookup Tool or consult Lookafter Helpdesk. |
| Outgoing mail server (SMTP): | vo1.agnx.com / vo2.agnx.com / g1.agnx.com IMPORTANT: To confirm which server to be used for your domain, please use the Email Lookup Tool or consult Lookafter Helpdesk. |
| User Name: | (Enter your email address, e.g. test@lookafter.com) |
| Password: | (Enter your password) |
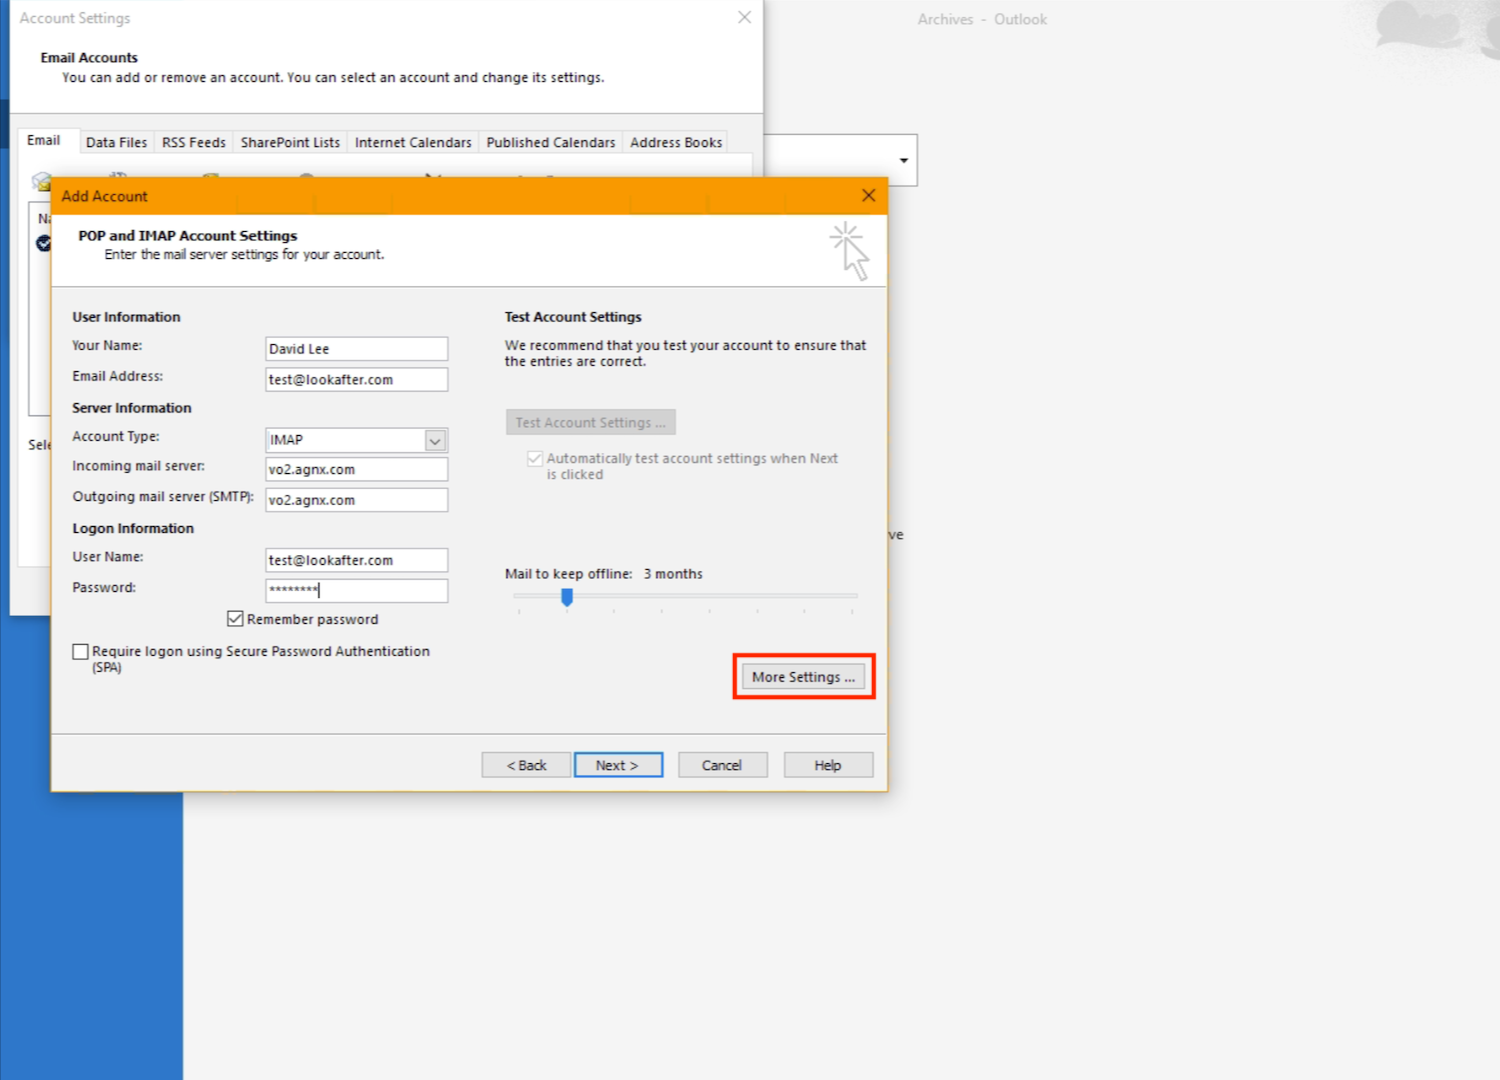
8. Once you have entered the server and logon information, click More Settings….
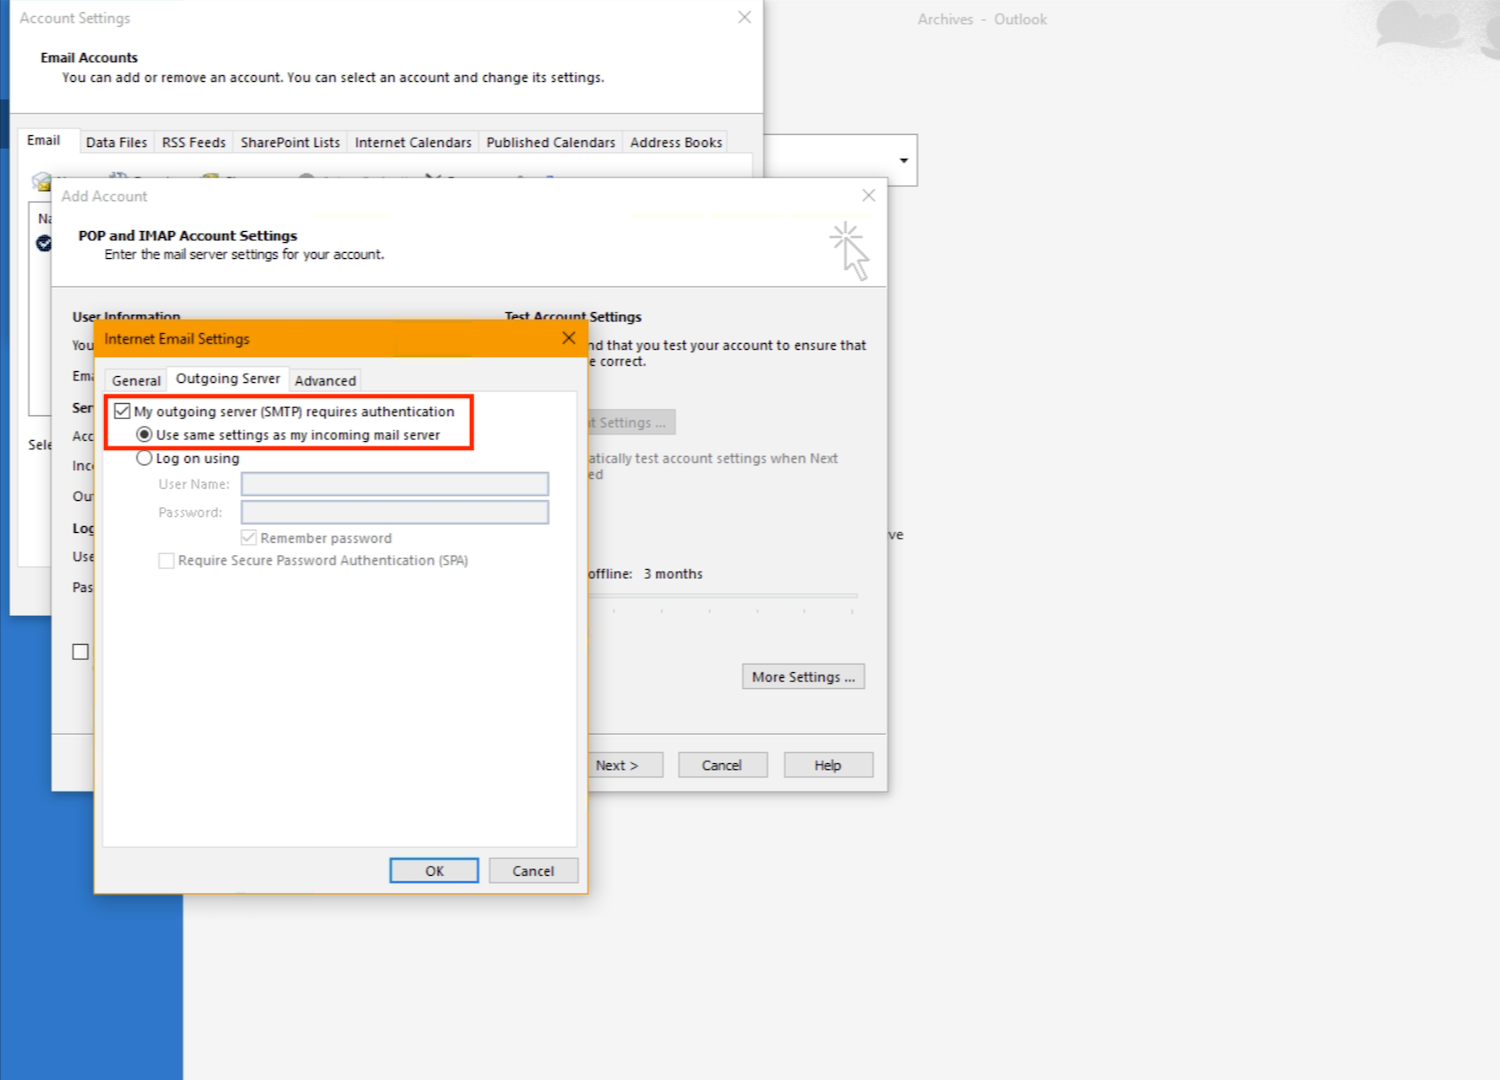
9. On the pop-up box, go to the “Outgoing Server” tab, and select the “My outgoing server (SMTP) requires authentication” and “Use same settings as my incoming mail server” options.
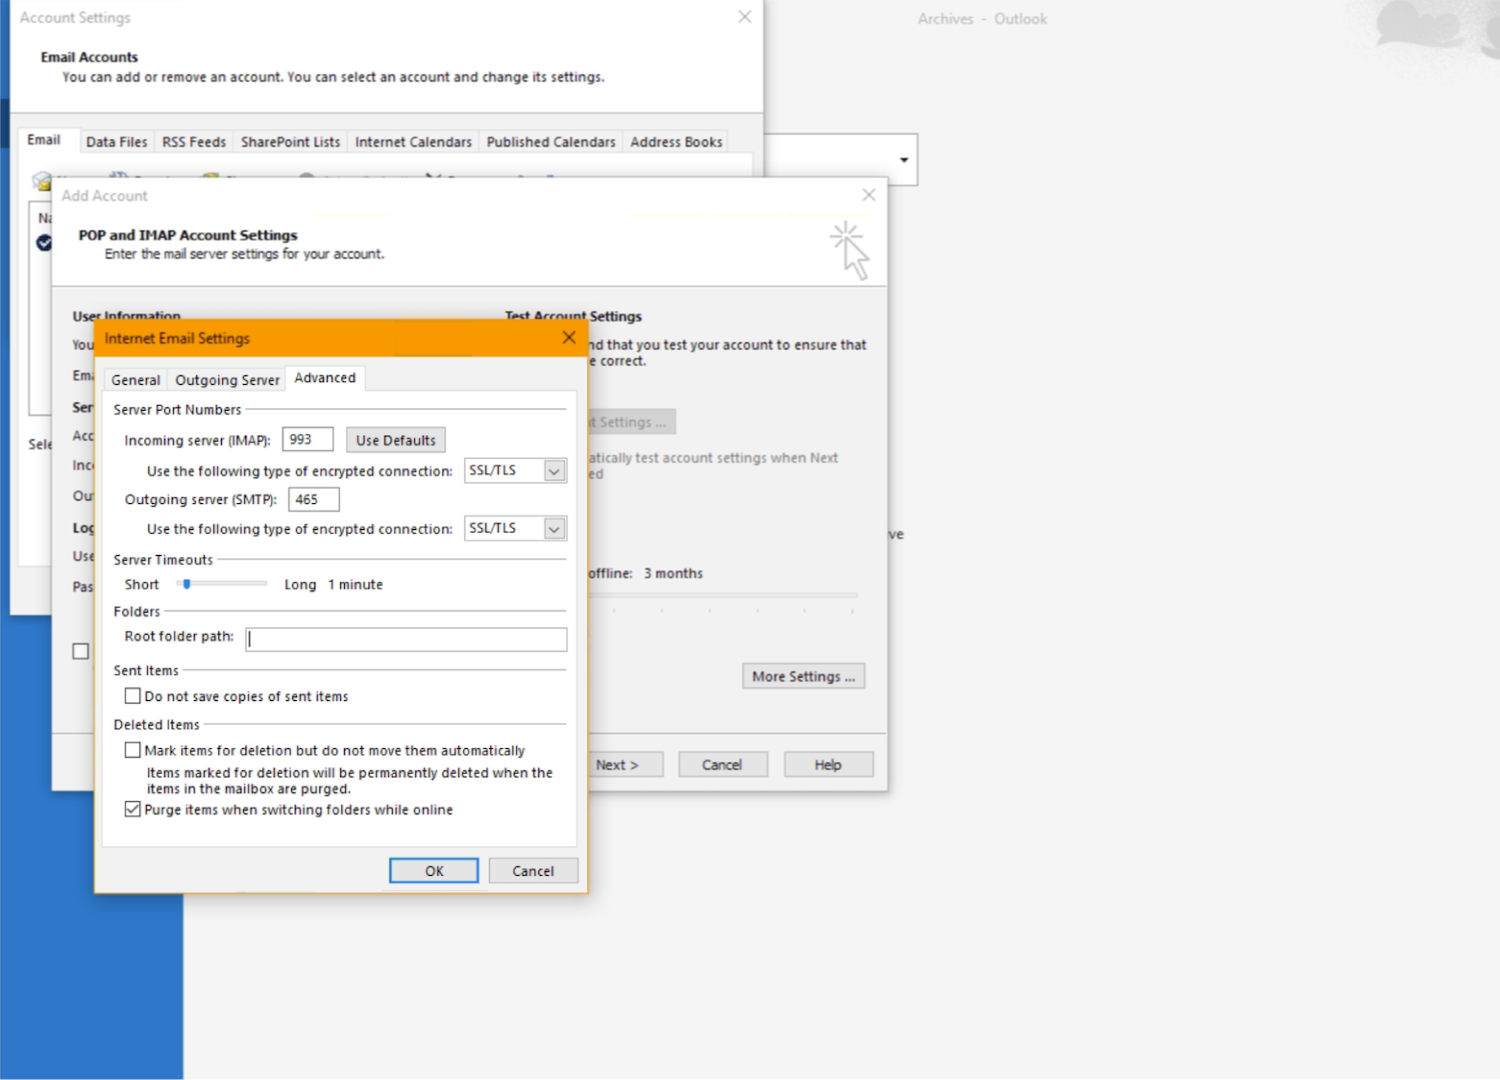
10. Next, go to the “Advanced” tab, and enter the following port numbers and encryption types:
| Incoming server (IMAP): | 993 |
|---|---|
| Use the following type of encrypted connections | SSL/TLS |
| Outgoing server (SMTP): | 465 |
| Use the following type of encrypted connections | SSL/TLS |
Once done, click OK to save and close the pop-up window.
11. Now that all details have been inserted, click Next.
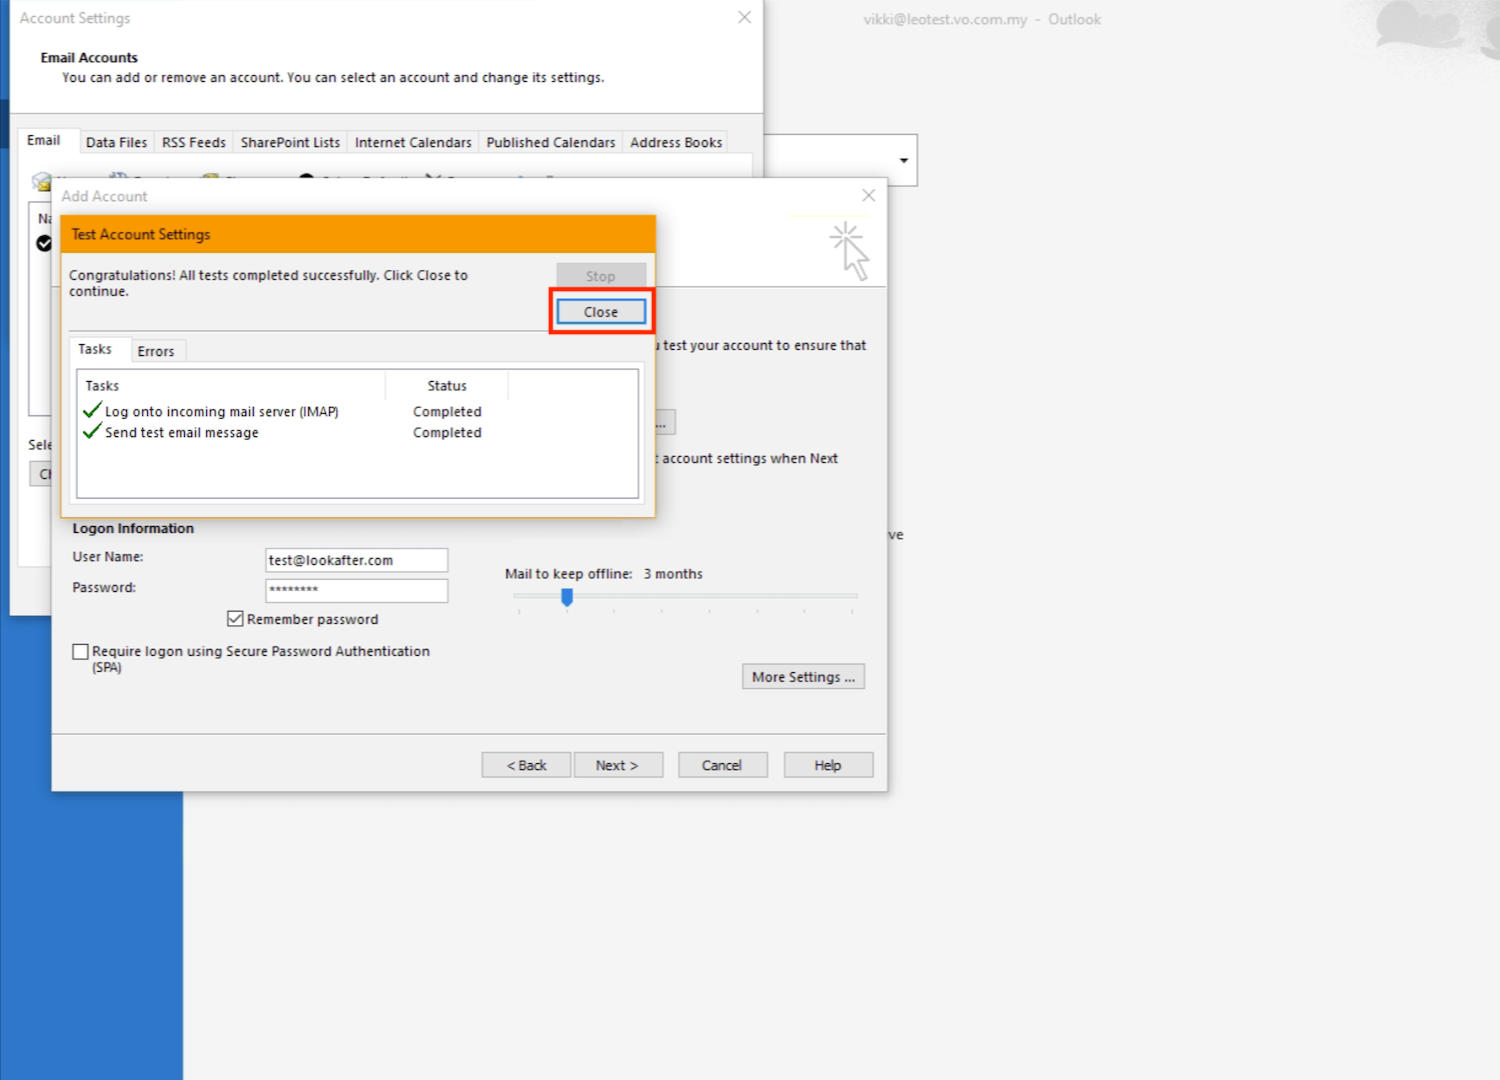
12. Ms Outlook will test on the incoming and outgoing connections. Once it is done, click Close.
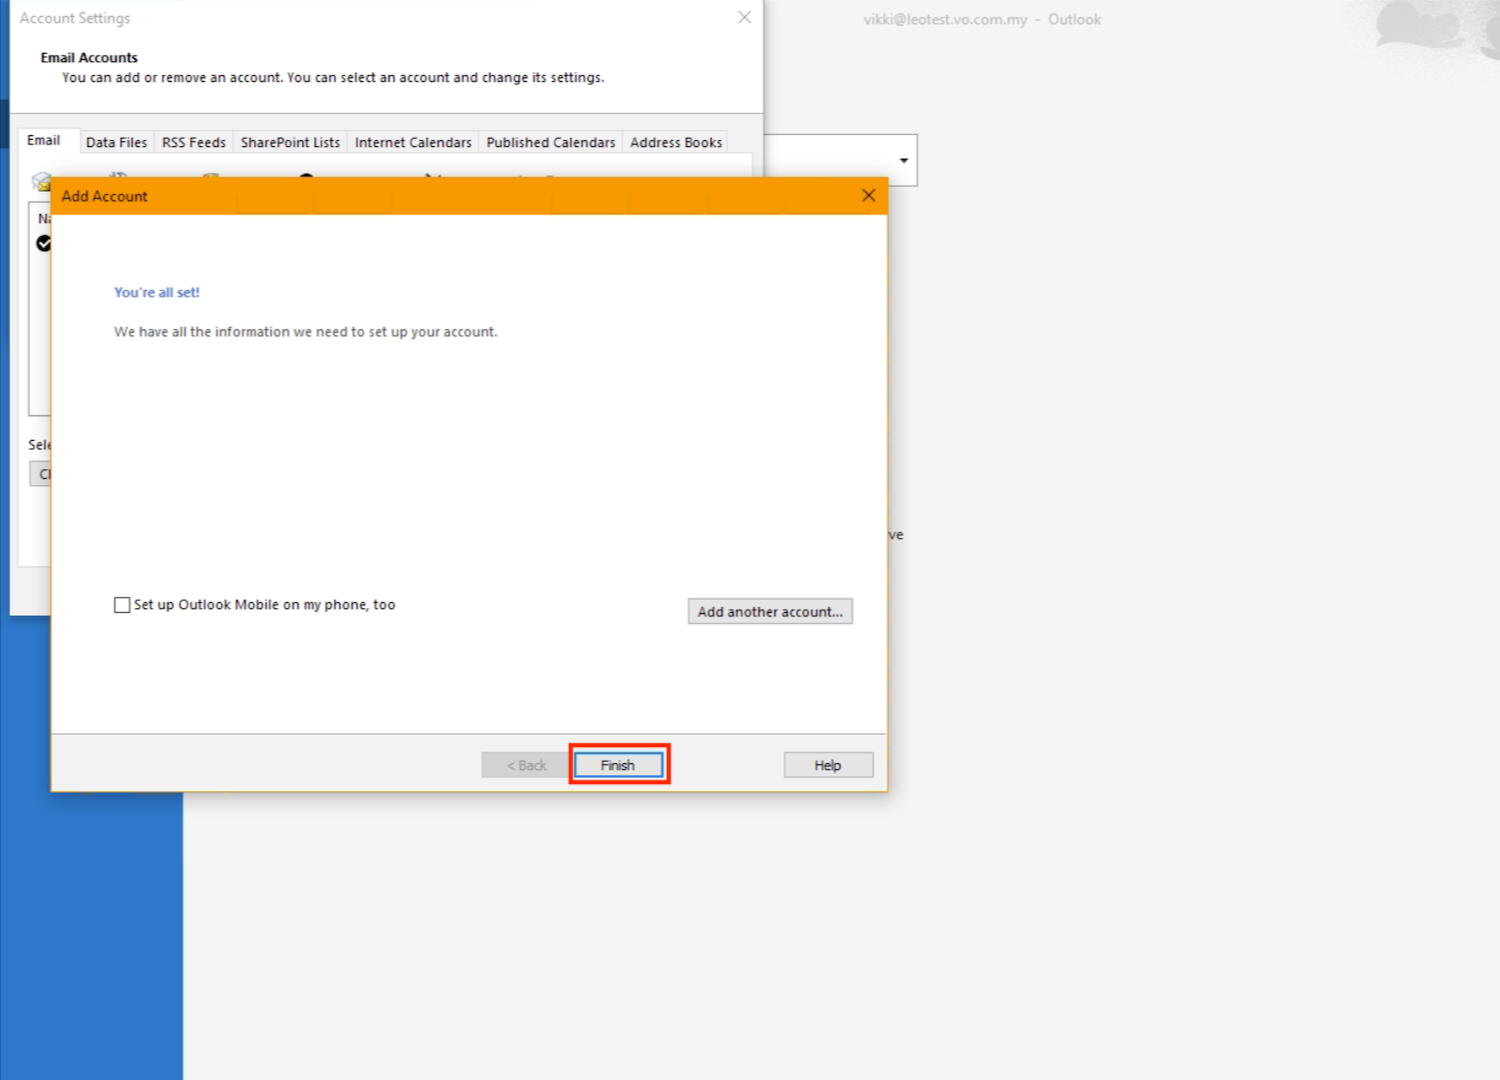
13. Finally, click Finish to complete the setup.
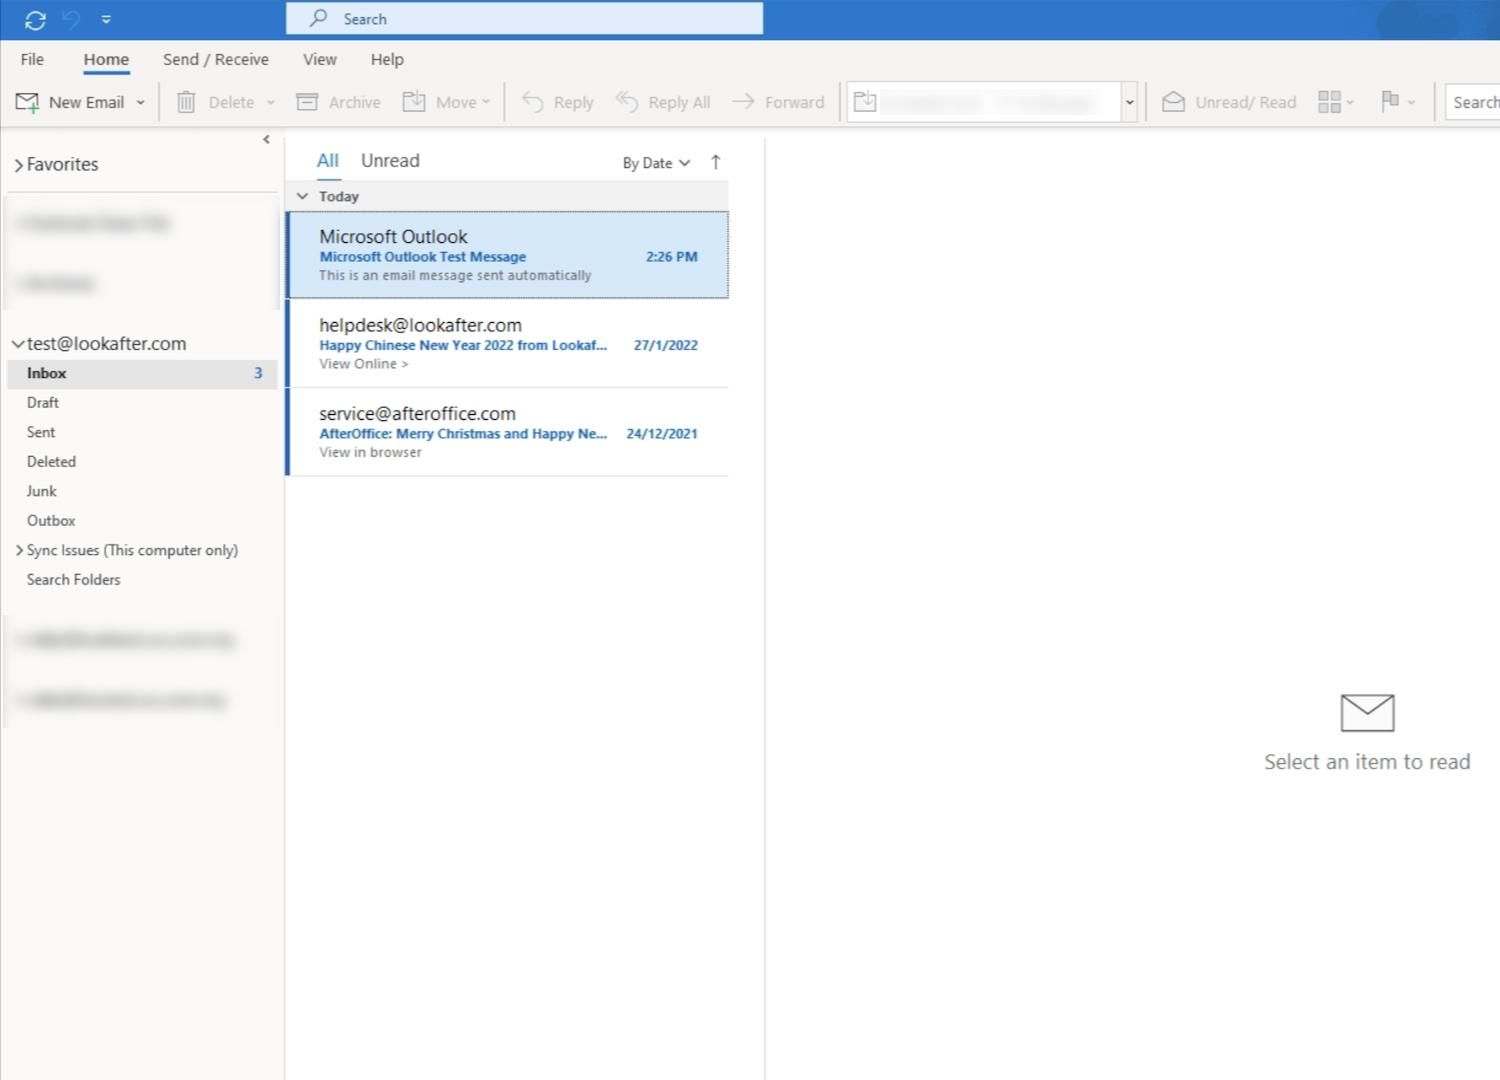
14. You can close all sub windows and go to Home, where you will see your emails being synchronized from the server.
By default, Ms Outlook will only synchronize the Inbox and Sent mailbox. If you want to access emails from other mail folders (e.g. Read, Junk or custom folders) on your Ms Outlook, find out how you can do so at Choose Specific IMAP Folders from Webmail to Appear on Ms Outlook.

