This is an old revision of the document!
Table of Contents
Home > FAQ > Email > Email Clients & Mobile > Mail Client Issues and Troubleshooting > How to 'switch' POP3 to IMAP mail account in Microsoft Outlook
How to 'switch' POP3 to IMAP mail account in Microsoft Outlook
POP3 protocol only downloads emails from your webmail's Inbox and does not sync emails across multiple devices. Thus, if you wish to access your emails anytime from several devices, you should consider using IMAP instead.
Switching from POP3 to IMAP is easy with the following steps:
1. Make a local backup on your emails
2. Remove your POP3 account
3. Set up your account with IMAP
4. Move old emails to your IMAP account (optional)
Step 1: Make a local backup on your emails
Firstly, it is recommended to back up your emails before making the switch. You may refer to Microsoft Guide: Export or backup email, contacts, and calendar to an Outlook .pst file for more details, or follow the steps below:
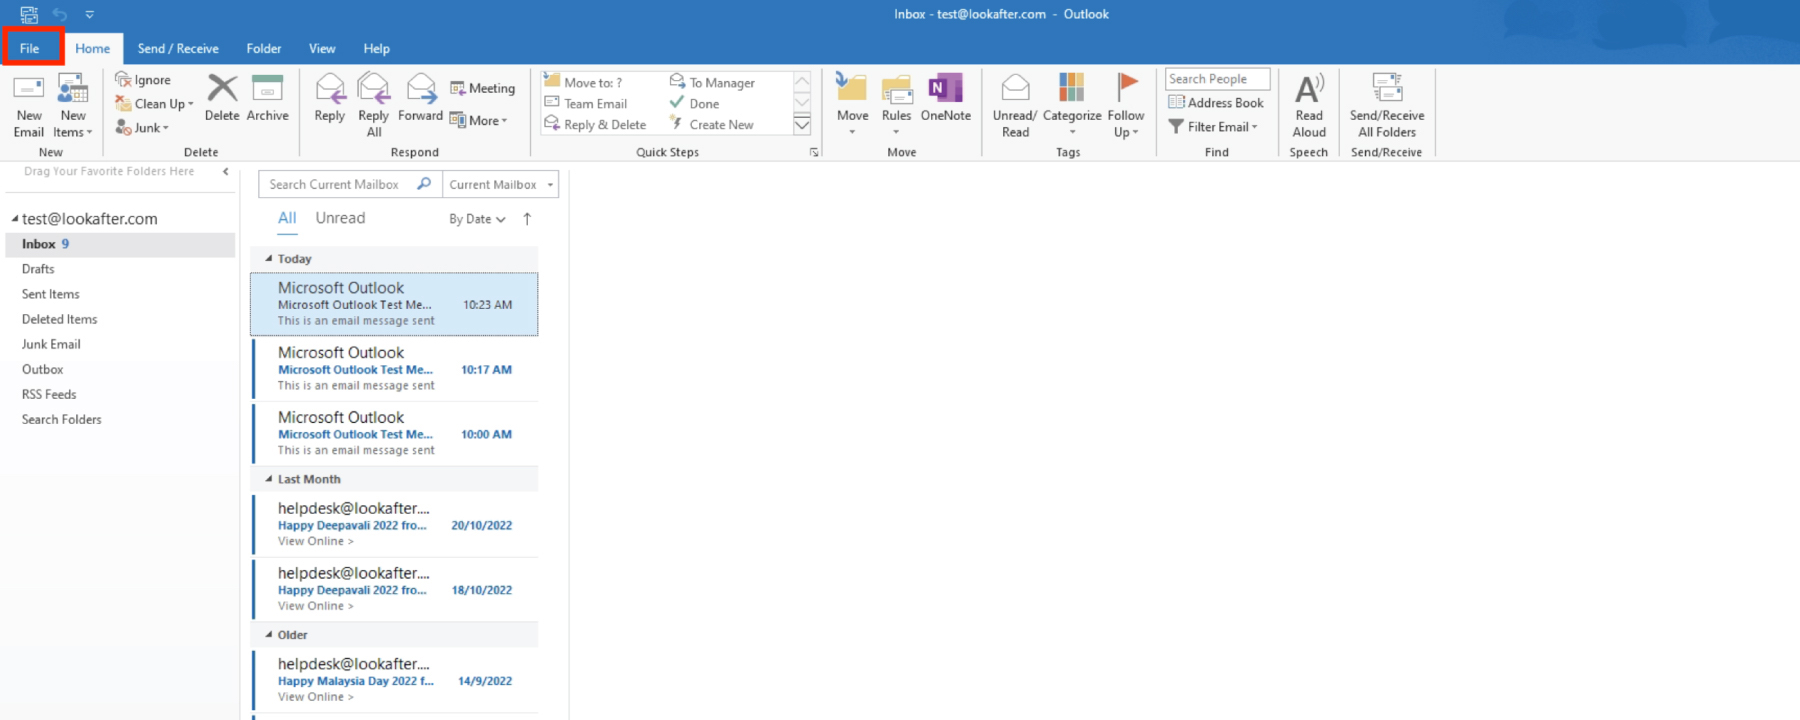
1. On your Outlook, go to File.
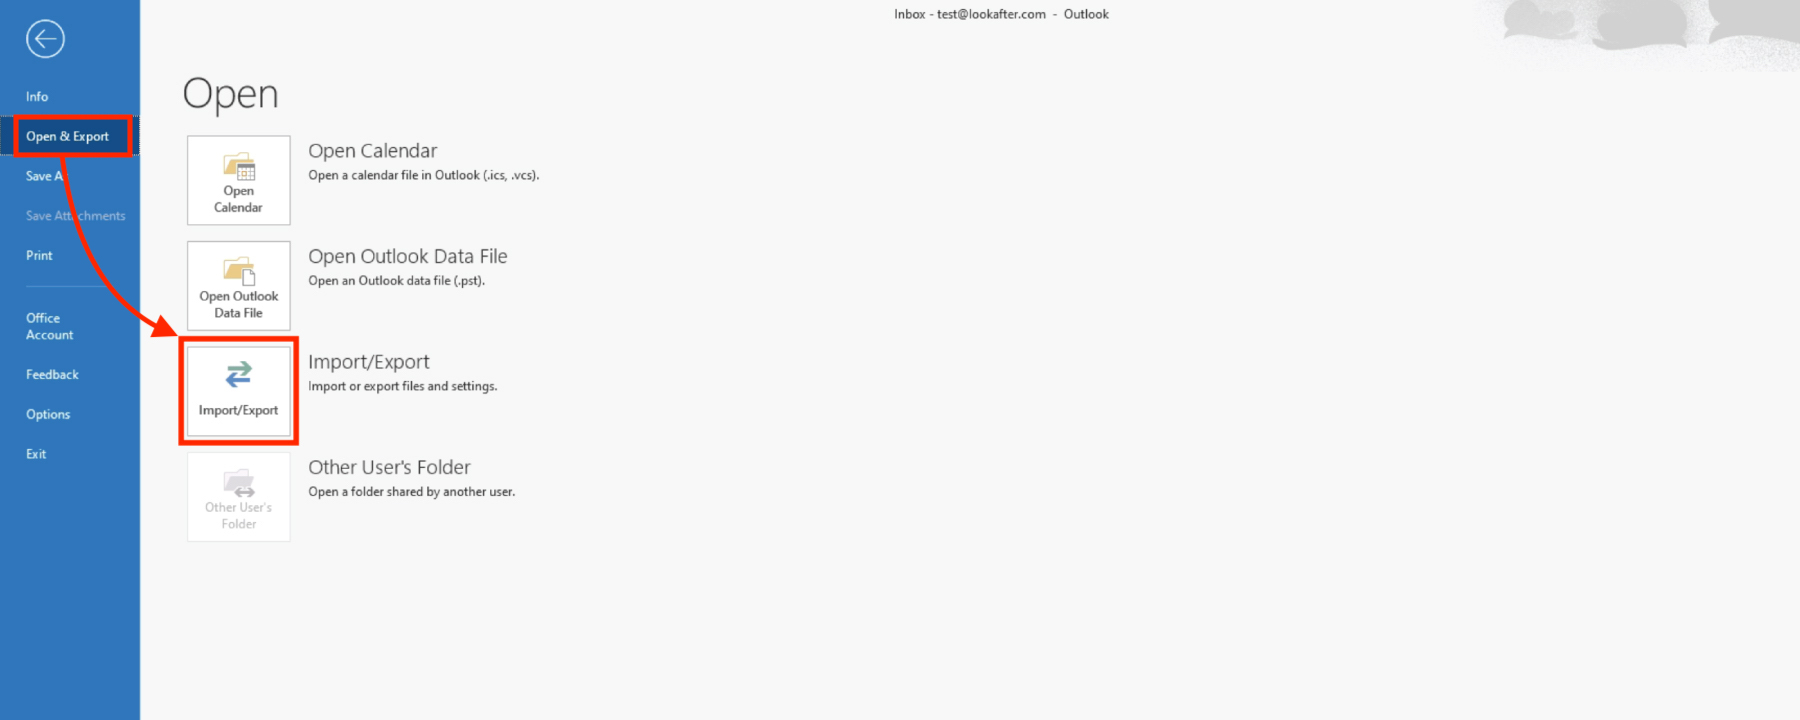
2. Then, select Open & Export and Import/Export.
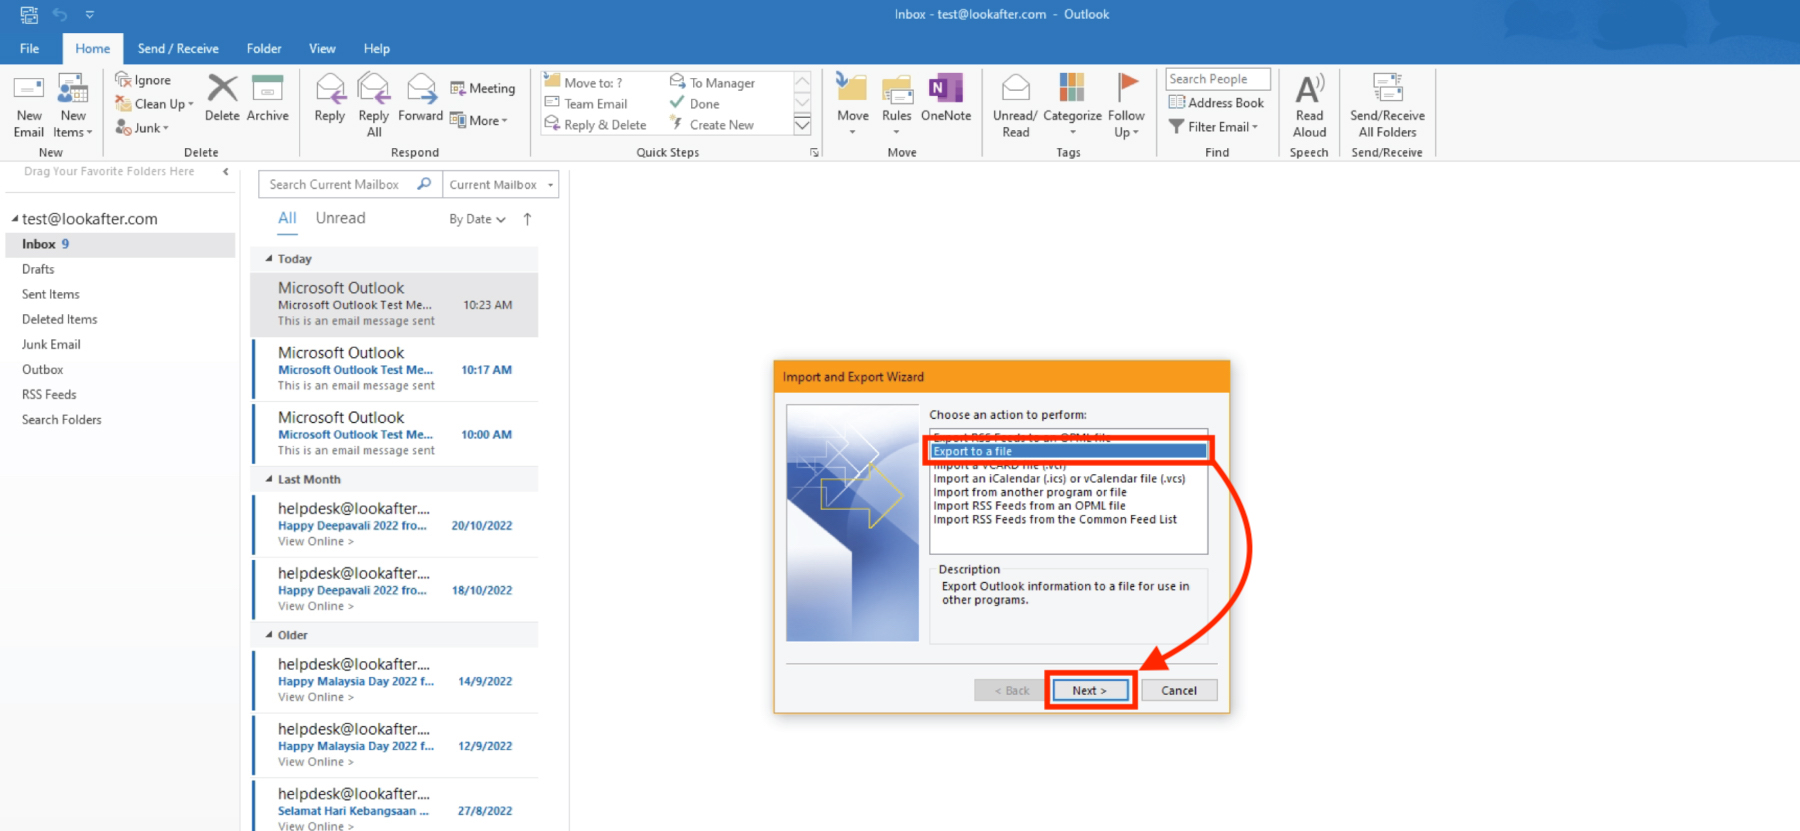
3. Choose Export to a file and click Next.
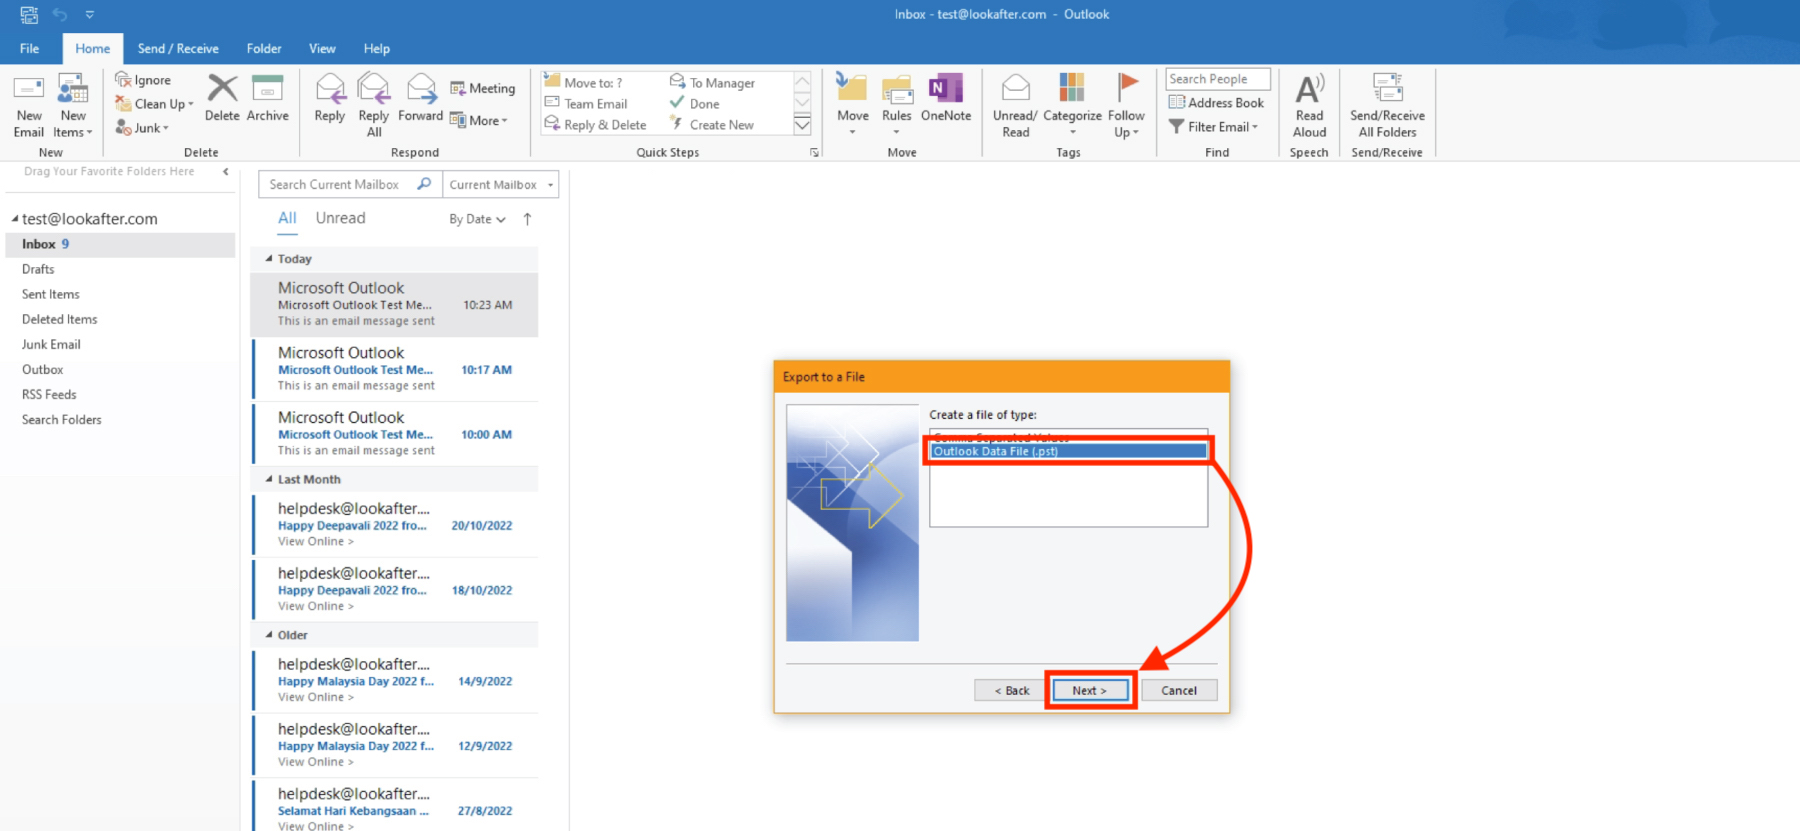
4. Next, choose Outlook Data File (.pst) and click Next.
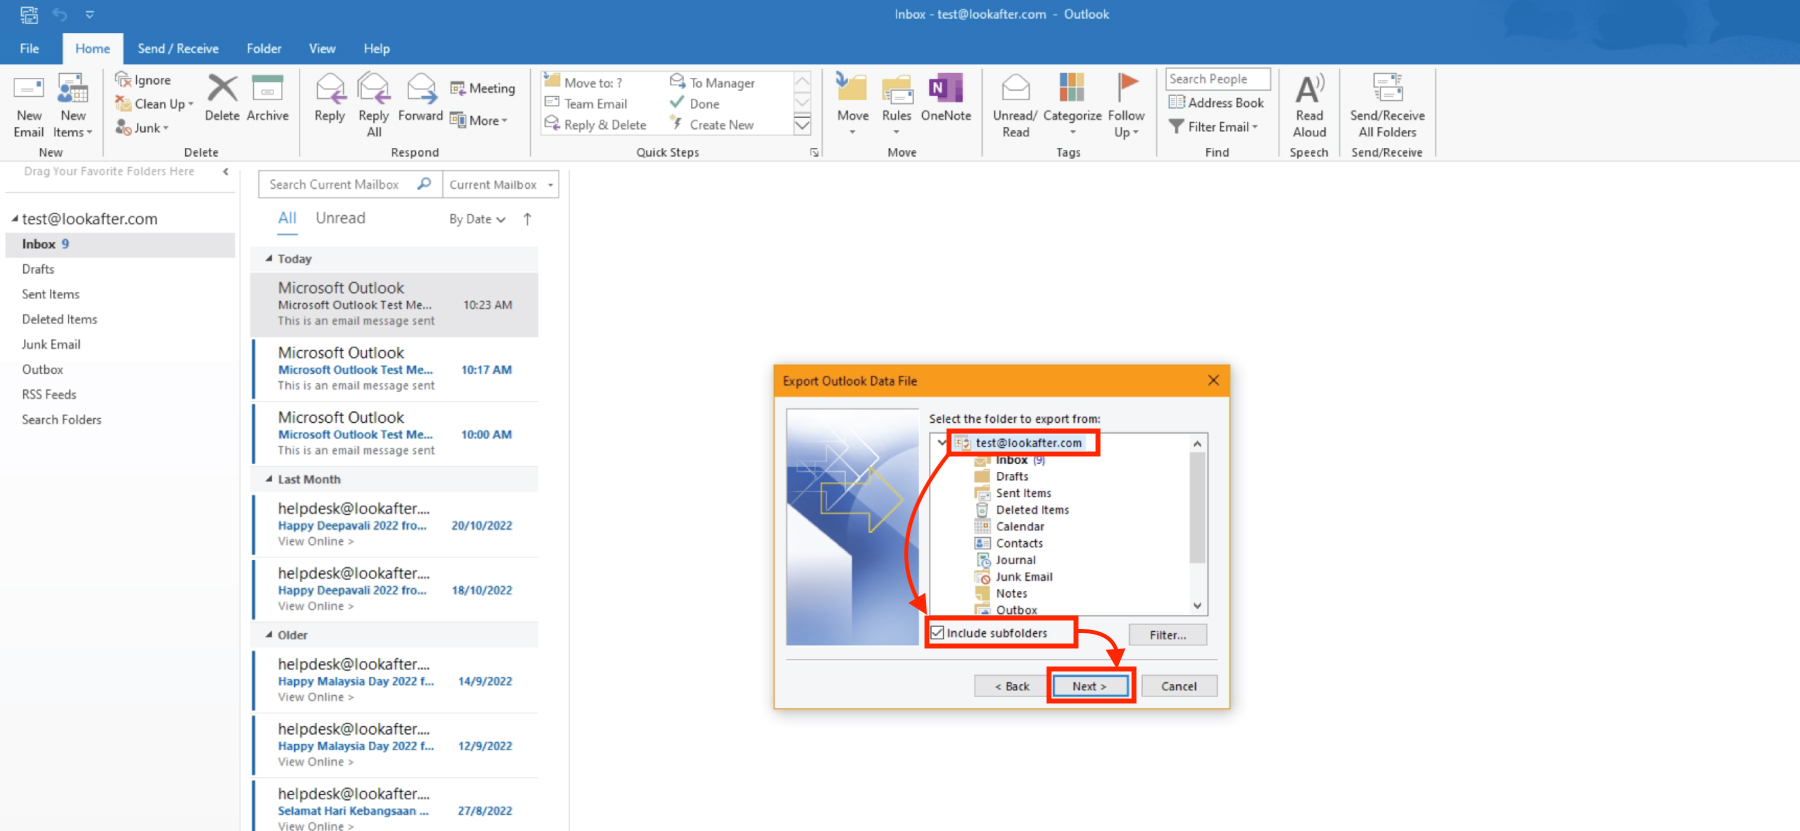
5. Select your mail account and make sure to tick the “Include subfolders” option. Then, click Next.
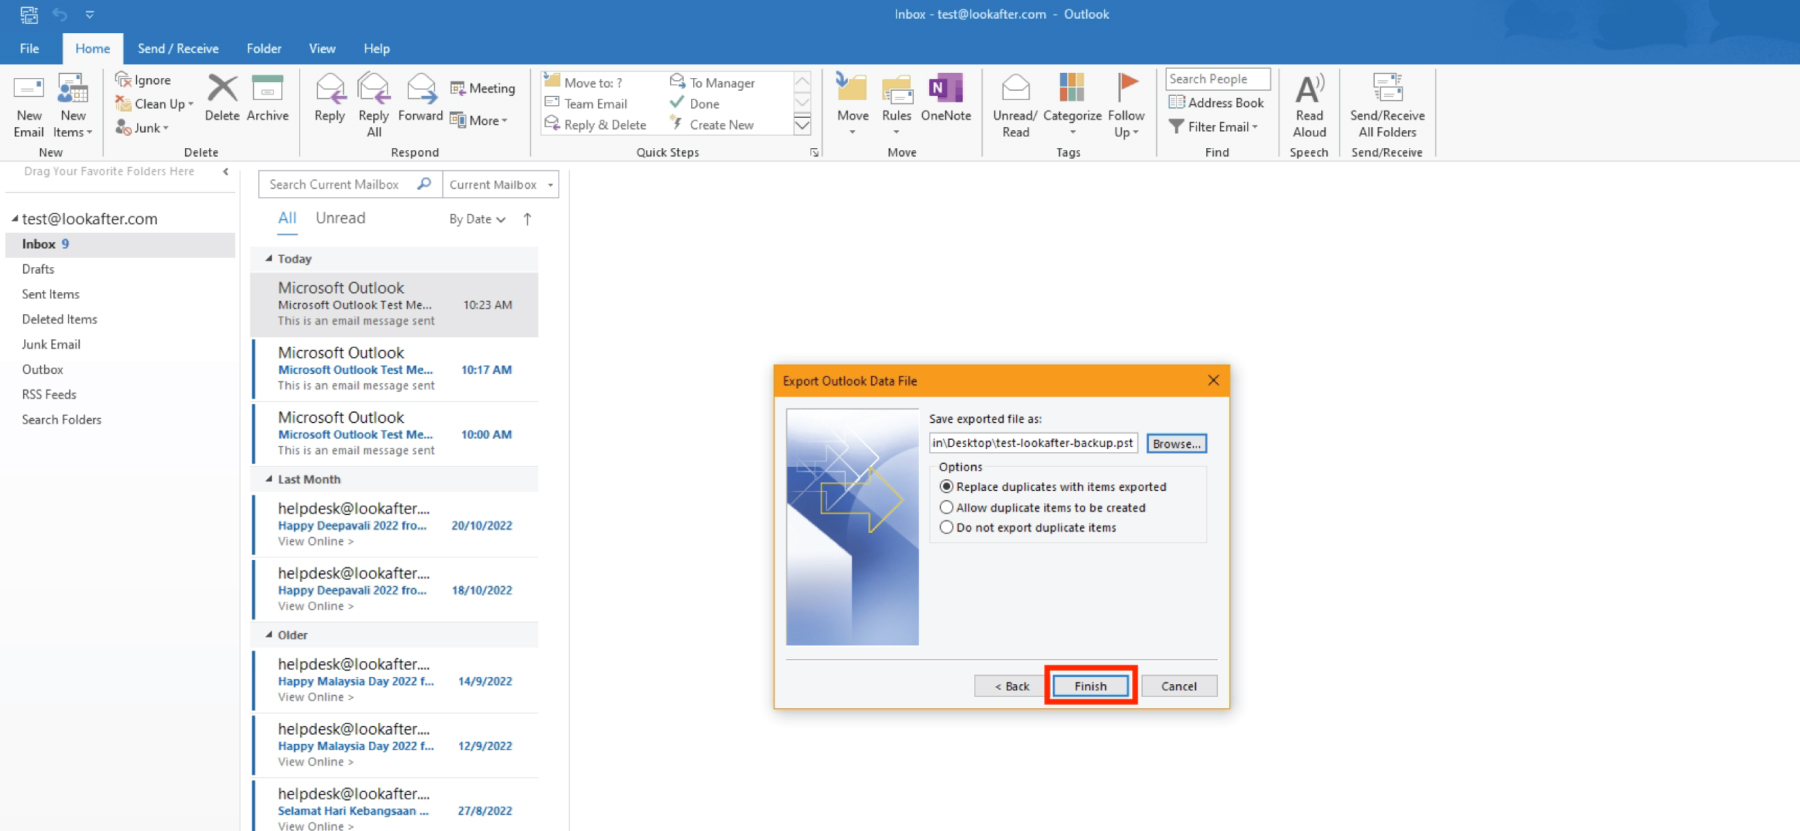
6. You may click Browse to select a location to save the backup file. Then, click Finish.
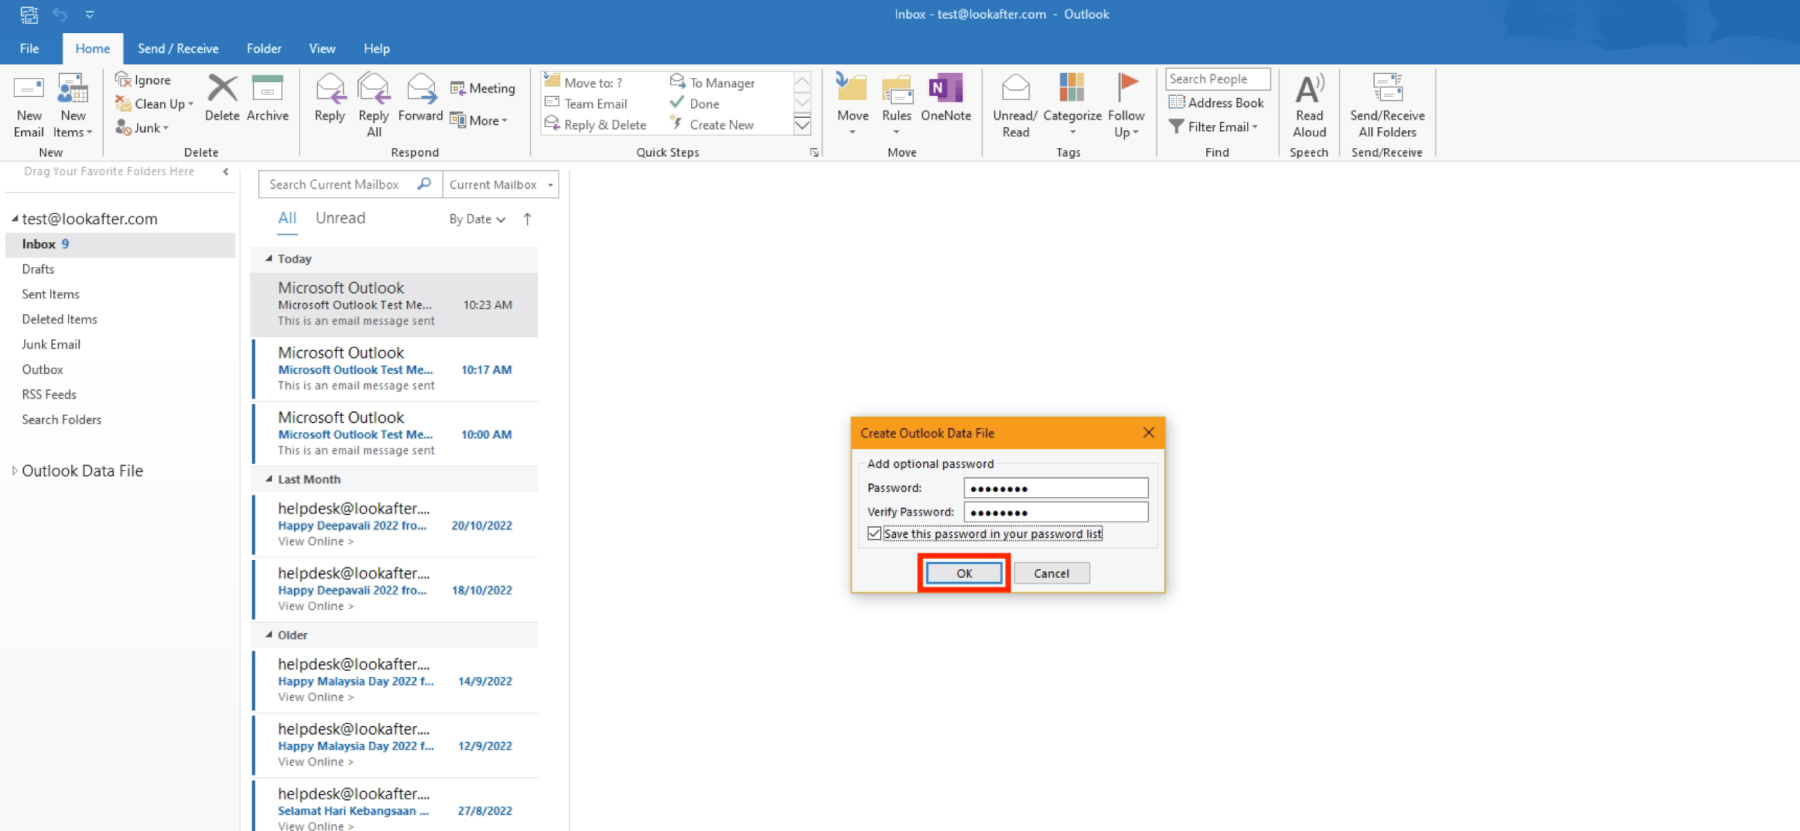
7. Fill in the password for your email backup file and click OK.
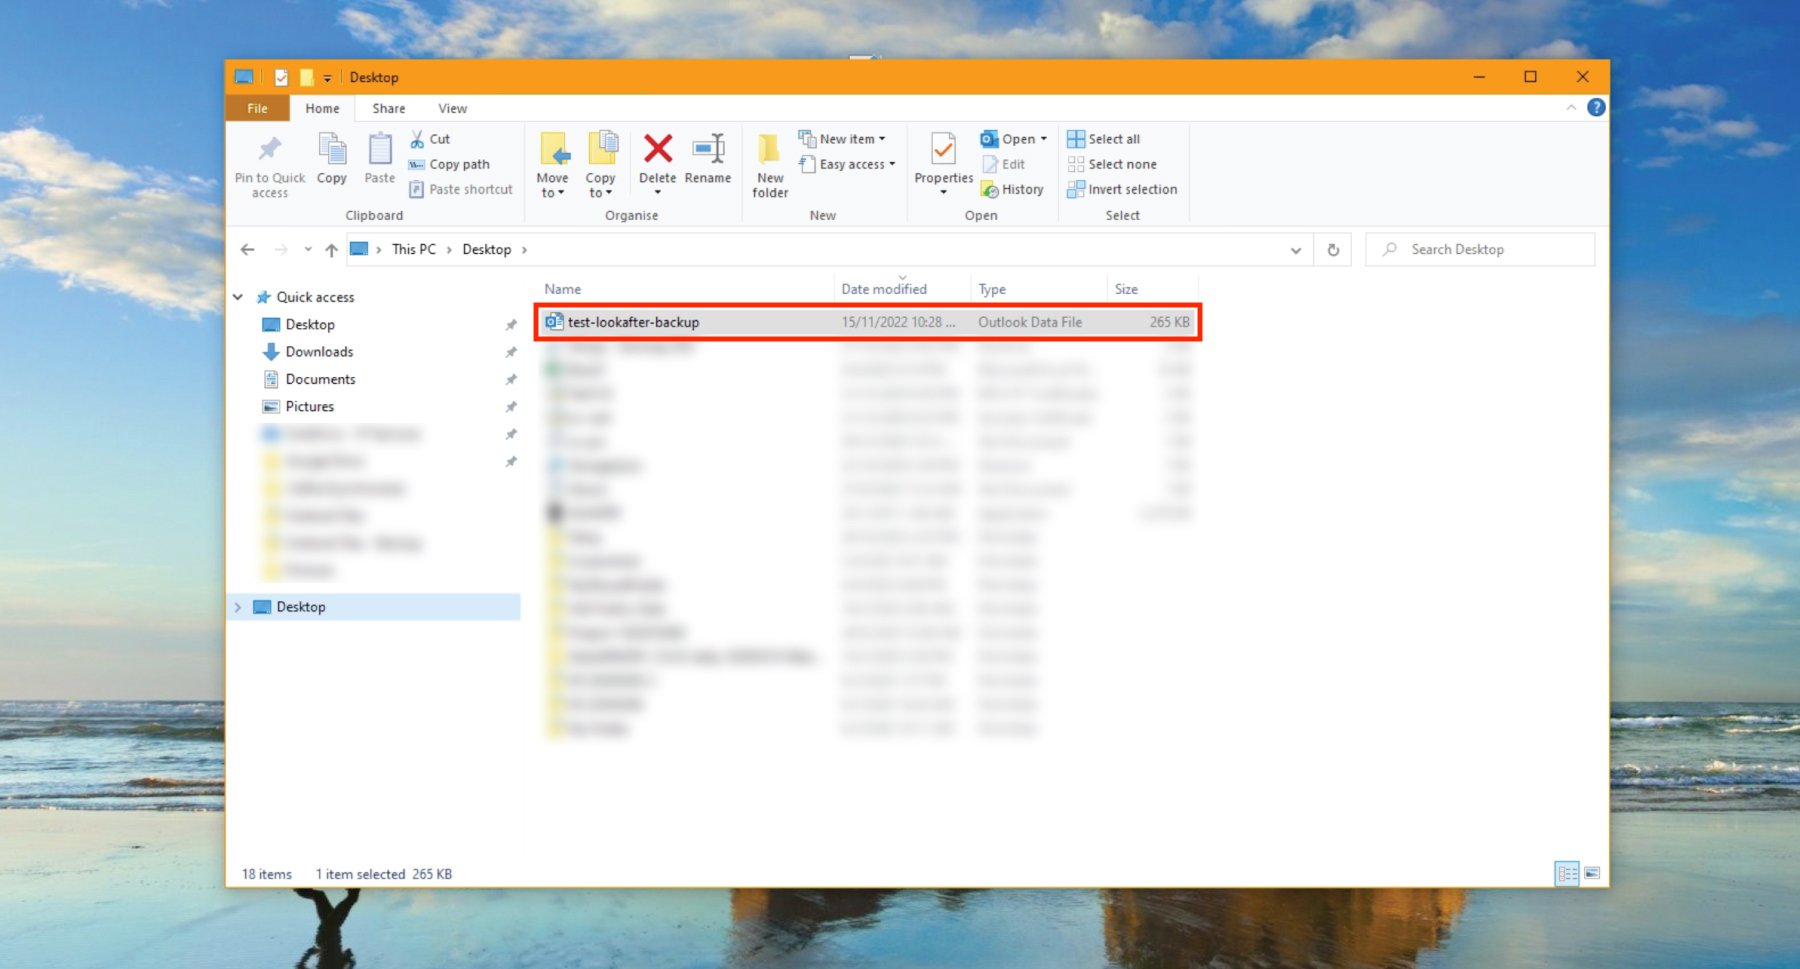
8. Your emails will be saved as a pst file in the selected folder location.
Step 2: Remove your POP3 account
After your emails have been backed up, you can proceed to remove your POP3 mail account.
Note that your POP3 emails will not be deleted when you remove the POP3 connection as they are stored locally on your computer.
Below are the steps to remove the POP3 account:
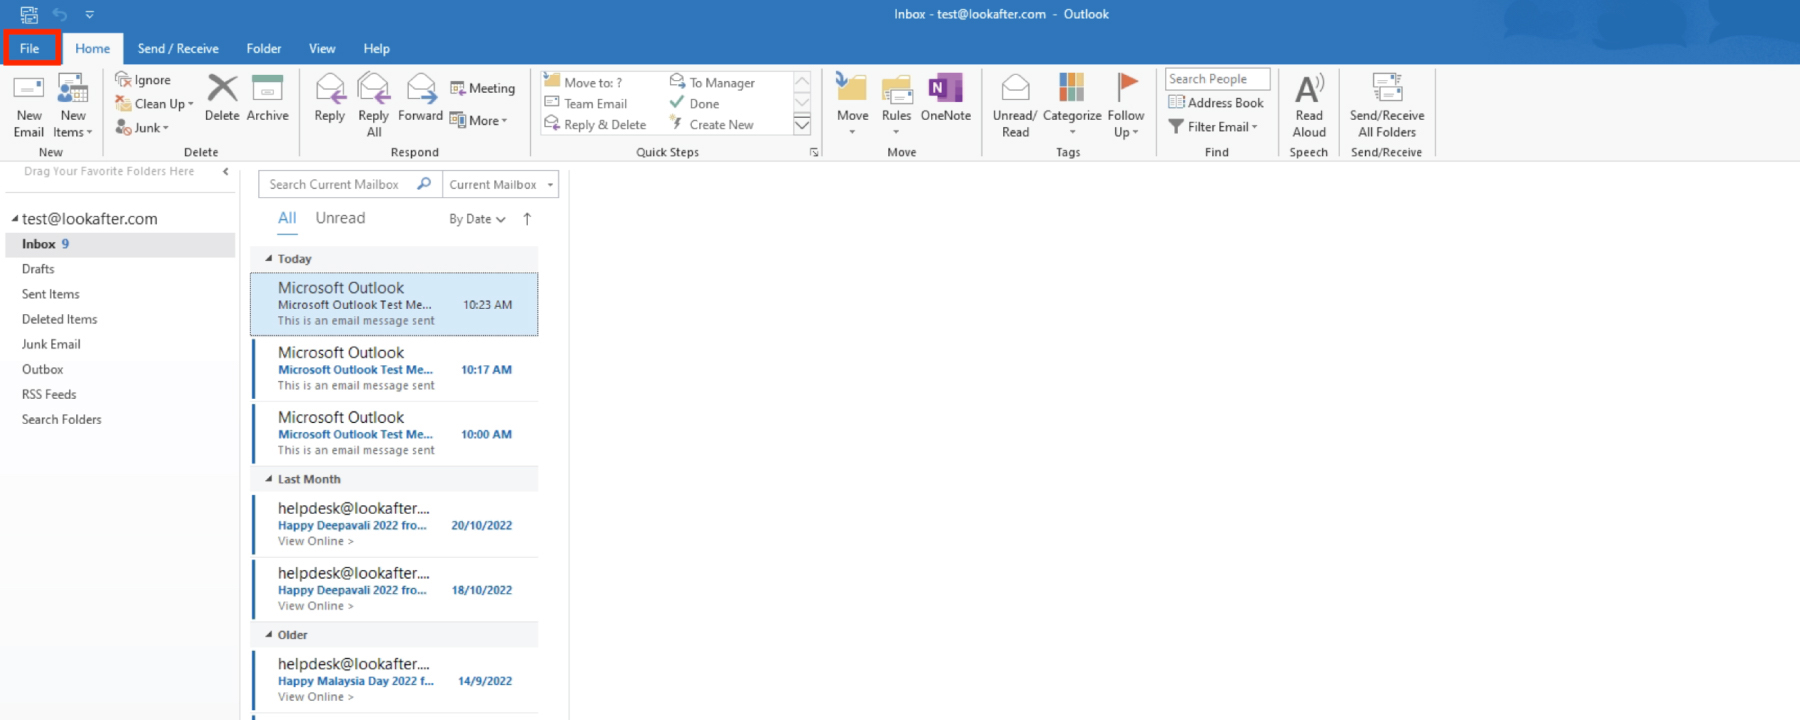
1. Go to File.
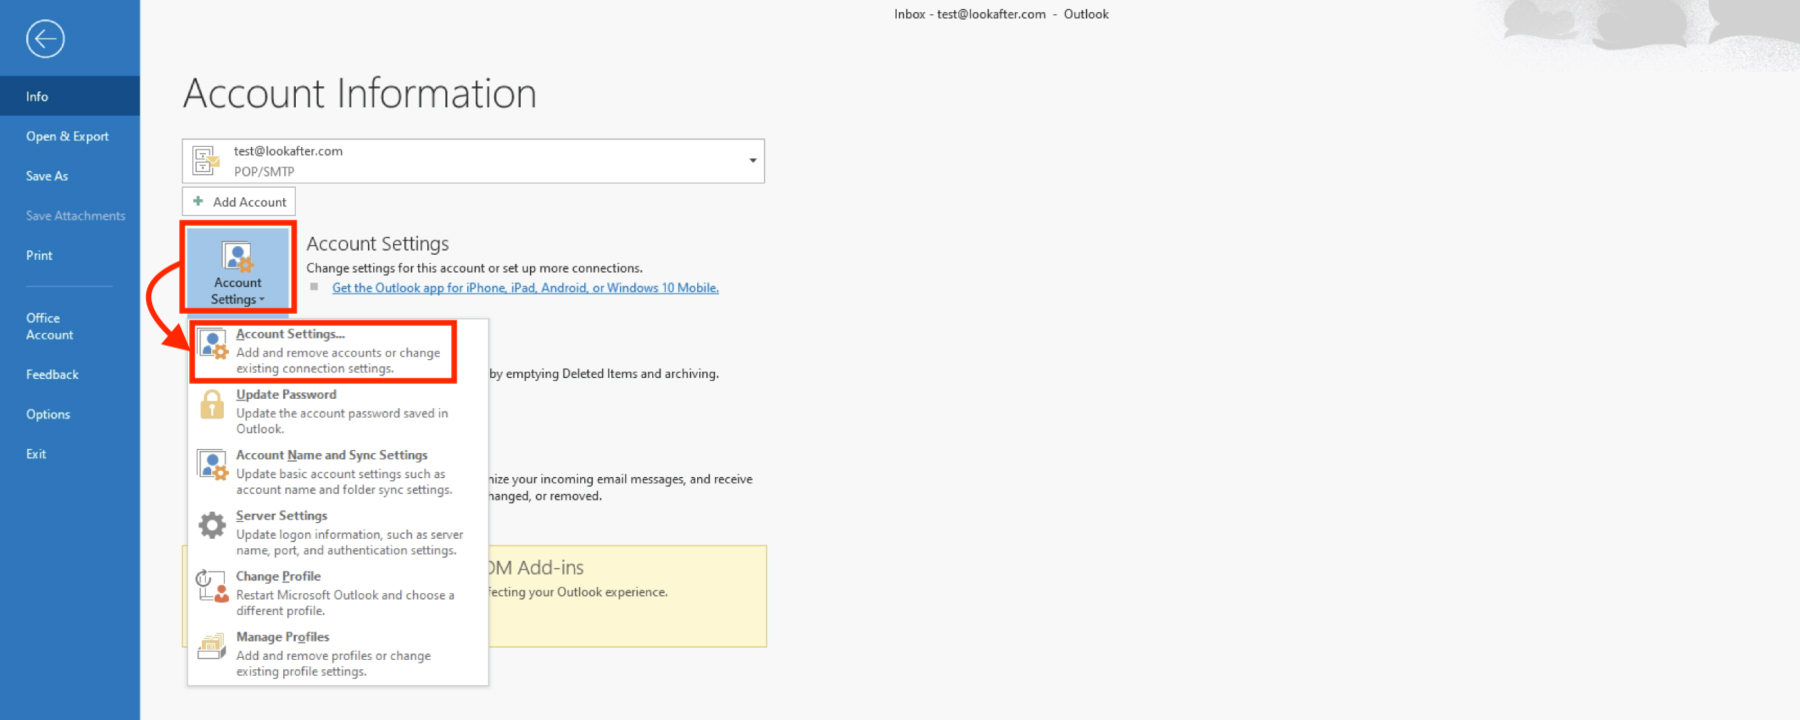
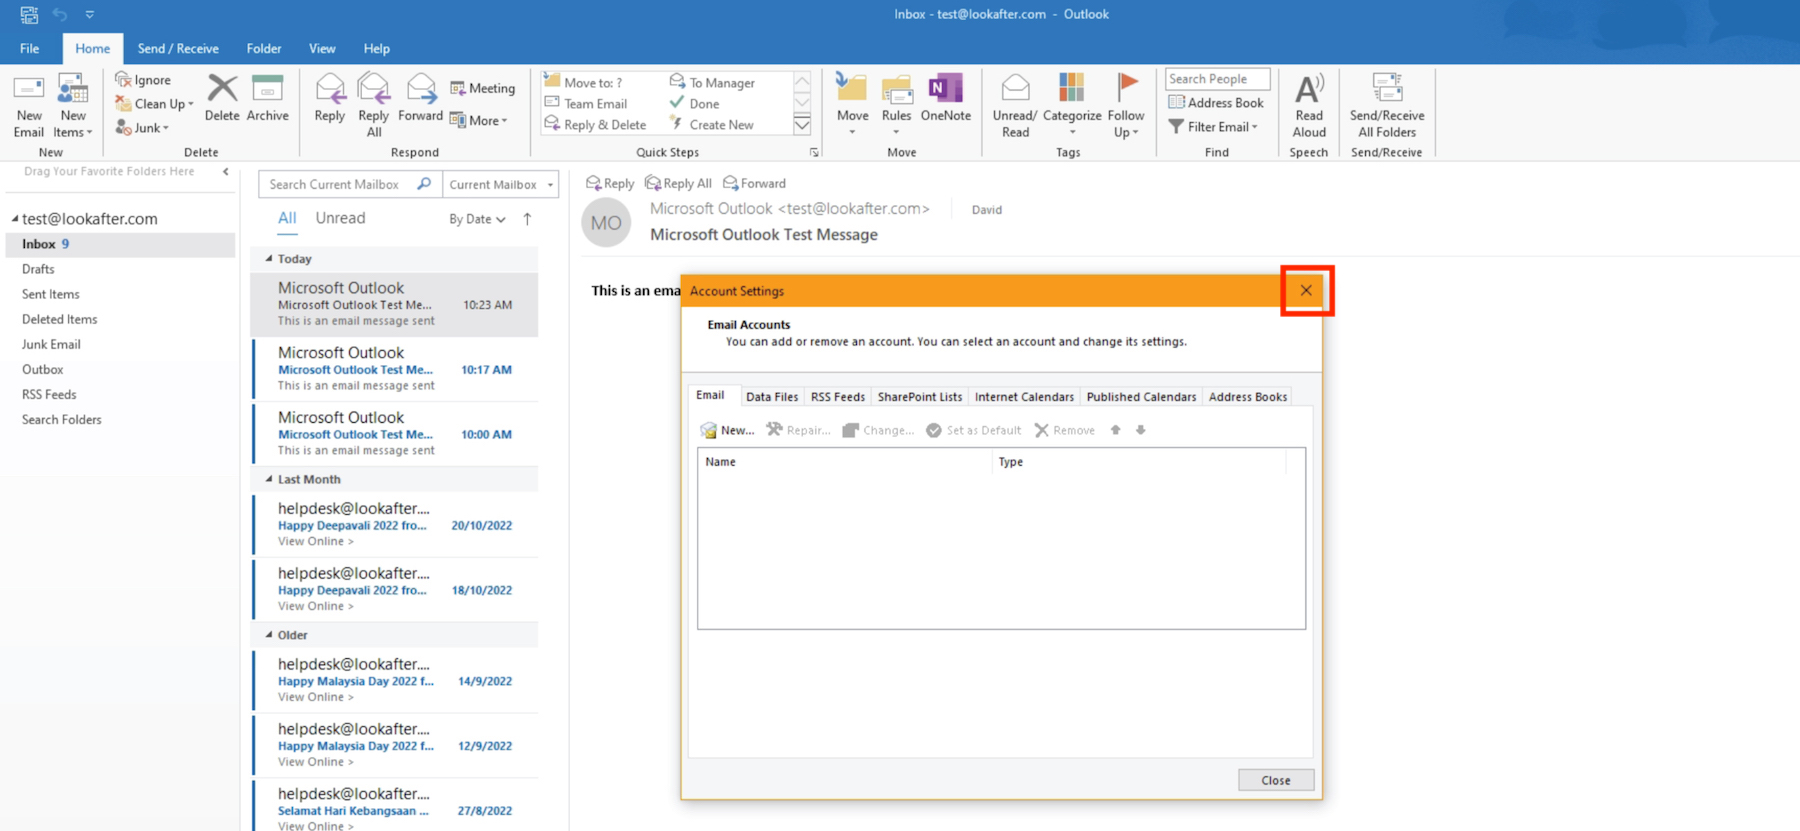
2. Select Account Settings > Account Settings….
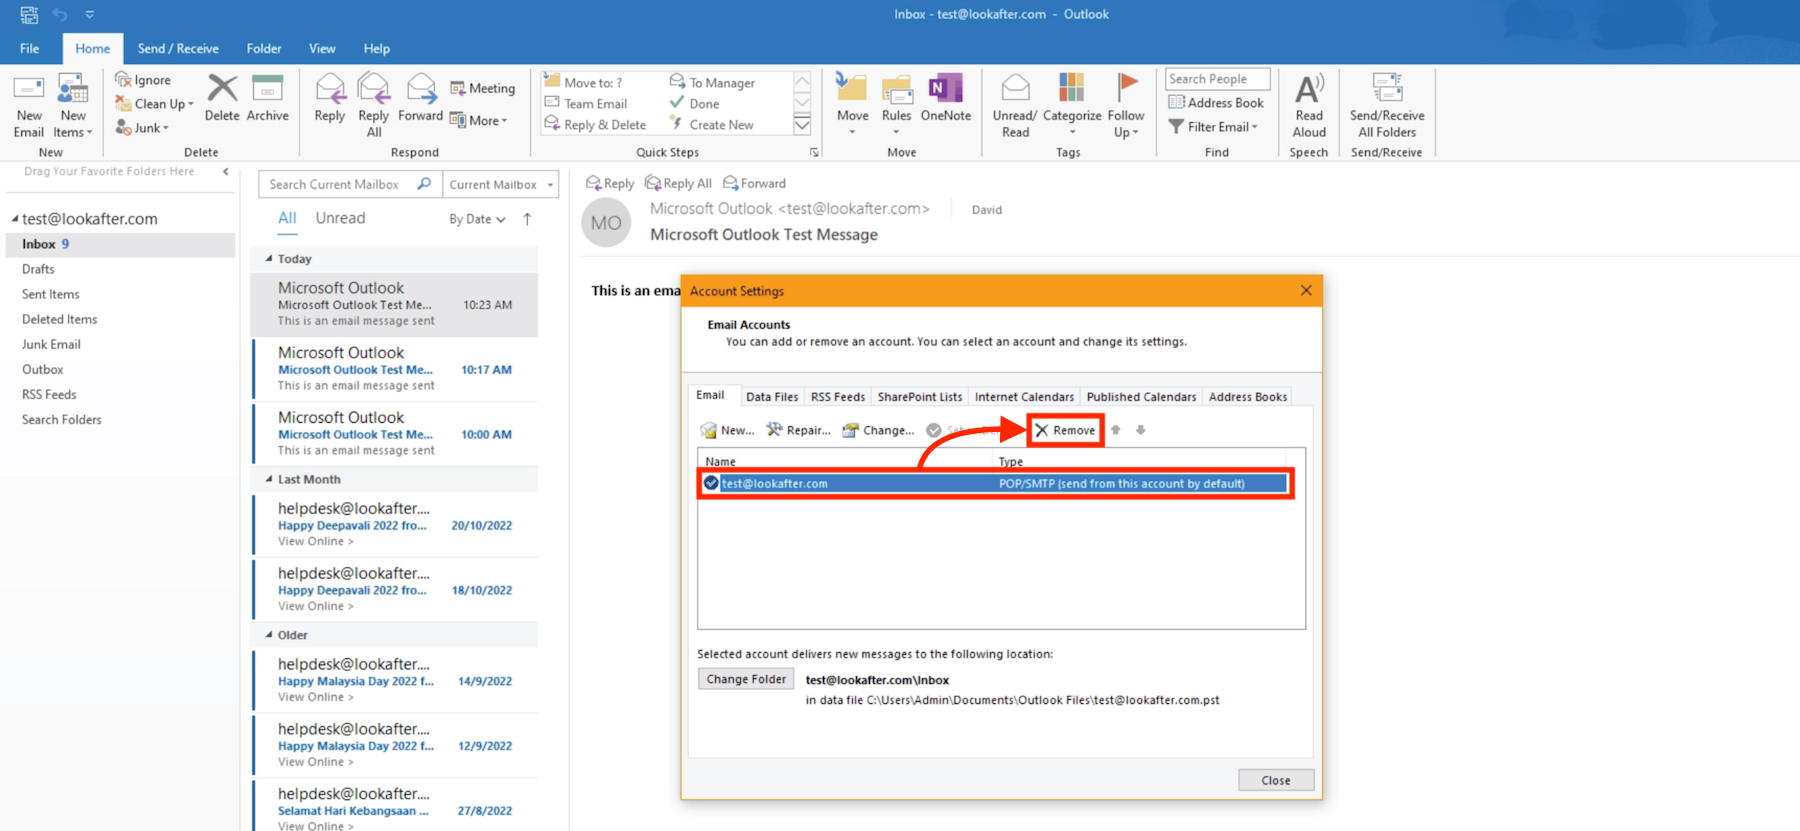
3. Select your POP3 mail account and click Remove.
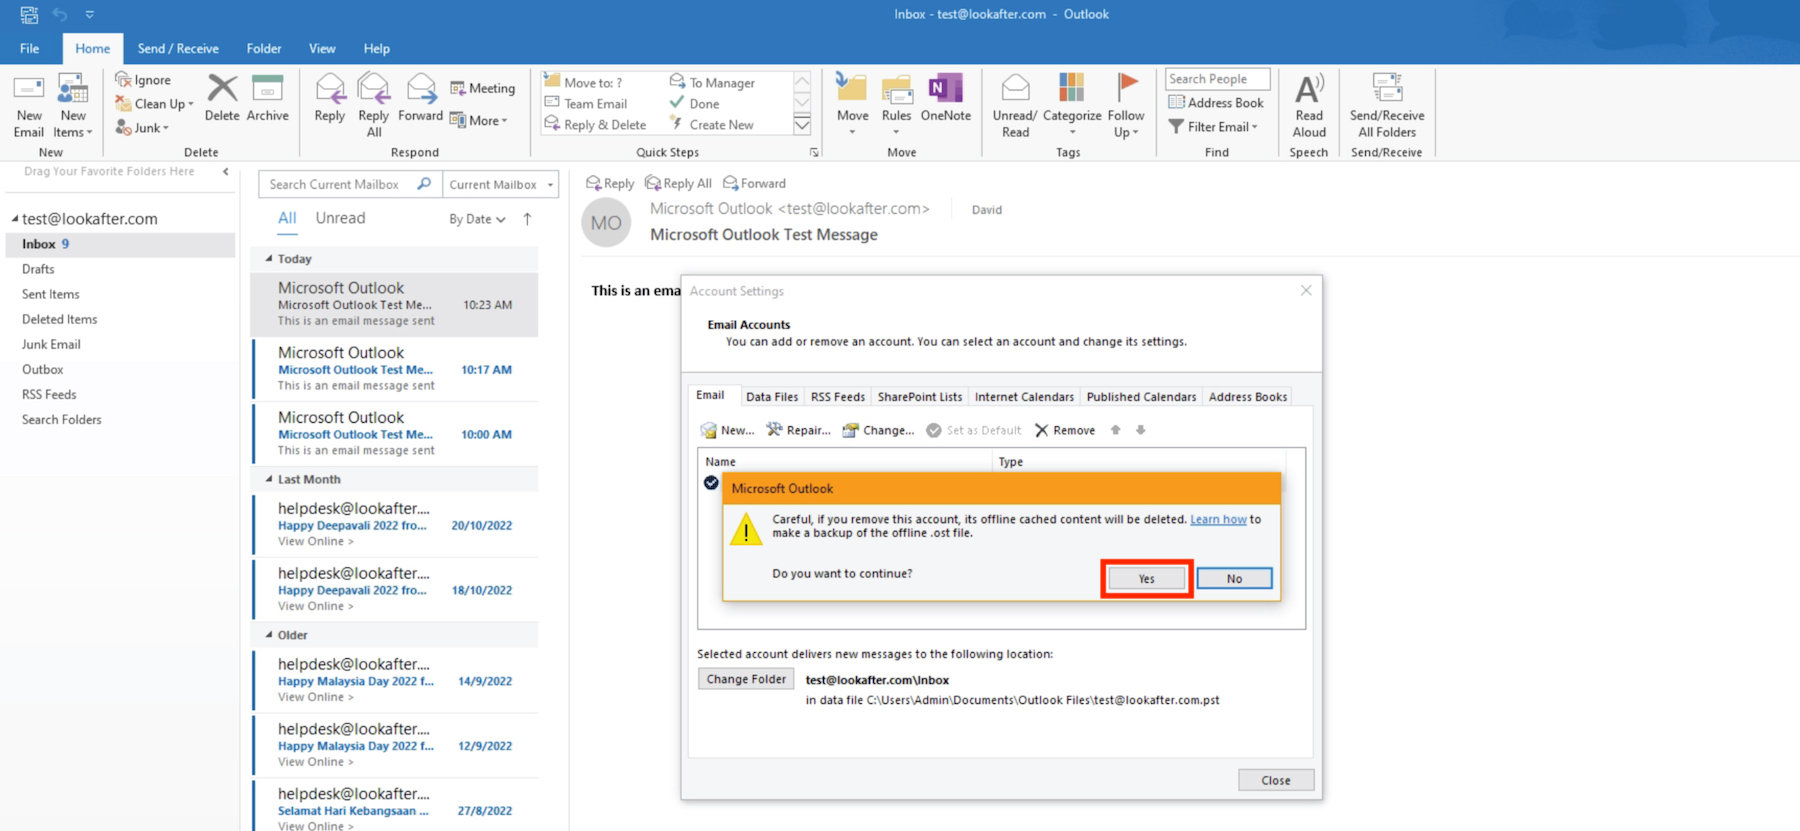
4. A warning message will be displayed. Click Yes to continue.
5. Once the POP3 account is removed, close the window.
Step 3: Set up your account with IMAP
You may proceed to add the new IMAP account once you have removed the previous POP3 mail account by referring the link below:
Email Setup Guide: Microsoft Outlook (Secure IMAP)
Step 4: Move old emails to your IMAP account (optional)
You may skip this step if you want to keep the old emails from the previous POP3 profile on your device locally.
Follow through the steps below if you want to upload and sync the old emails to the server and make them available across all devices using IMAP.
Before you proceed, please make sure your email quota is sufficient to contain all emails.
1. Select the new folder that you have created in your POP3 account such as “Old Inbox” and “Old Sent”. Then, drag and drop it under the IMAP folder. By doing this, you can separate the folder for new and old backup emails.
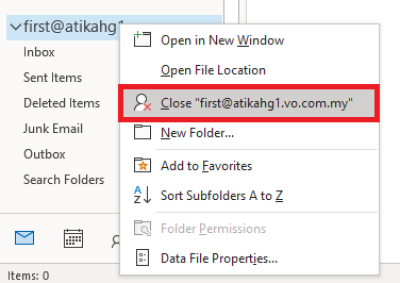
2. Repeat the step for all of the folders. After you have finished moving the emails, you may close the POP3 account by right-click on the account and select [Close].
You may expect longer synchronisation time in Microsoft Outlook if you have larger folder's size.

