Table of Contents
Home > FAQ > Email > Email Clients & Mobile > Mail Client Issues and Troubleshooting > How to 'switch' POP3 to IMAP mail account in Microsoft Outlook
How to 'switch' POP3 to IMAP mail account in Microsoft Outlook
POP3 protocol only downloads emails from your webmail's Inbox and does not sync emails across multiple devices. Thus, if you wish to access your emails anytime from several devices, you should consider using IMAP instead.
Switching from POP3 to IMAP is easy with the following steps:
1. Make a local backup on your emails
2. Remove your POP3 account
3. Set up your account with IMAP
4. Move old emails to your IMAP account (optional)
Step 1: Make a local backup on your emails
Firstly, it is recommended to back up your emails before making the switch. You may refer to Microsoft Guide: Export or backup email, contacts, and calendar to an Outlook .pst file for more details, or follow the steps below:
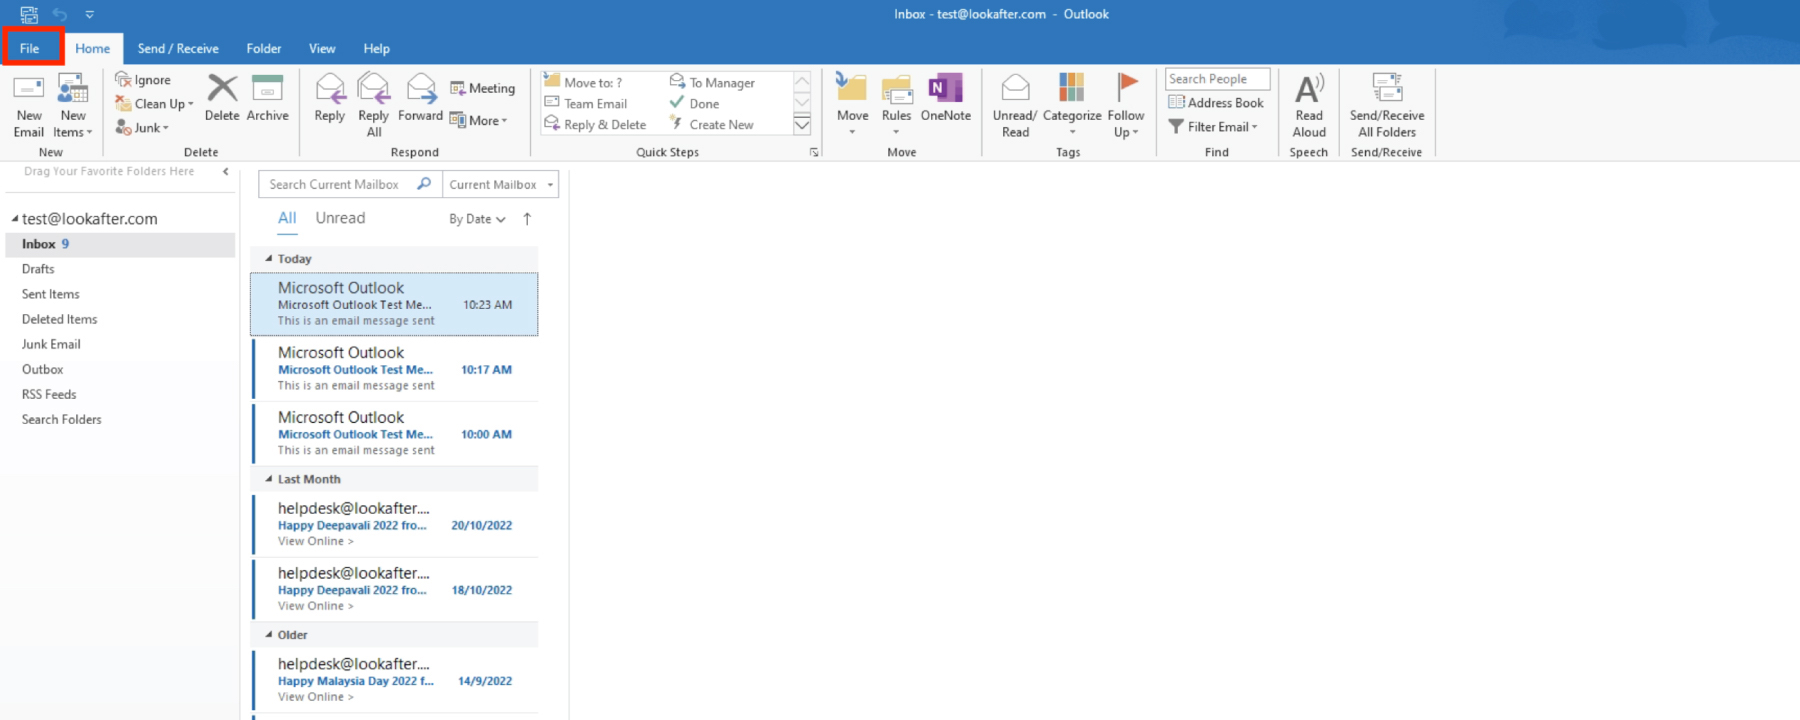
1. On your Outlook, go to File.
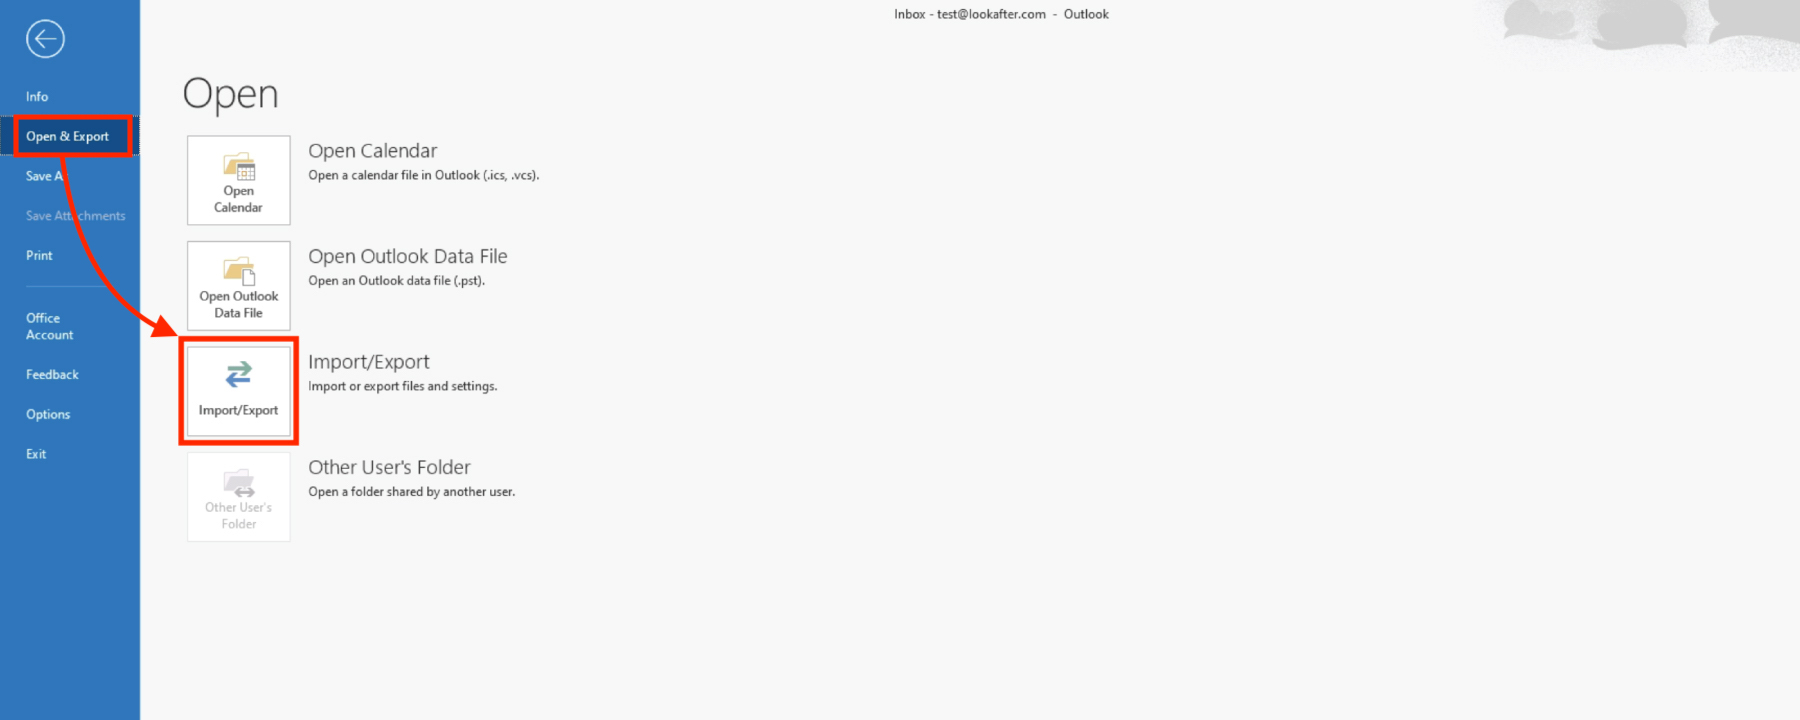
2. Then, select Open & Export and Import/Export.
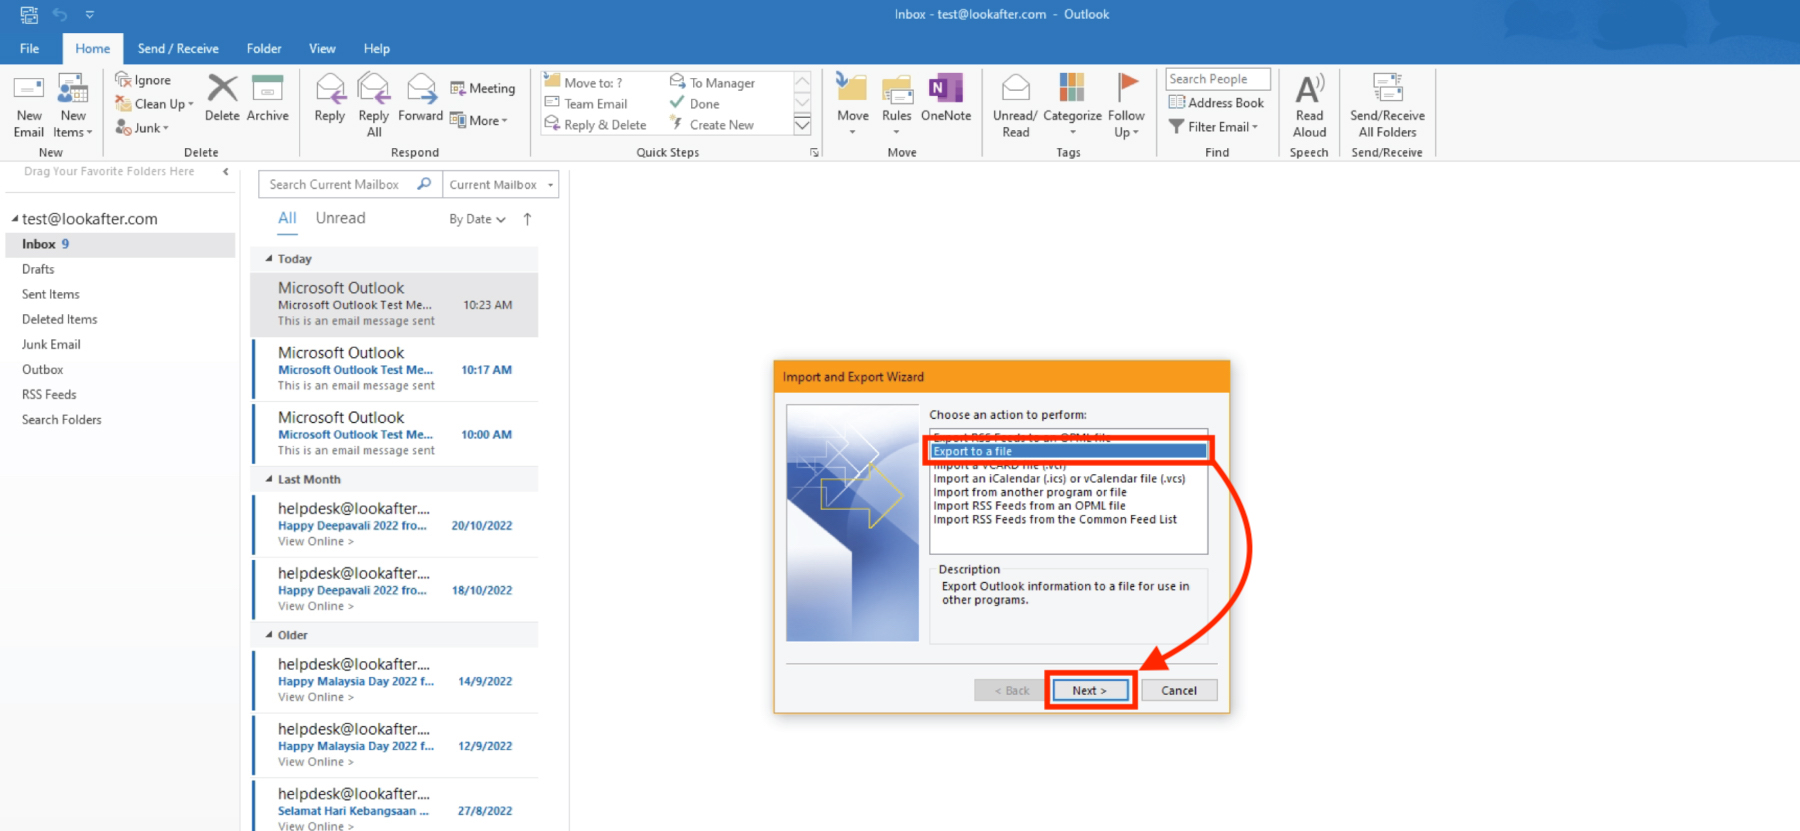
3. Choose Export to a file and click Next.
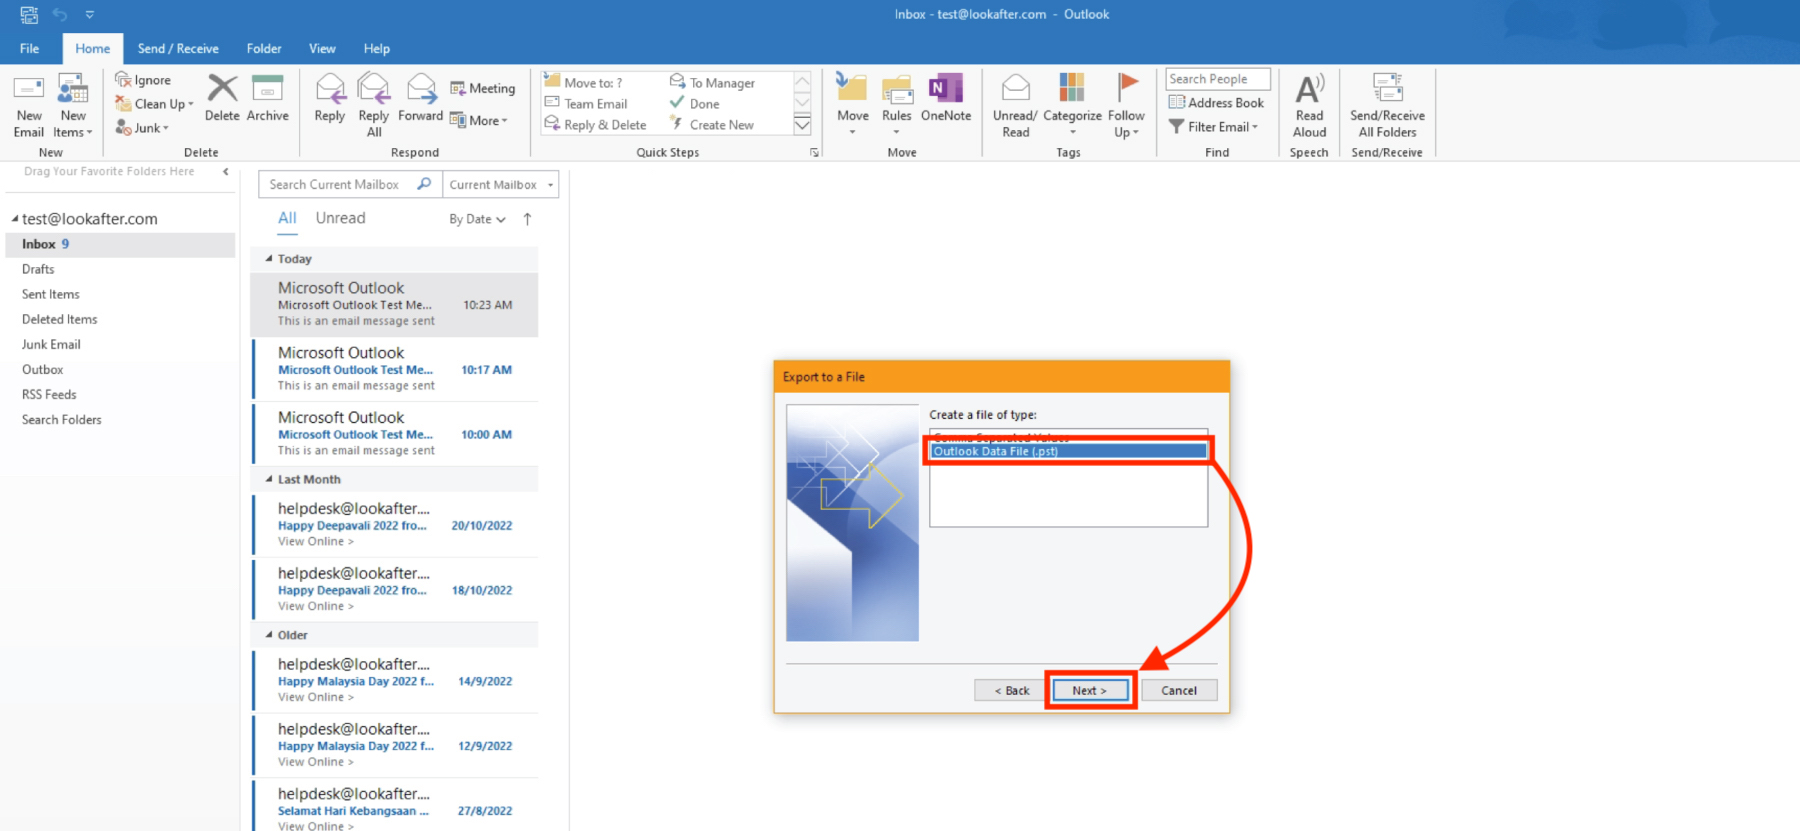
4. Next, choose Outlook Data File (.pst) and click Next.
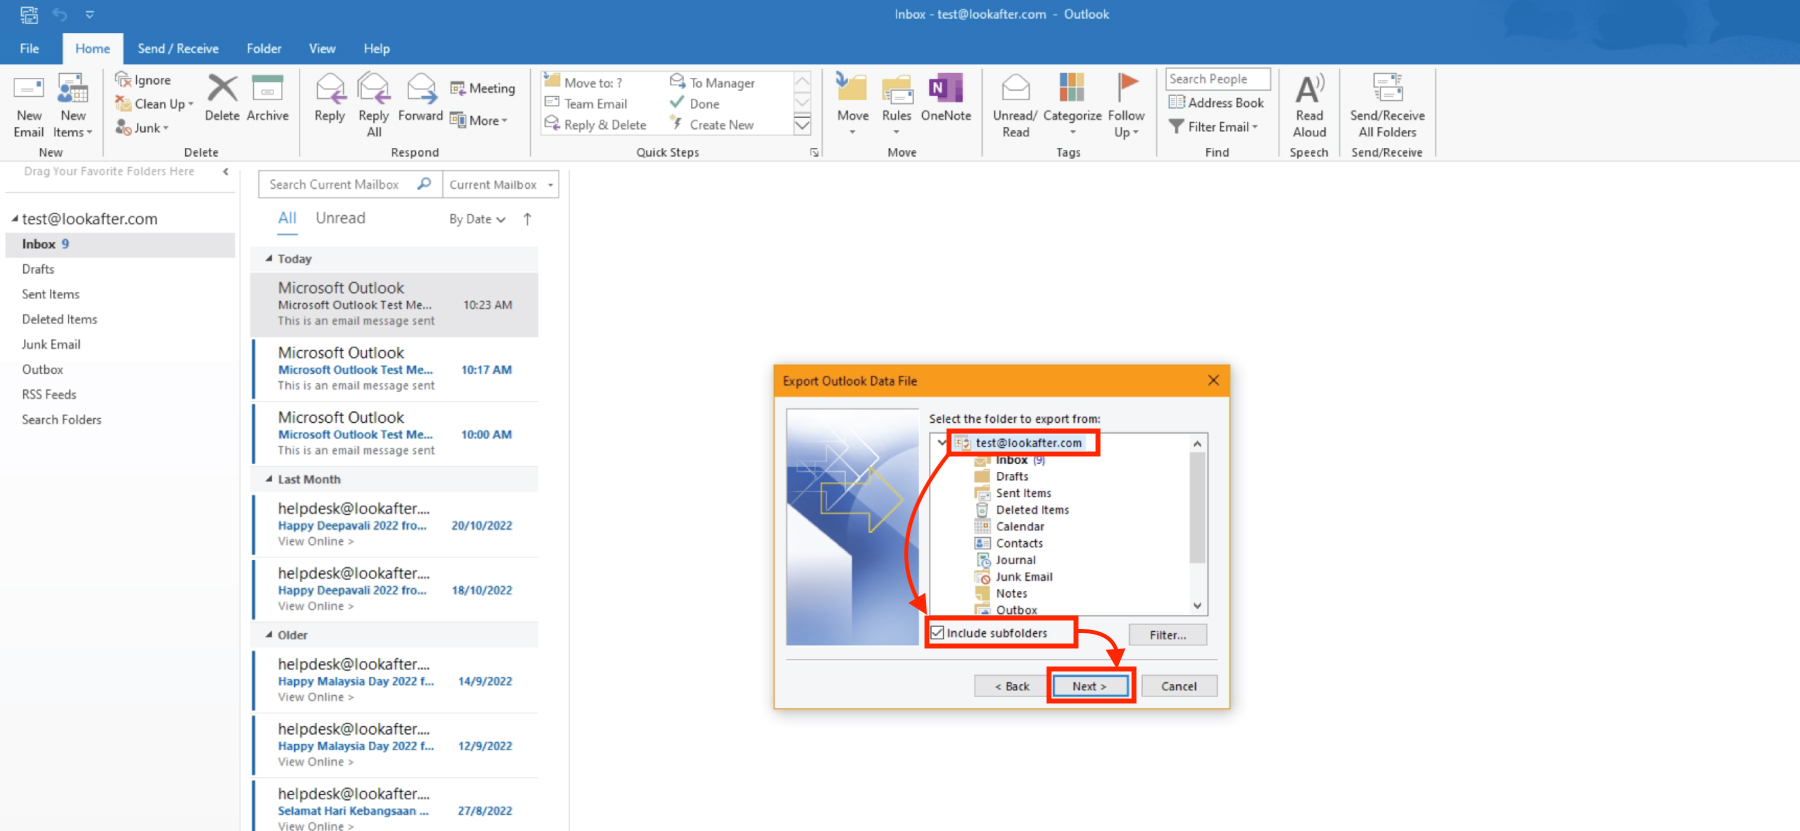
5. Select your mail account and make sure to tick the “Include subfolders” option. Then, click Next.
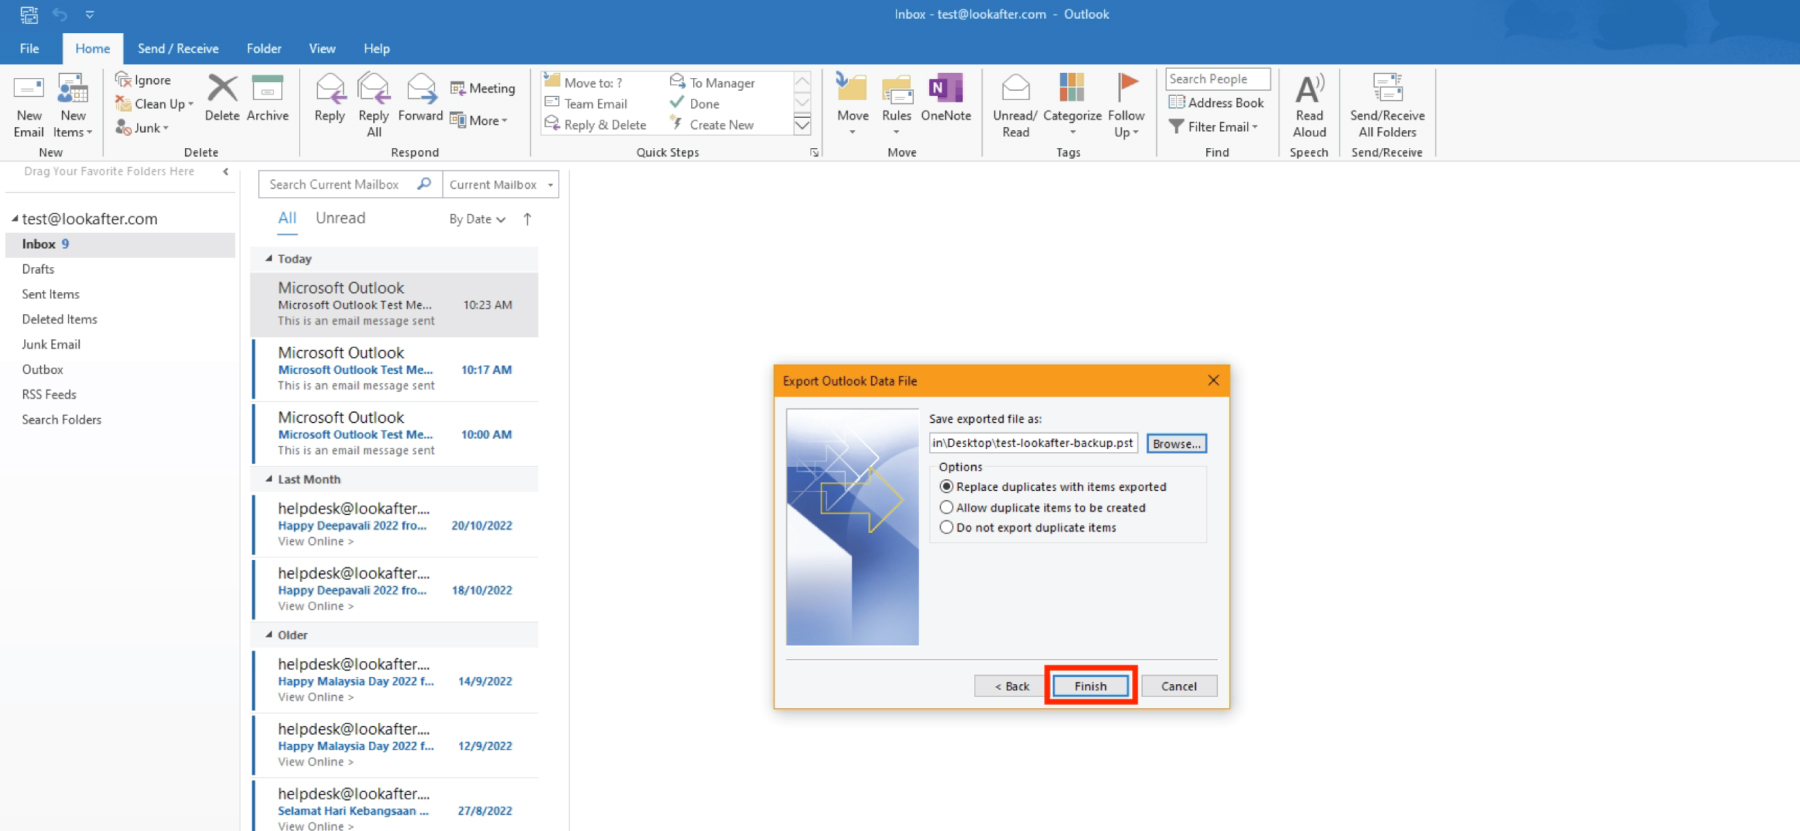
6. You may click Browse to select a location to save the backup file. Then, click Finish.
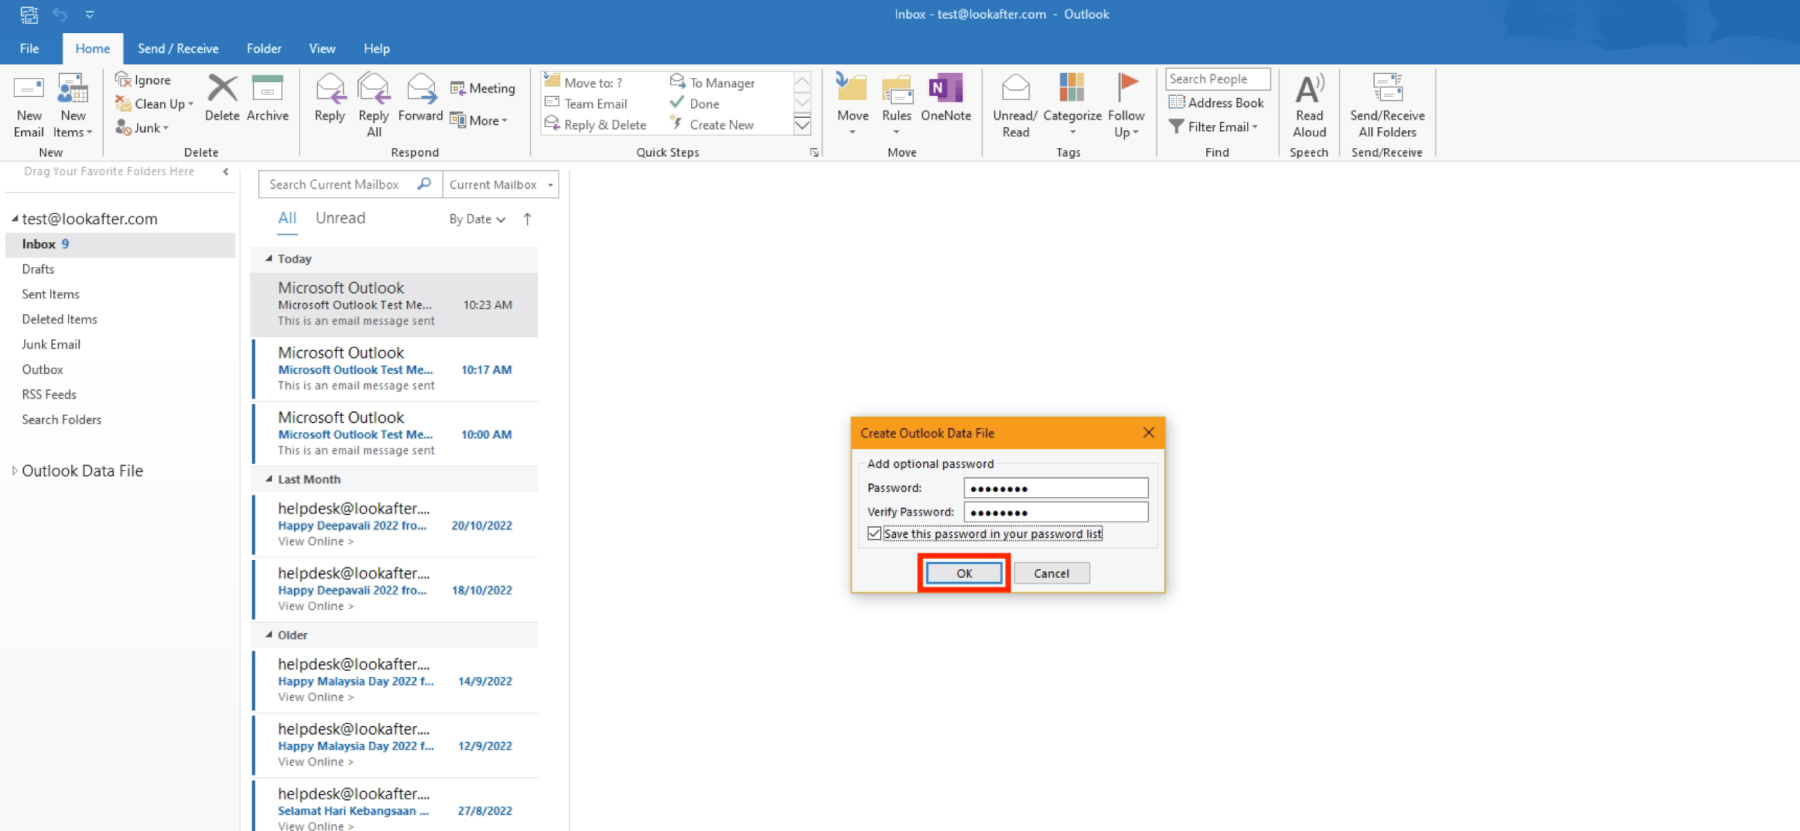
7. Fill in the password for your email backup file and click OK.
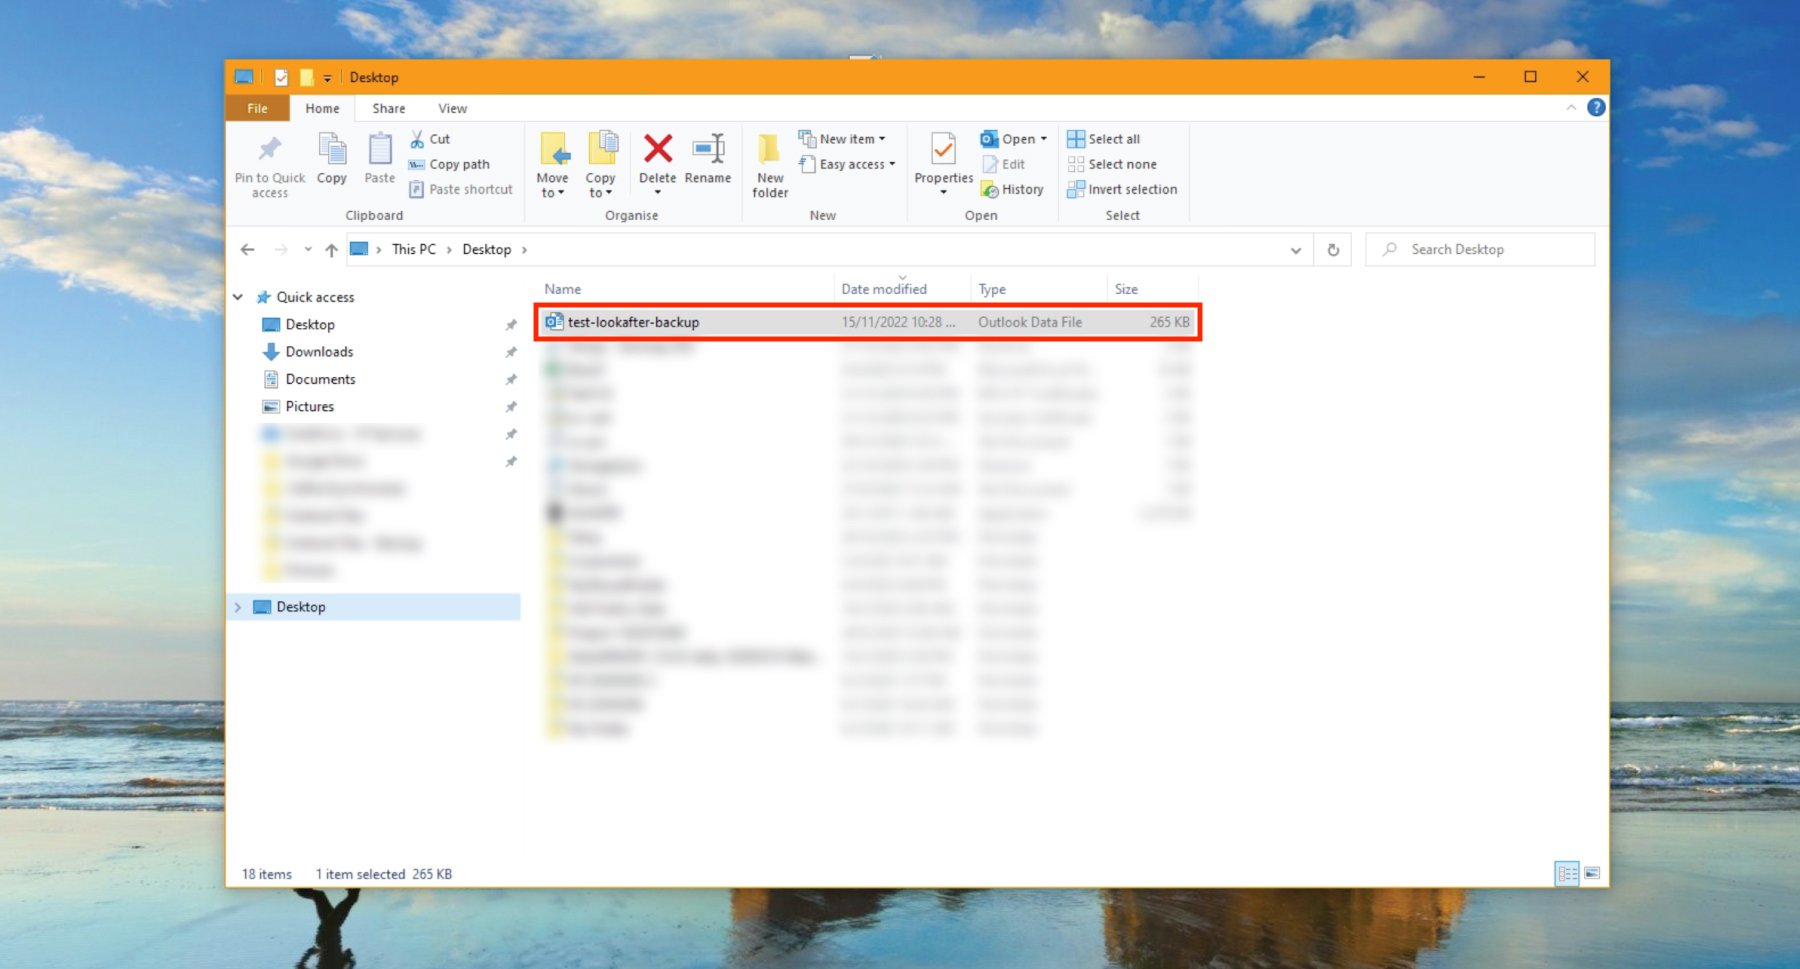
8. Your emails will be saved as a pst file in the selected folder location.
Step 2: Remove your POP3 account
After your emails have been backed up, you can proceed to remove your POP3 mail account.
Note that your POP3 emails will not be deleted when you remove the POP3 connection as they are stored locally on your computer.
Below are the steps to remove the POP3 account:
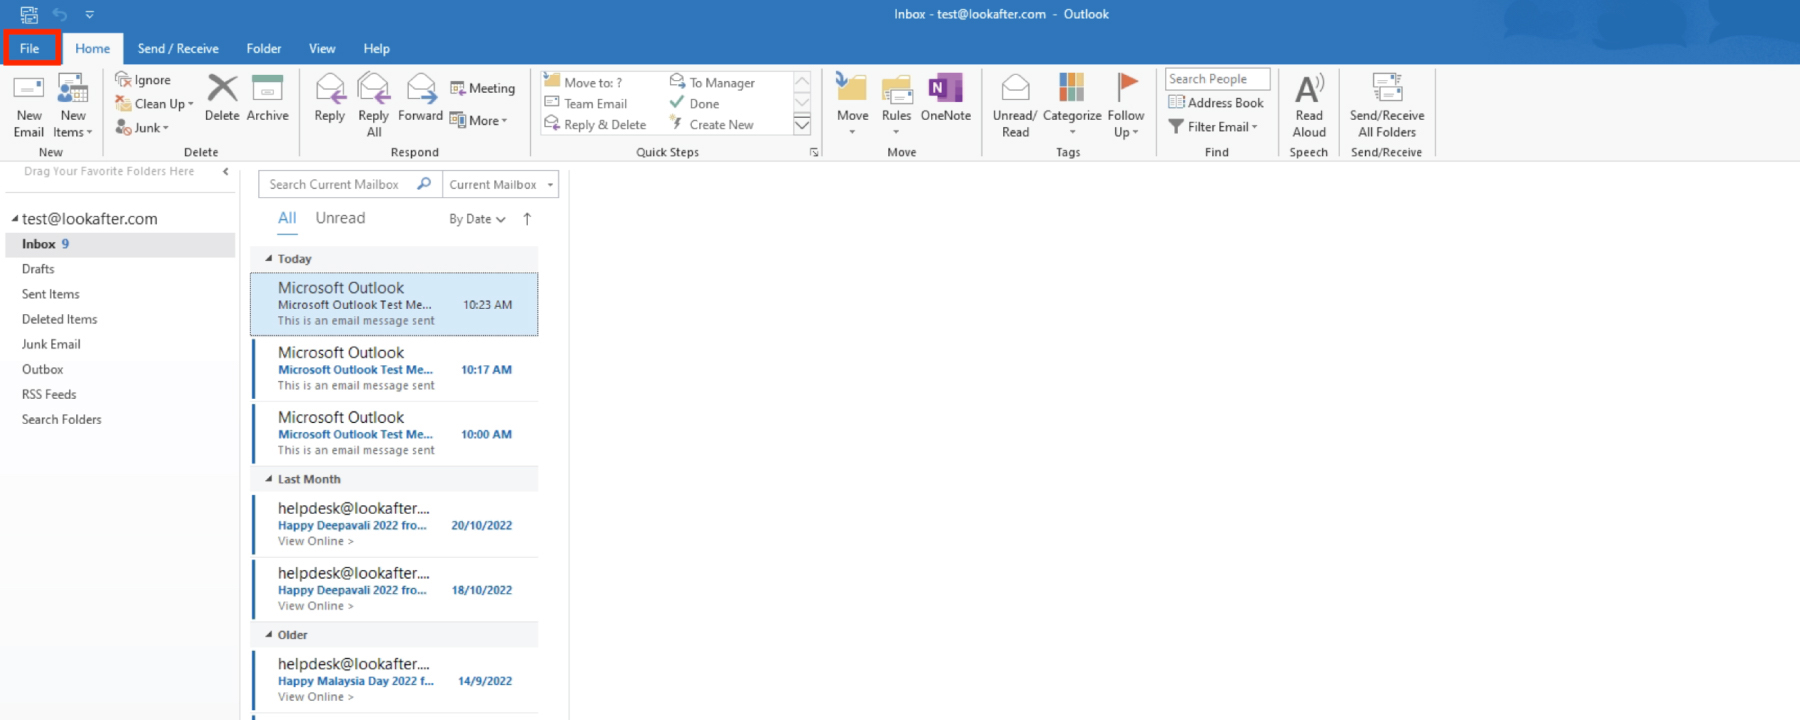
1. Go to File.
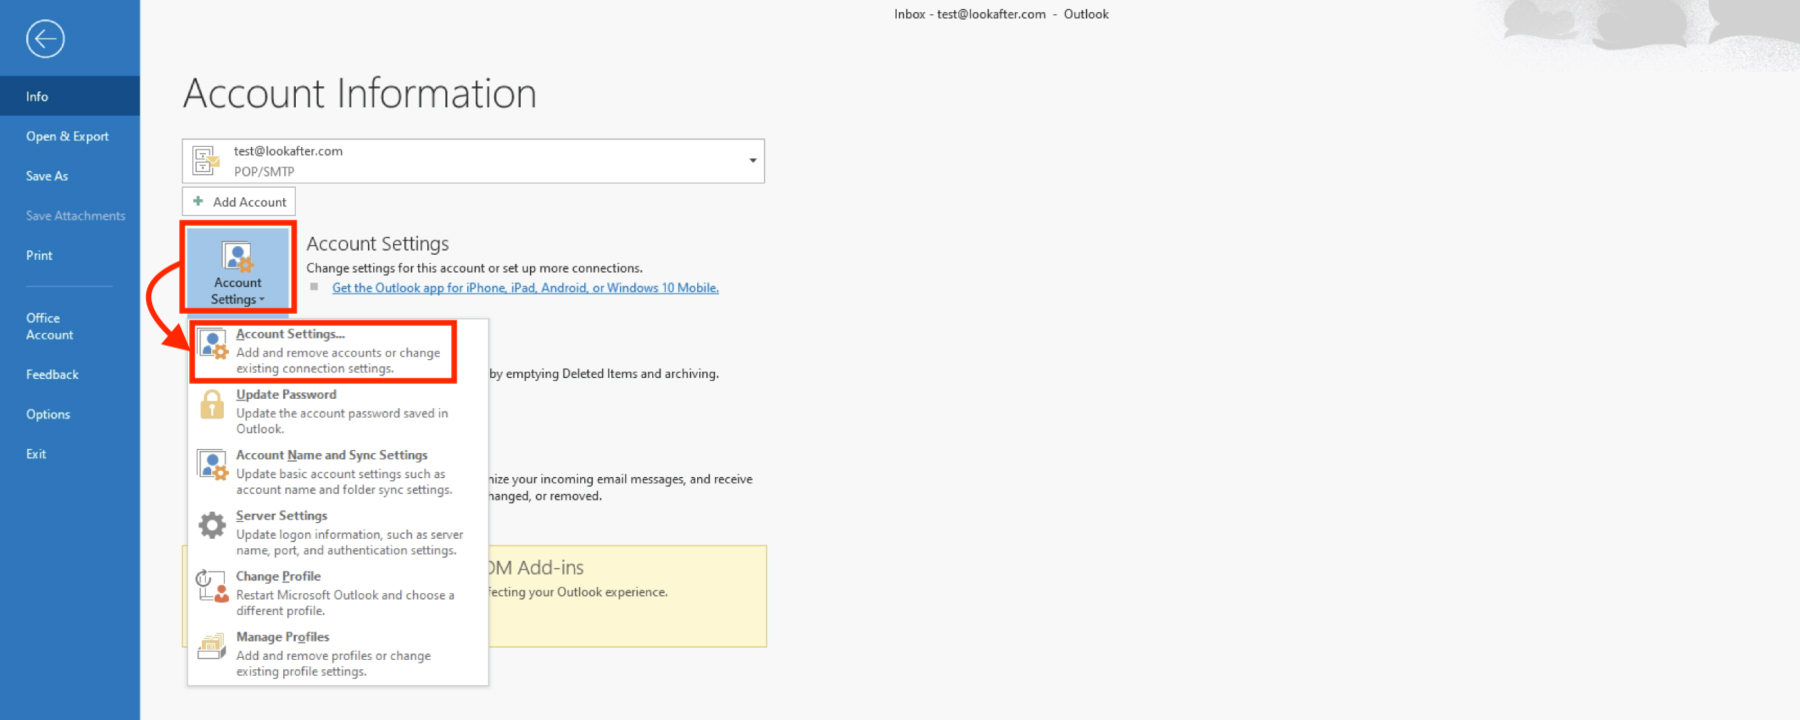
2. Select Account Settings > Account Settings….
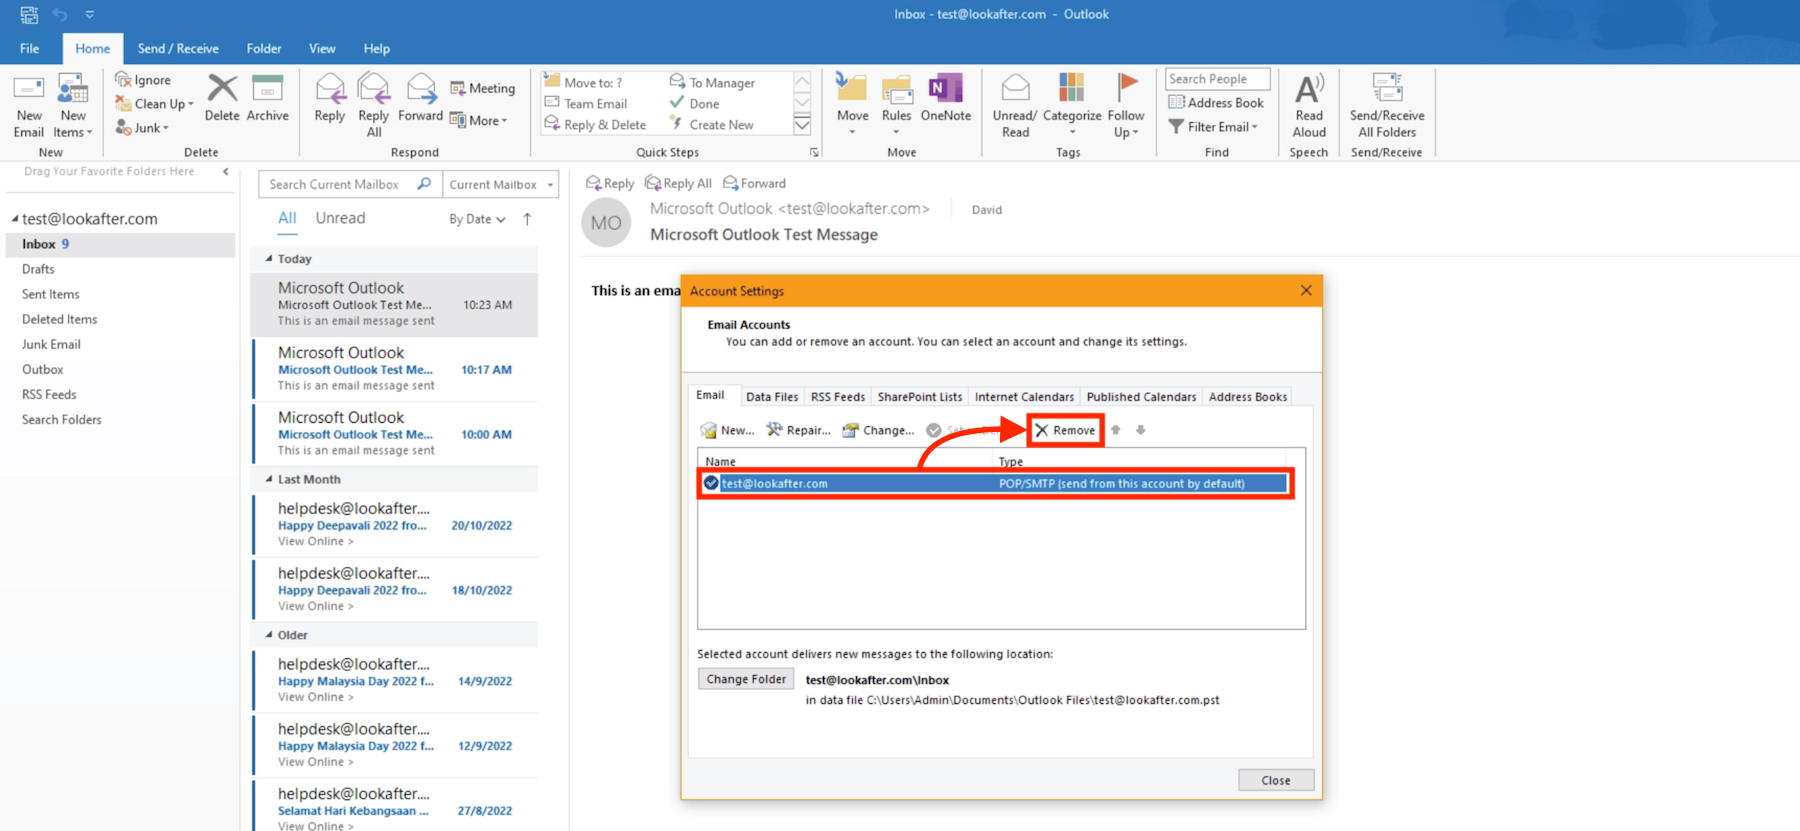
3. Select your POP3 mail account and click Remove.
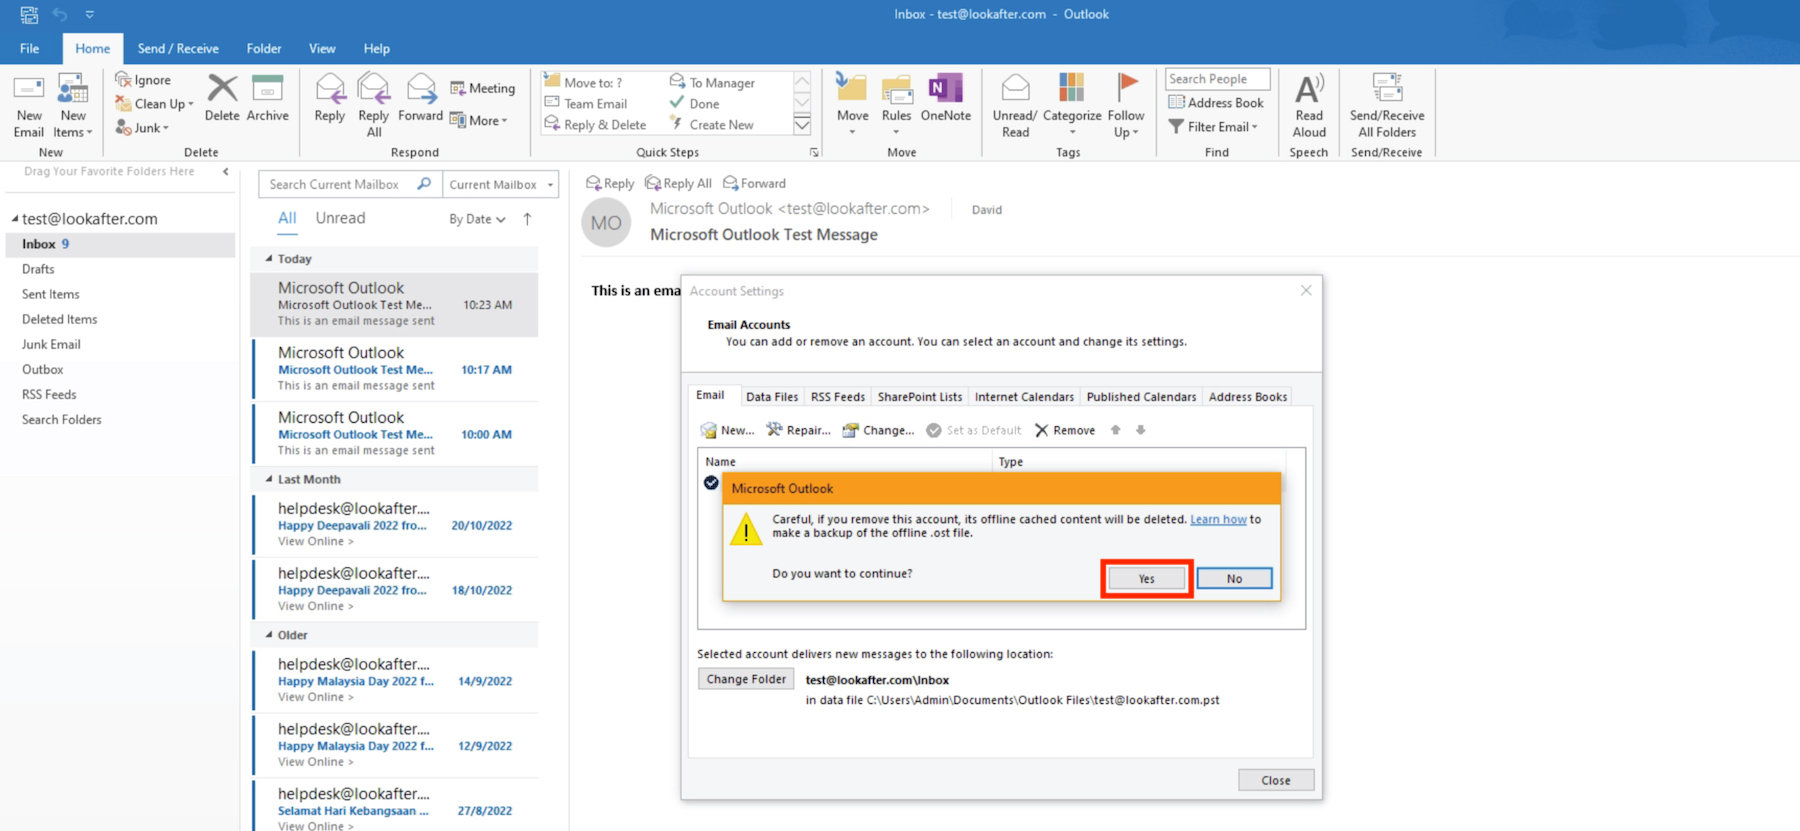
4. A warning message will be displayed. Click Yes to continue.
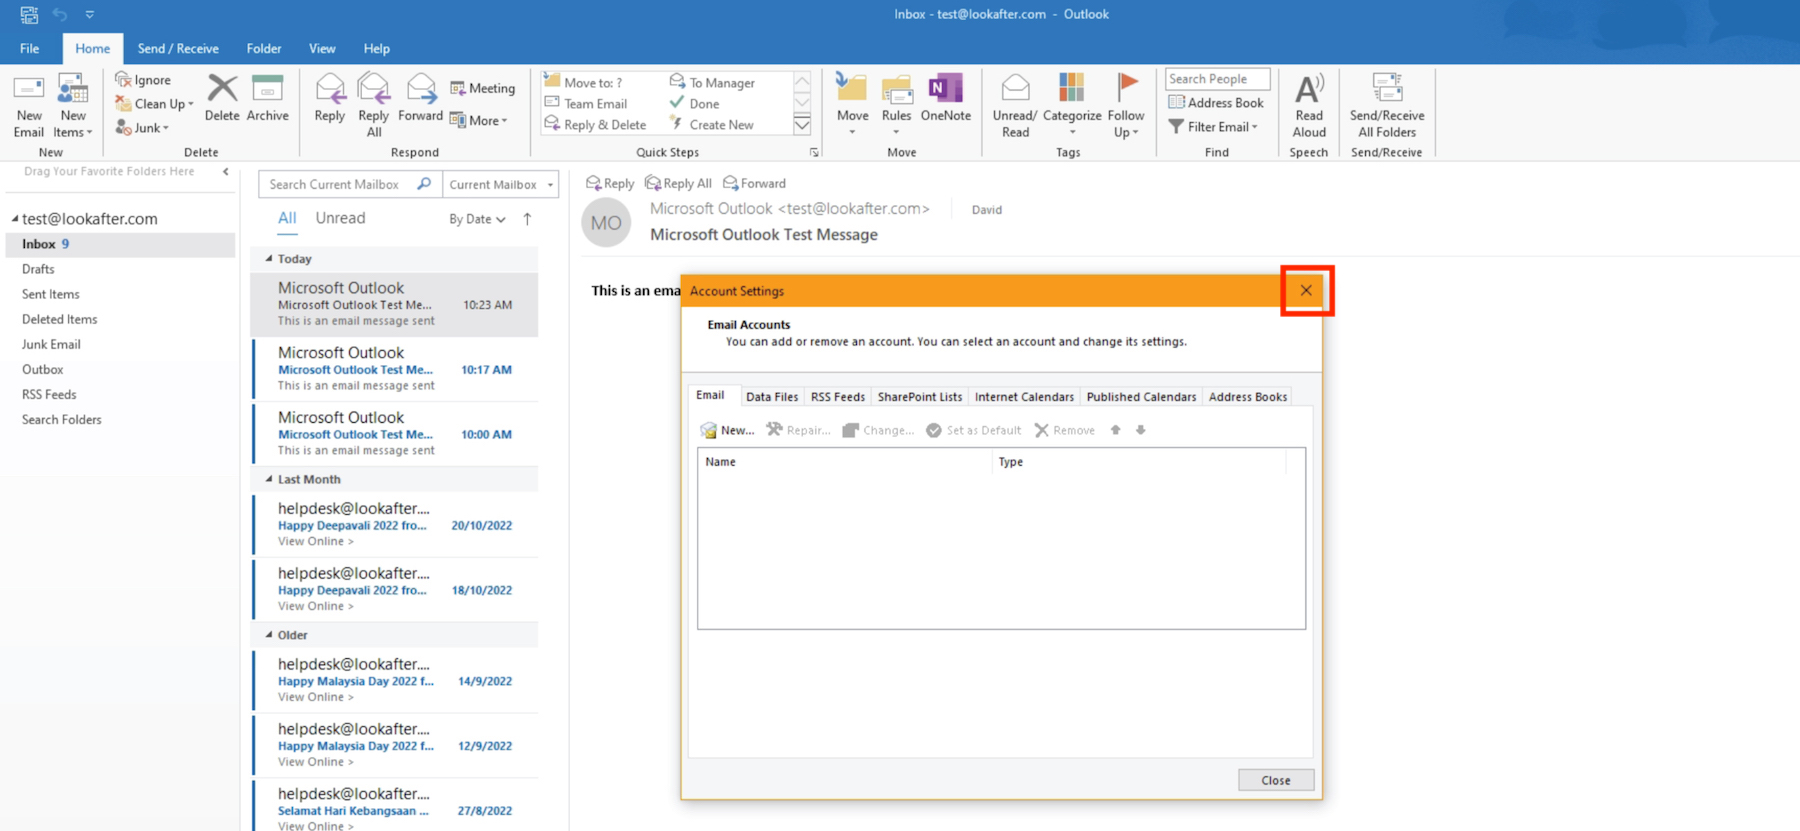
5. Once the POP3 account is removed, close the window.
Step 3: Set up your account with IMAP
You may proceed to add the new IMAP account once you have removed the previous POP3 mail account by referring the steps below.
Note: If you encounter issue creating IMAP using the default setup wizard (e.g. Ms Outlook could not fetch the accurate server settings), please refer to the manual setup guide.
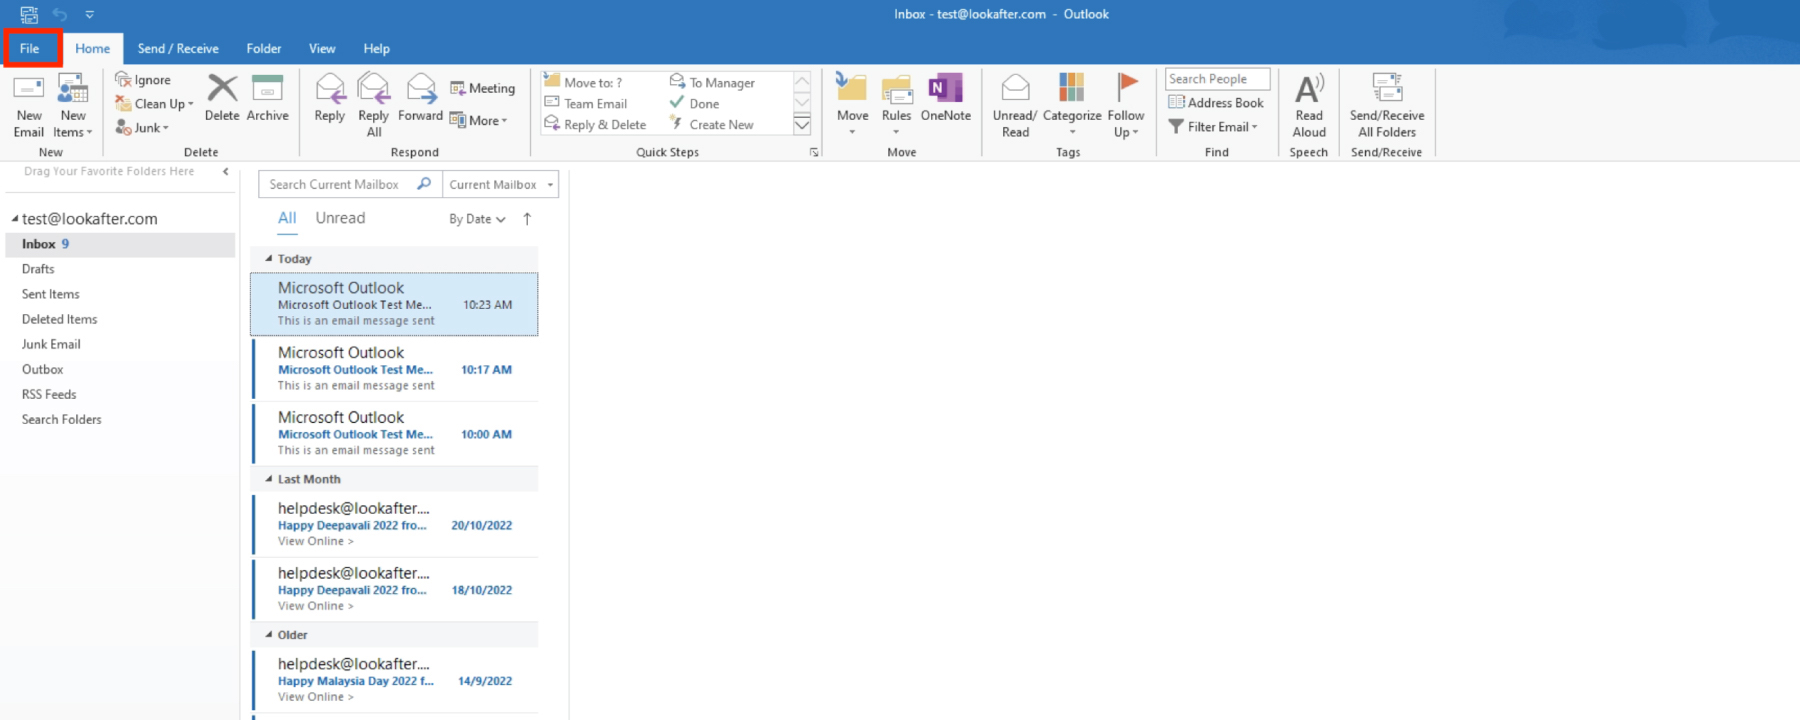
1. Go to File.
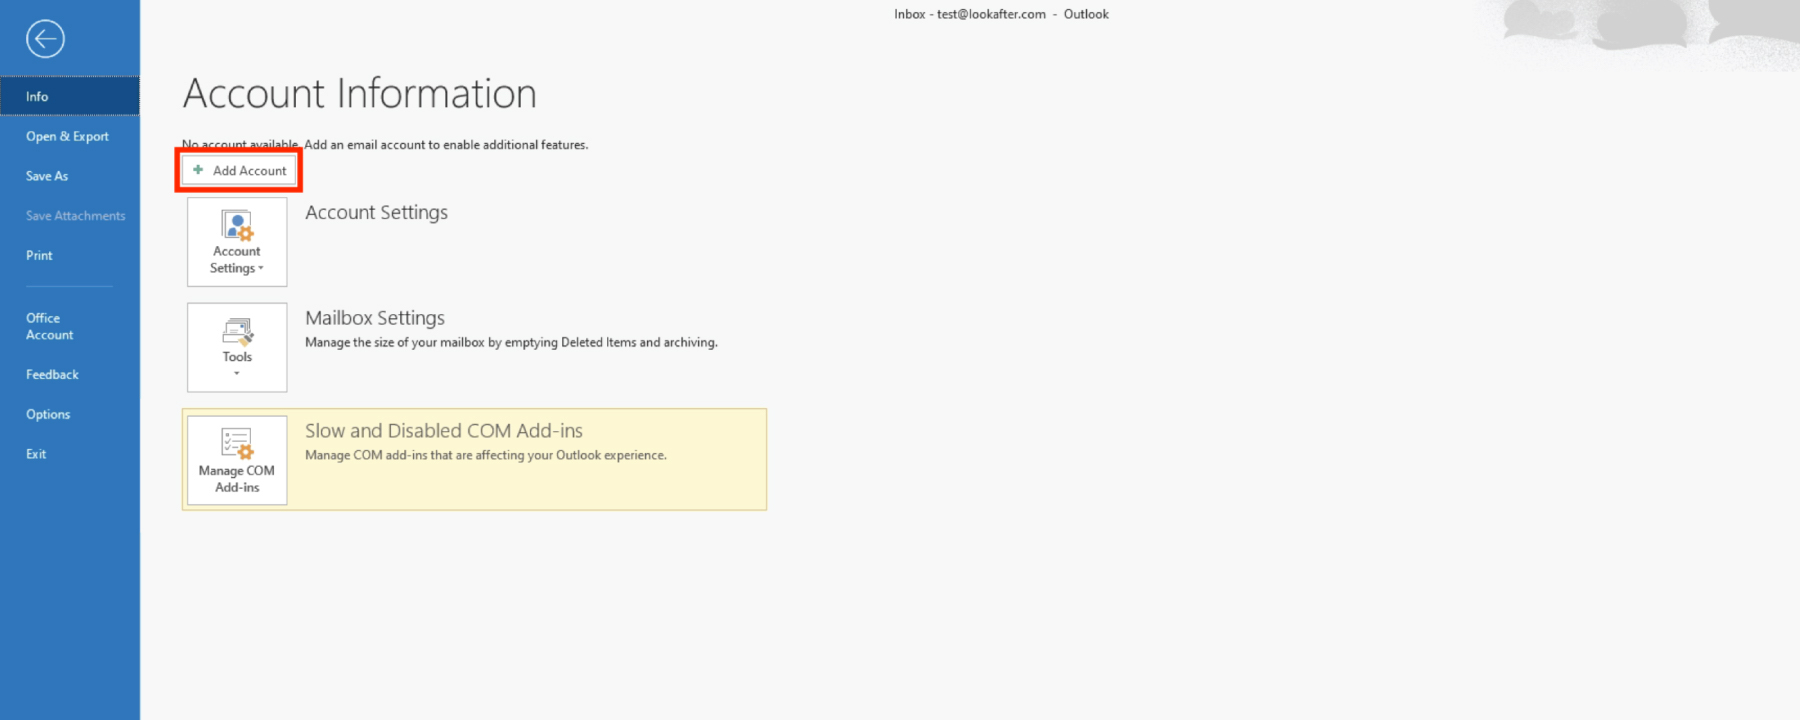
2. Click Add Account.
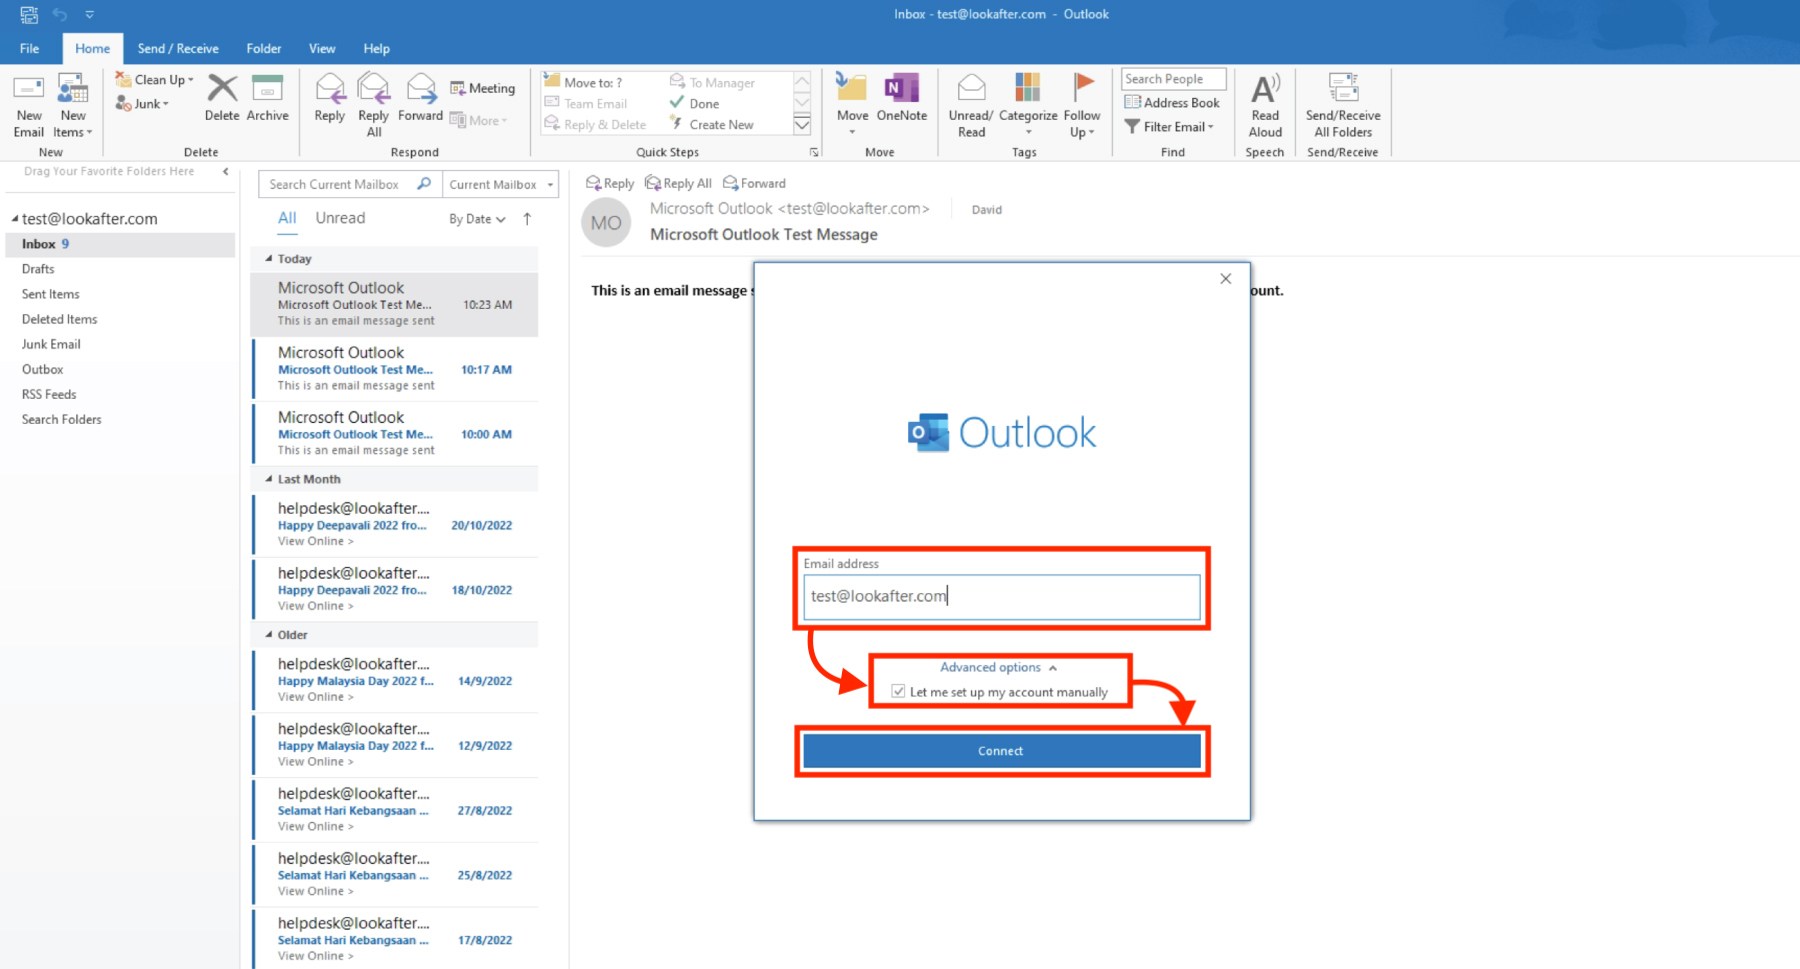
3.Fill in your email address into the given field. Then, click on Advanced options, select Let me set up my account manually and proceed with Connect.
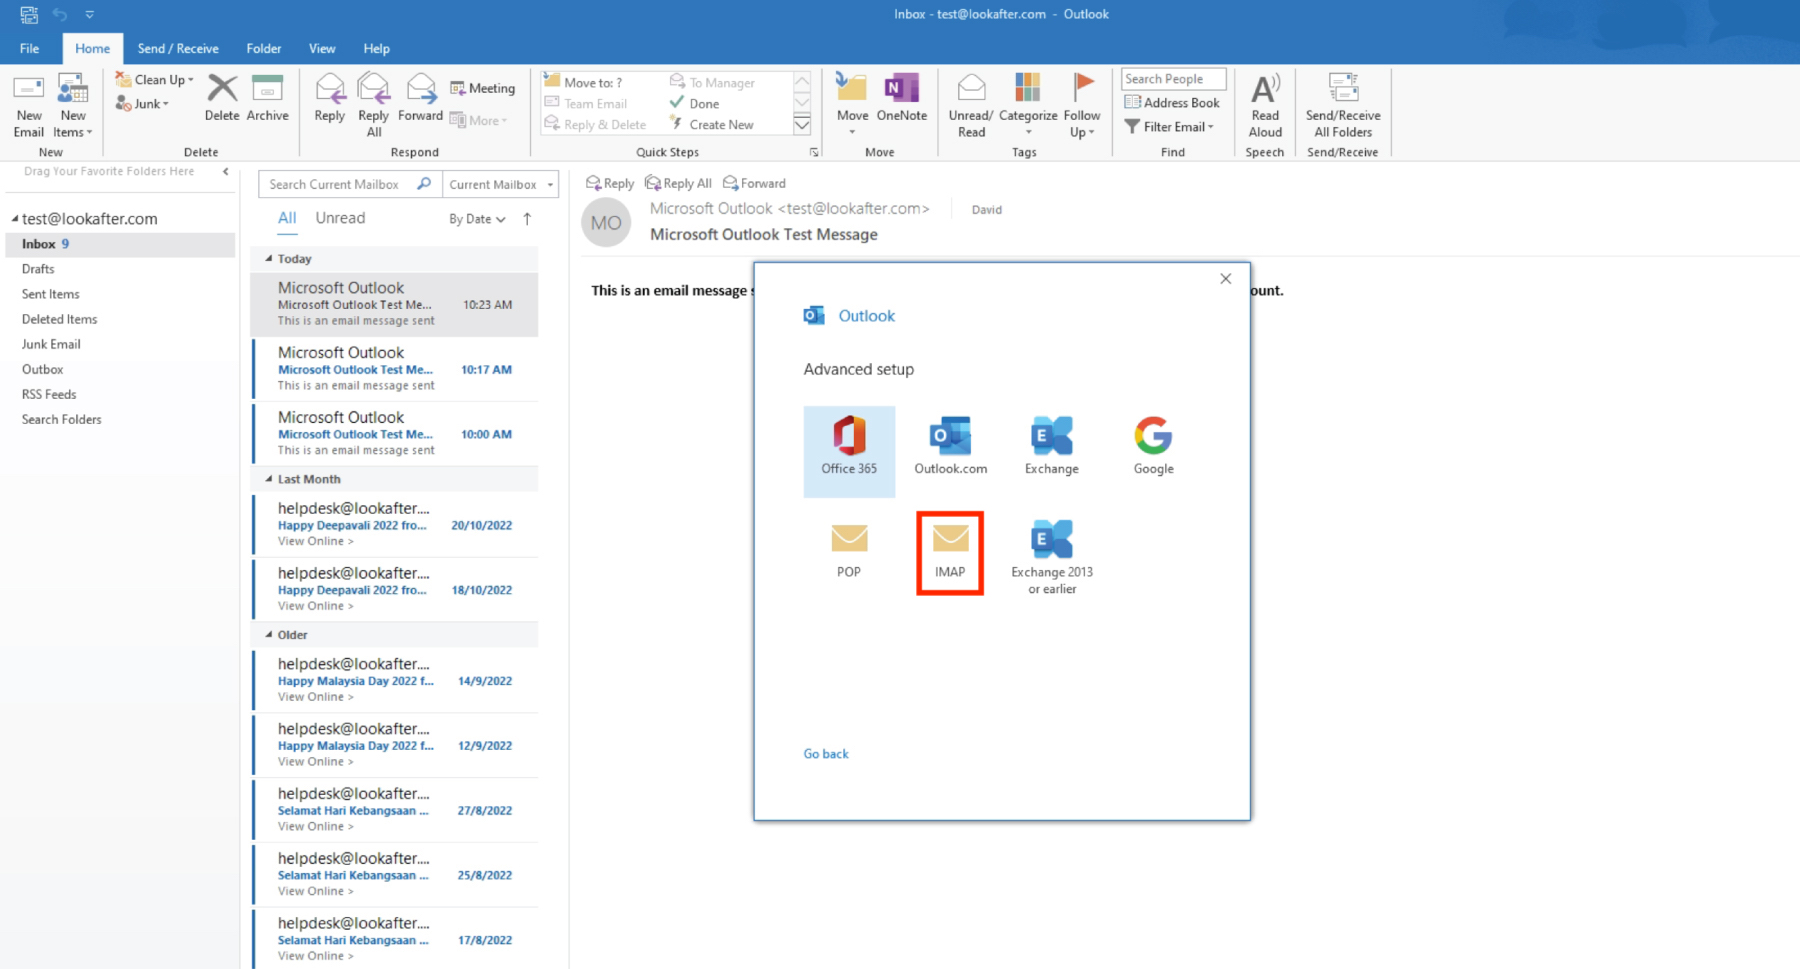
4. Proceed by selecting IMAP.
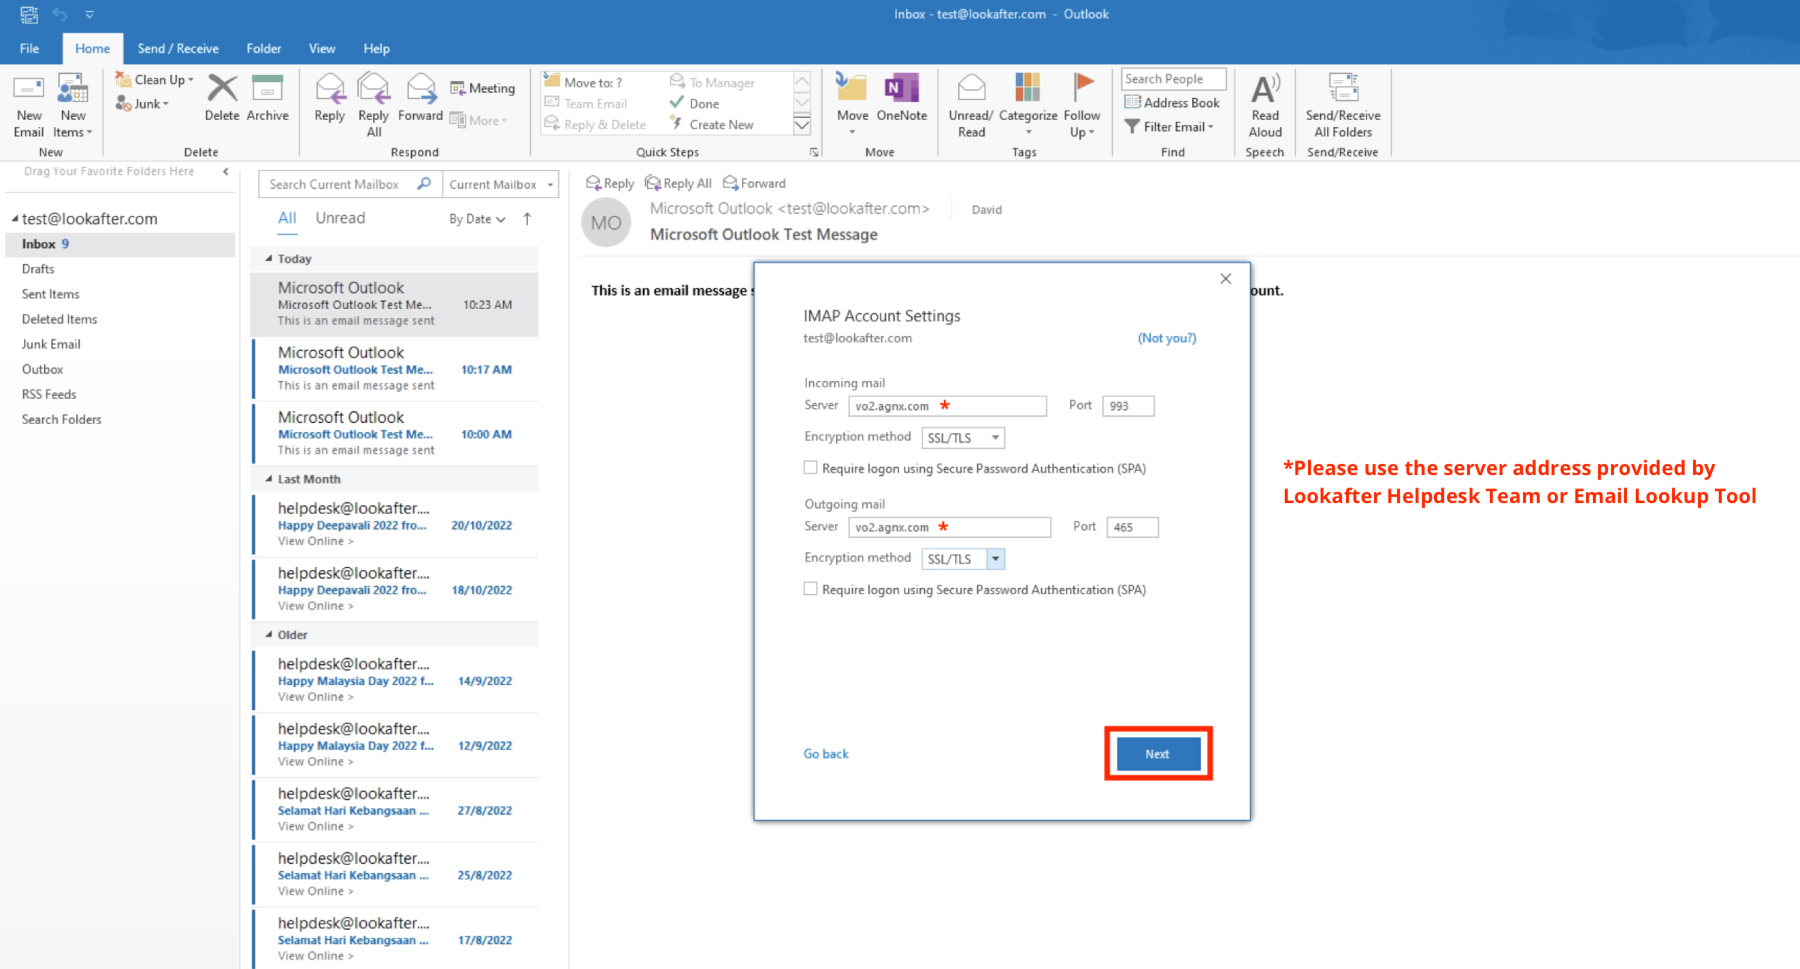
5. Please fill in these details in the IMAP Account Settings:
| Incoming mail server | vo1.agnx.com / vo2.agnx.com / g1.agnx.com IMPORTANT: To confirm which server to be used for your domain, please use the Email Lookup Tool or consult Lookafter Helpdesk. |
|---|---|
| Port (incoming) | 993 |
| Encryption method | SSL/TLS |
| Require logon using Secure Password Authentication (SPA) | Leave untick |
| Outgoing mail server | vo1.agnx.com / vo2.agnx.com / g1.agnx.com IMPORTANT: To confirm which server to be used for your domain, please use the Email Lookup Tool or consult Lookafter Helpdesk. |
| Port (outgoing) | 465 |
| Encryption method | SSL/TLS |
| Require logon using Secure Password Authentication (SPA) | Leave untick |
Click Next to continue.
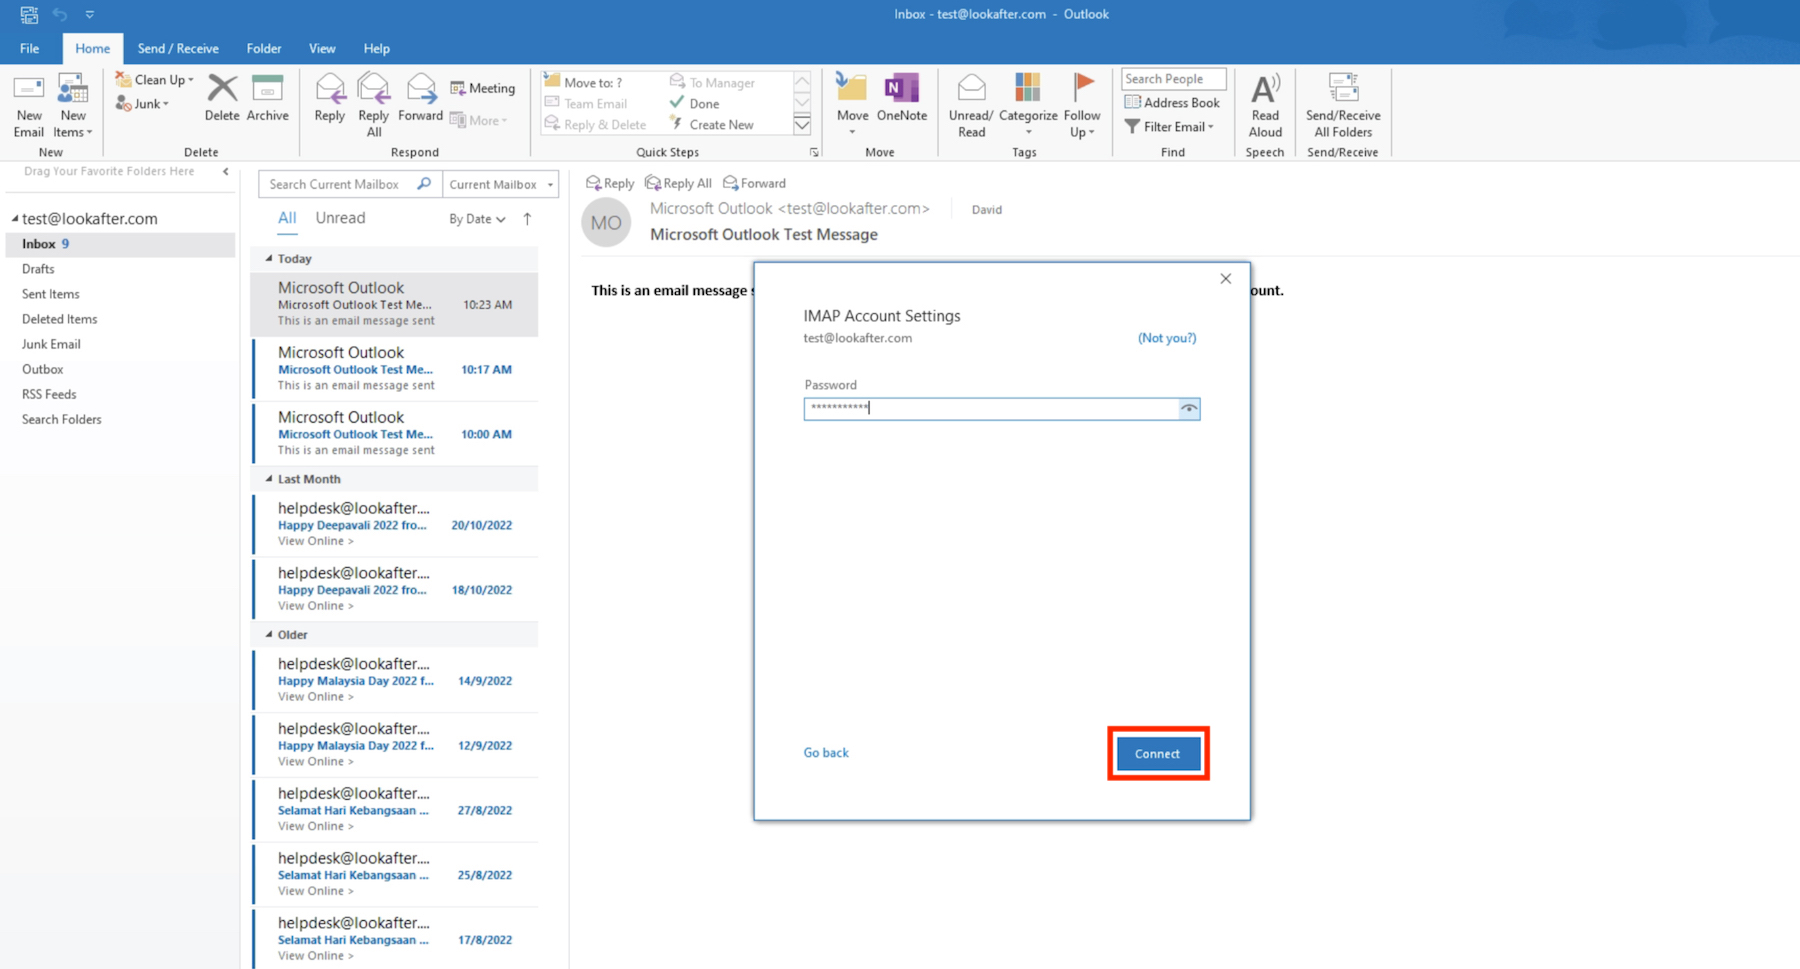
6. Then, enter your email account's password and proceed with Connect.
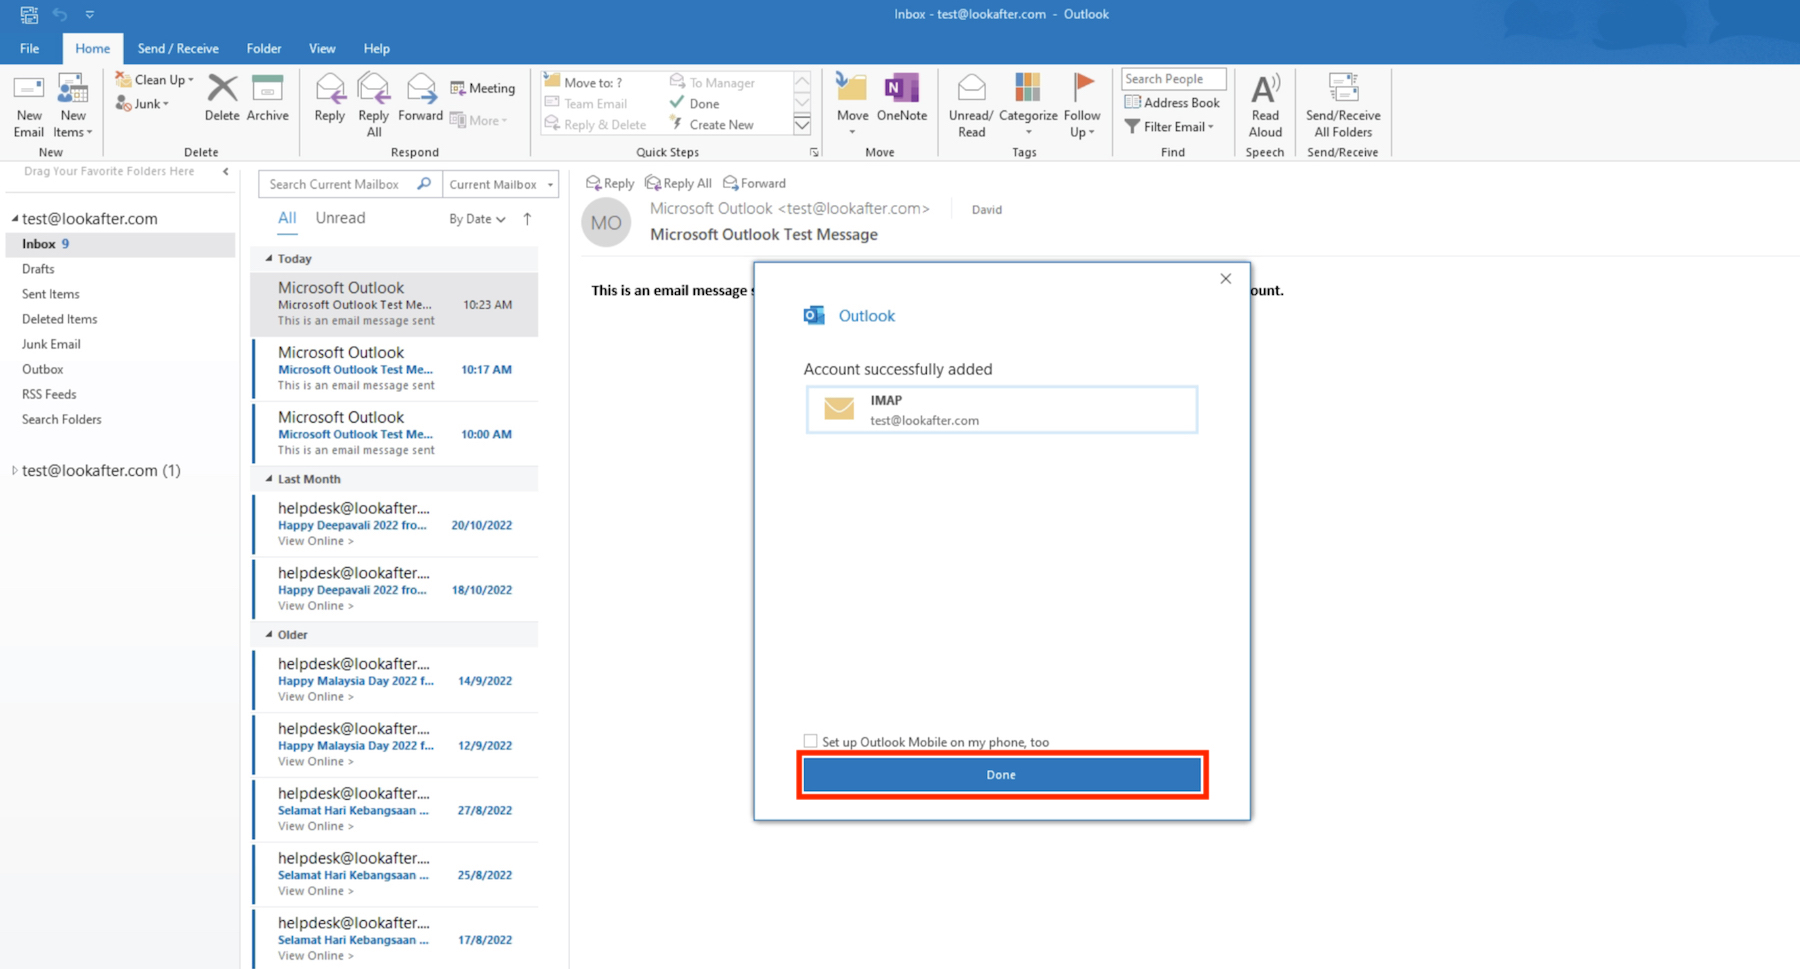
7. Once the IMAP account has been successfully added, you will see this screen. Click Done to finish the setup.
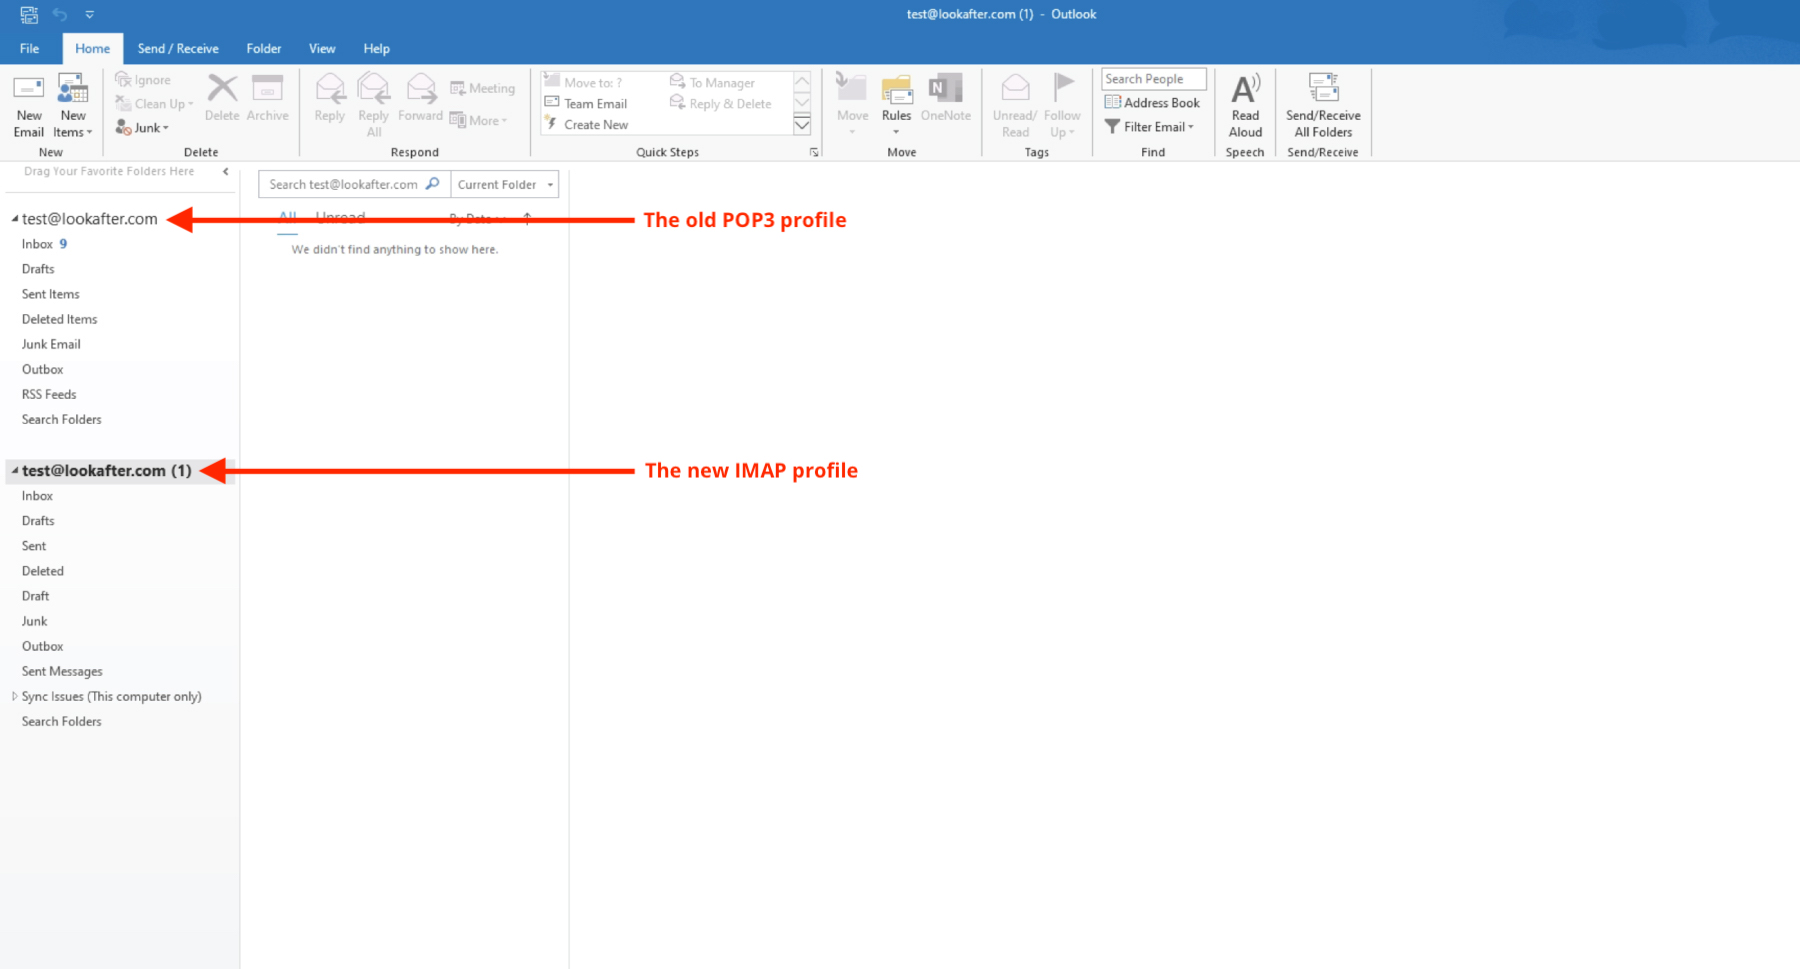
8. You will see two profiles on the left; one contains emails that were downloaded from your previous POP3 account, and another is your newly created IMAP account.
Note that some emails may be missing from the IMAP account if you have set to delete emails from the server on your previous POP3 account.
If you want to move emails from your local device (downloaded by previous POP3 account) back to the server so that you can view them across different devices with IMAP, proceed to Step 4 below.
Step 4: Move old emails to your IMAP account (optional)
You can skip this step if you want to keep the old emails (from the previous POP3 account) on your device locally without synching to the server.
If you want to upload and sync the old emails to the server and make them available across all devices using IMAP, follow through the steps below.
IMPORTANT: Before you proceed, please make sure your email space is sufficient to contain all emails.
If required, please request your avomaster or voadmin to increase your email space.
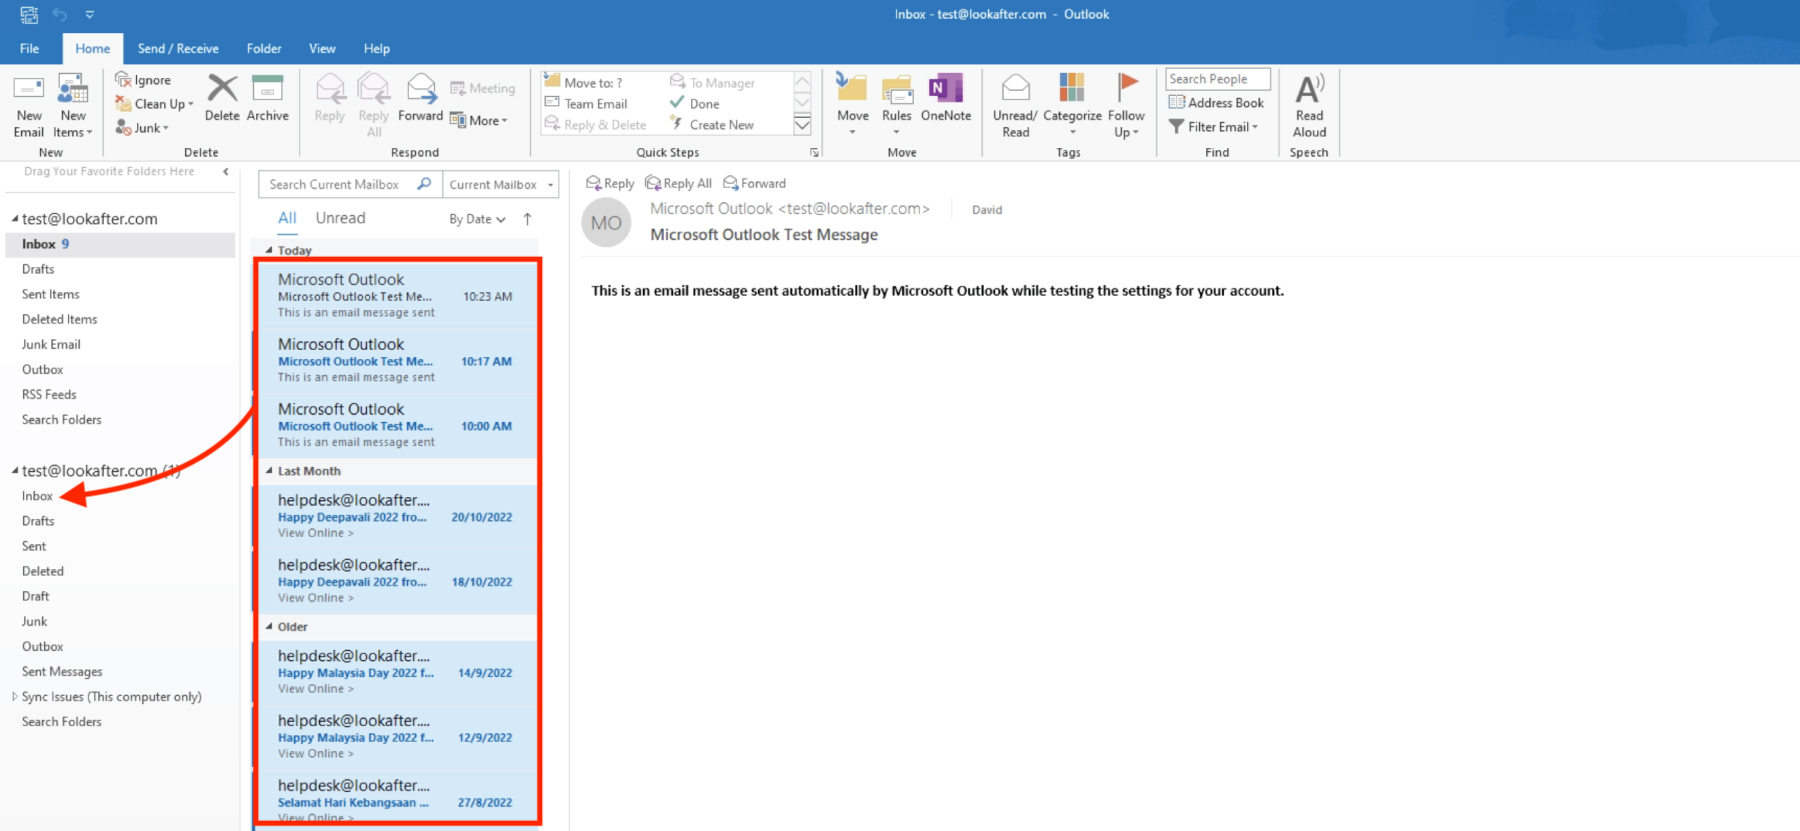
1. To move emails from the old POP3 account to the new IMAP account, simply select the emails from your POP3 profile, and drop them to the Inbox or any folder within the IMAP profile.
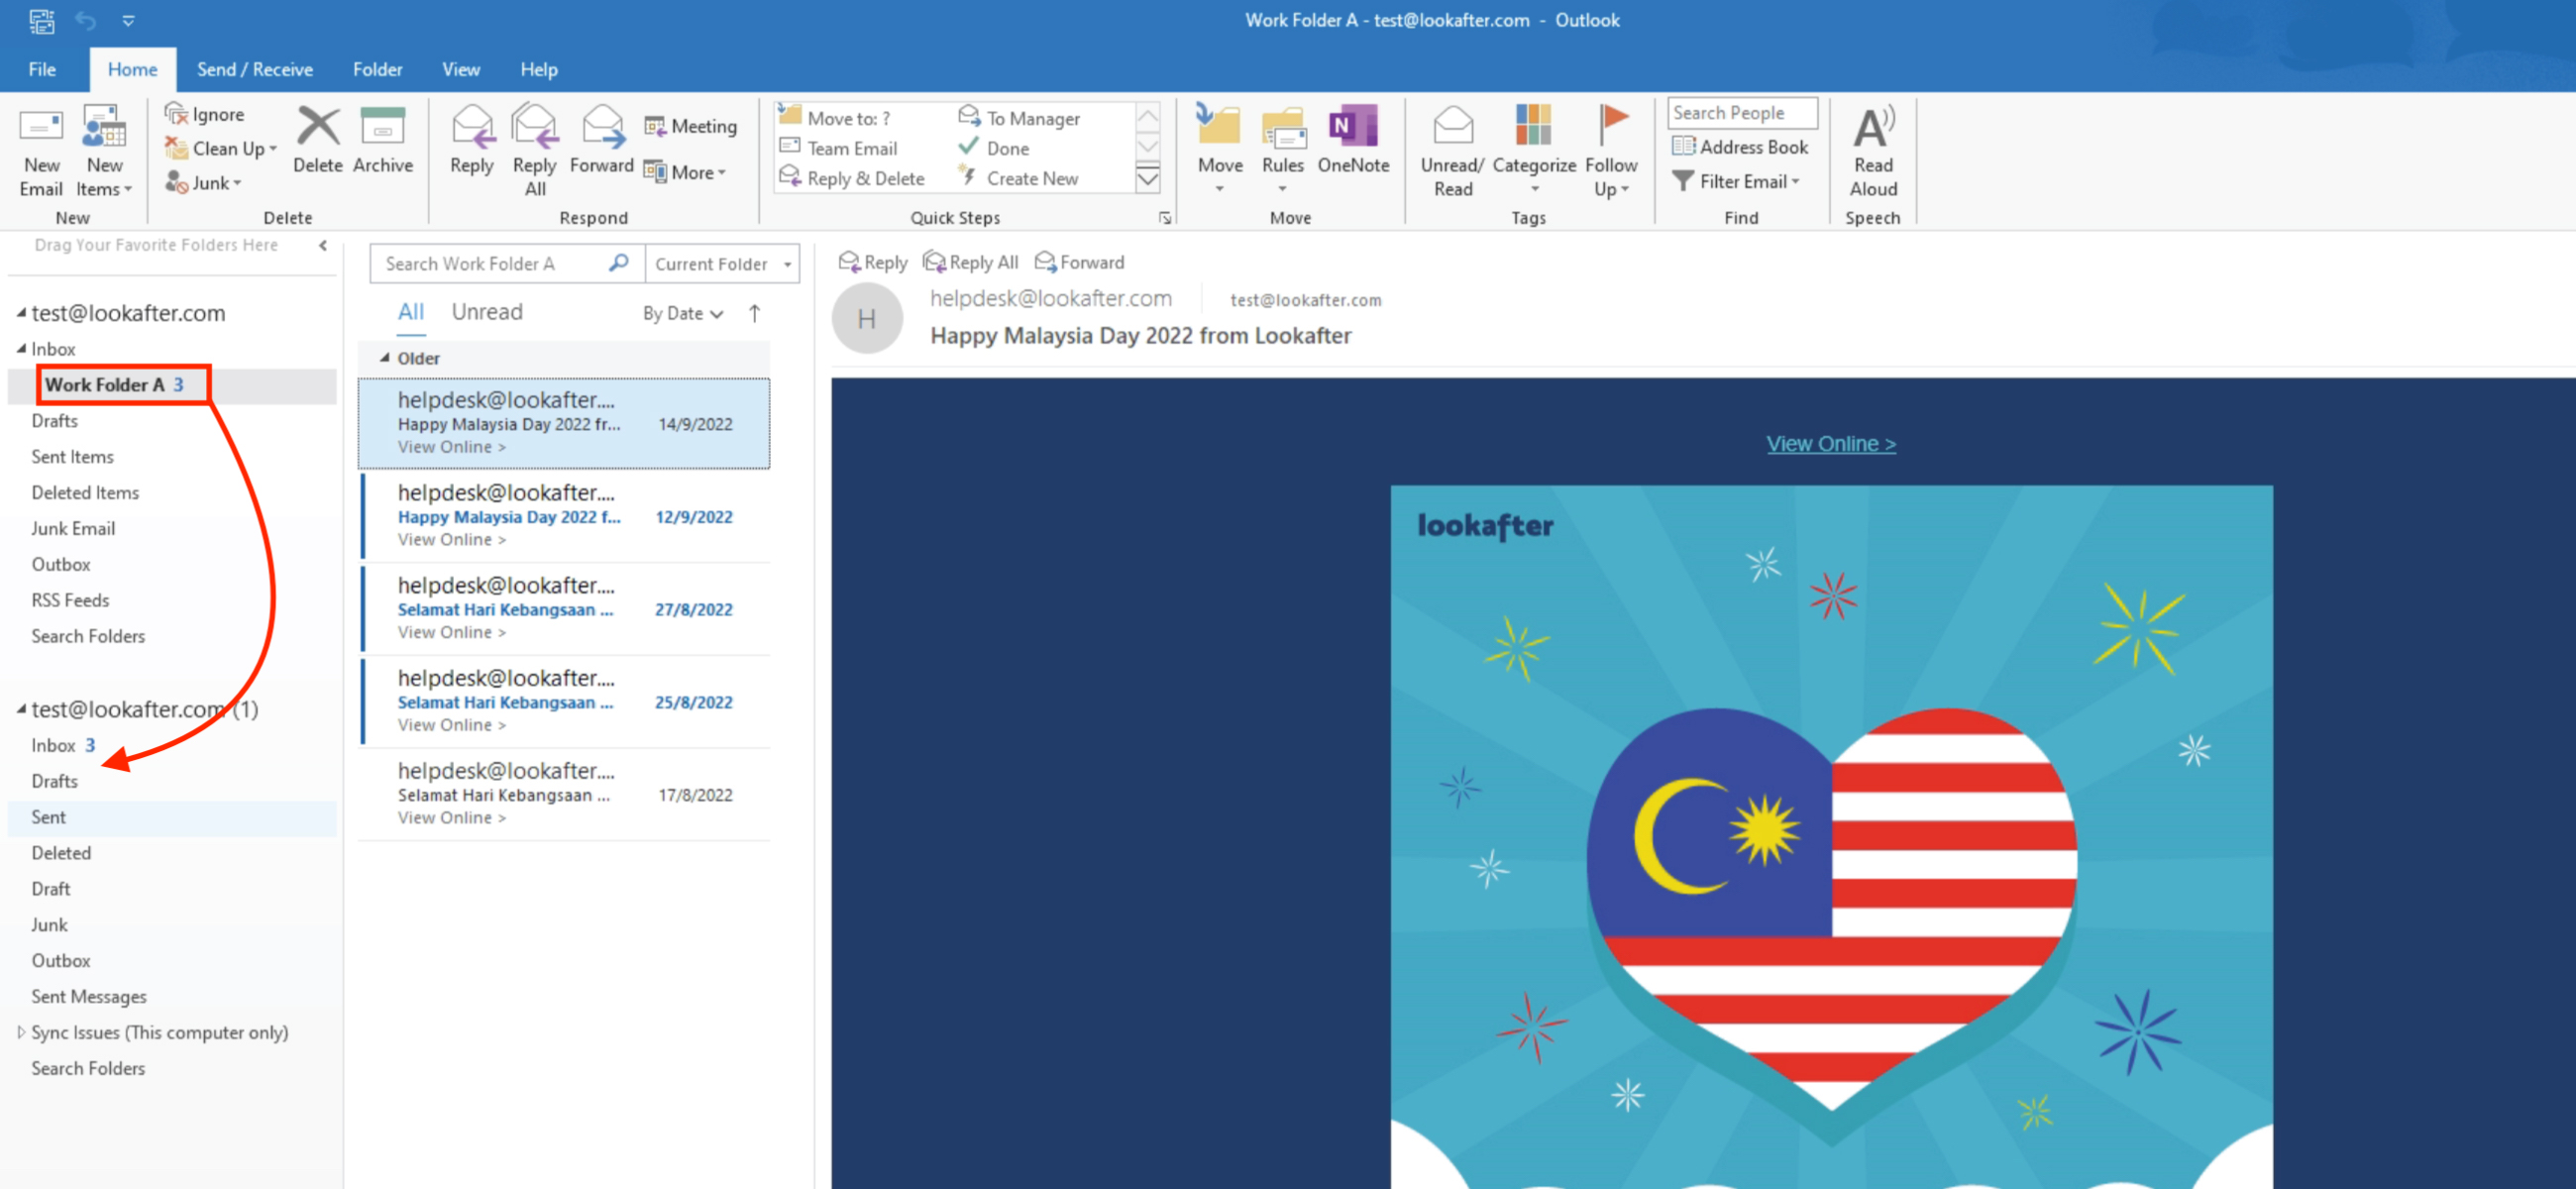
2. Alternatively, you can first create a custom folder under the POP3 profile, and move the desired emails into that folder. Then, drag-and-drop the folder to your IMAP profile. You will then be able to see this custom mail folder on webmail and other devices that are set up with IMAP.

