Home > FAQ > Email > Email Clients & Mobile > Mail Setup Guides for Desktop PC/Laptop > Setting Up POP3 in Microsoft Outlook
Setting Up POP3 in Microsoft Outlook
This document lists the steps of setting up POP3 profile in Microsoft Outlook using the default setup wizard. If you have problems setting up the profile (e.g. Ms Outlook could not fetch the accurate server settings), please refer to the manual setup guide.
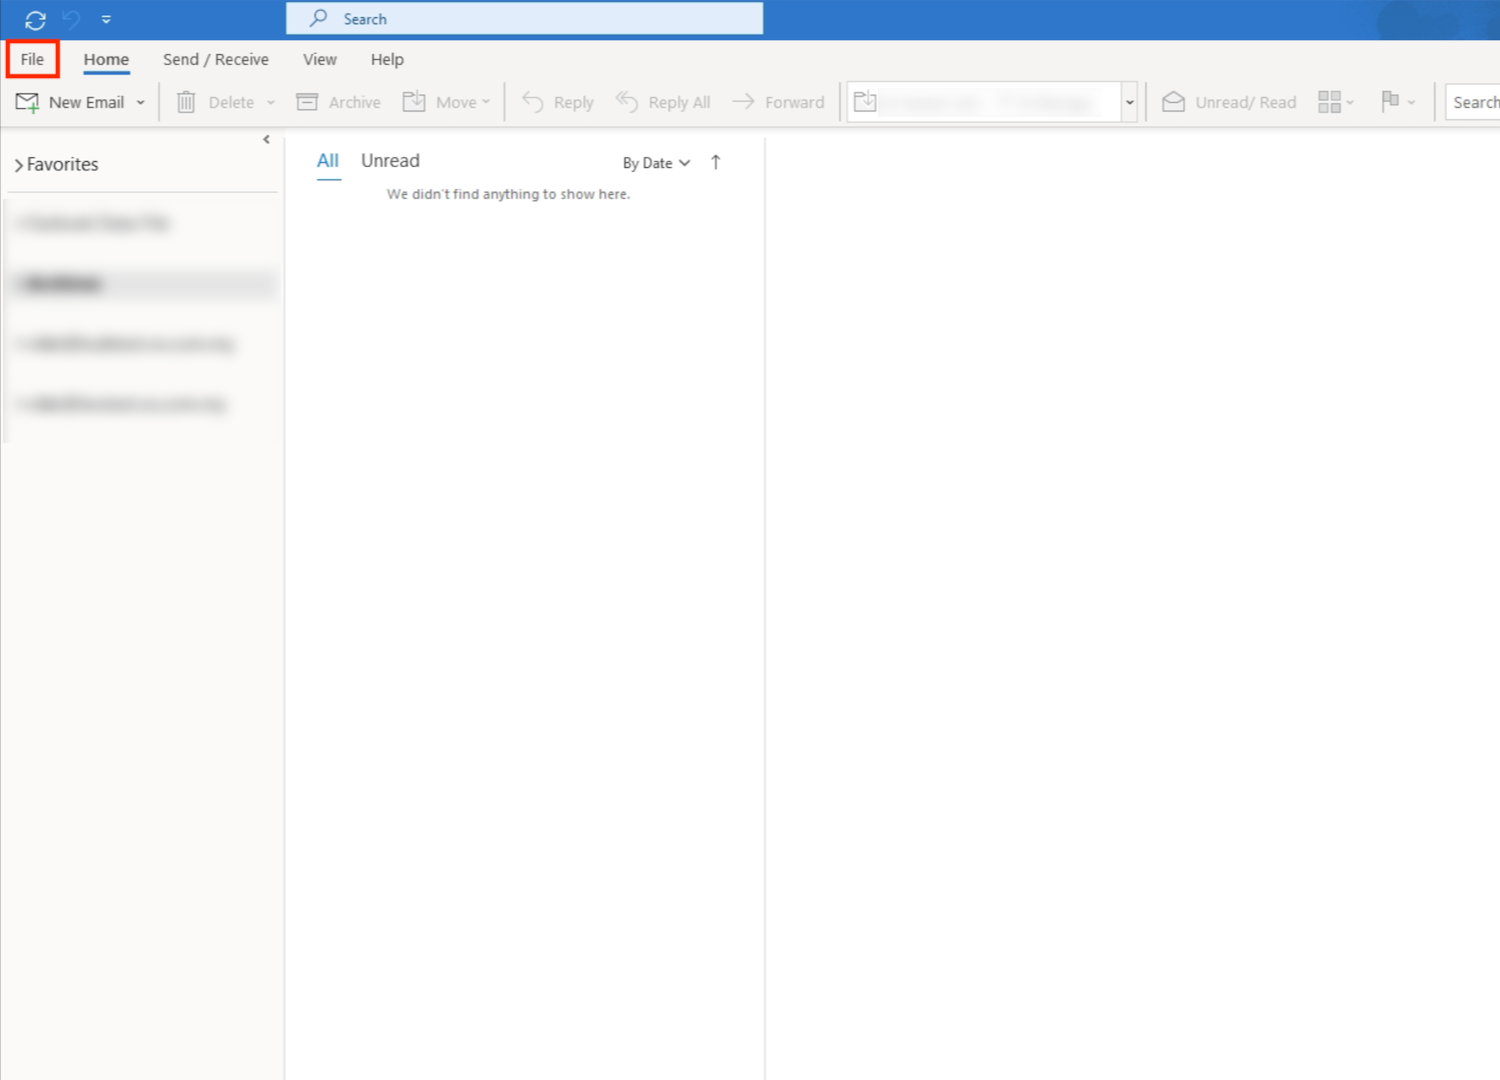
1. Open Microsoft Outlook. Then, go to File.
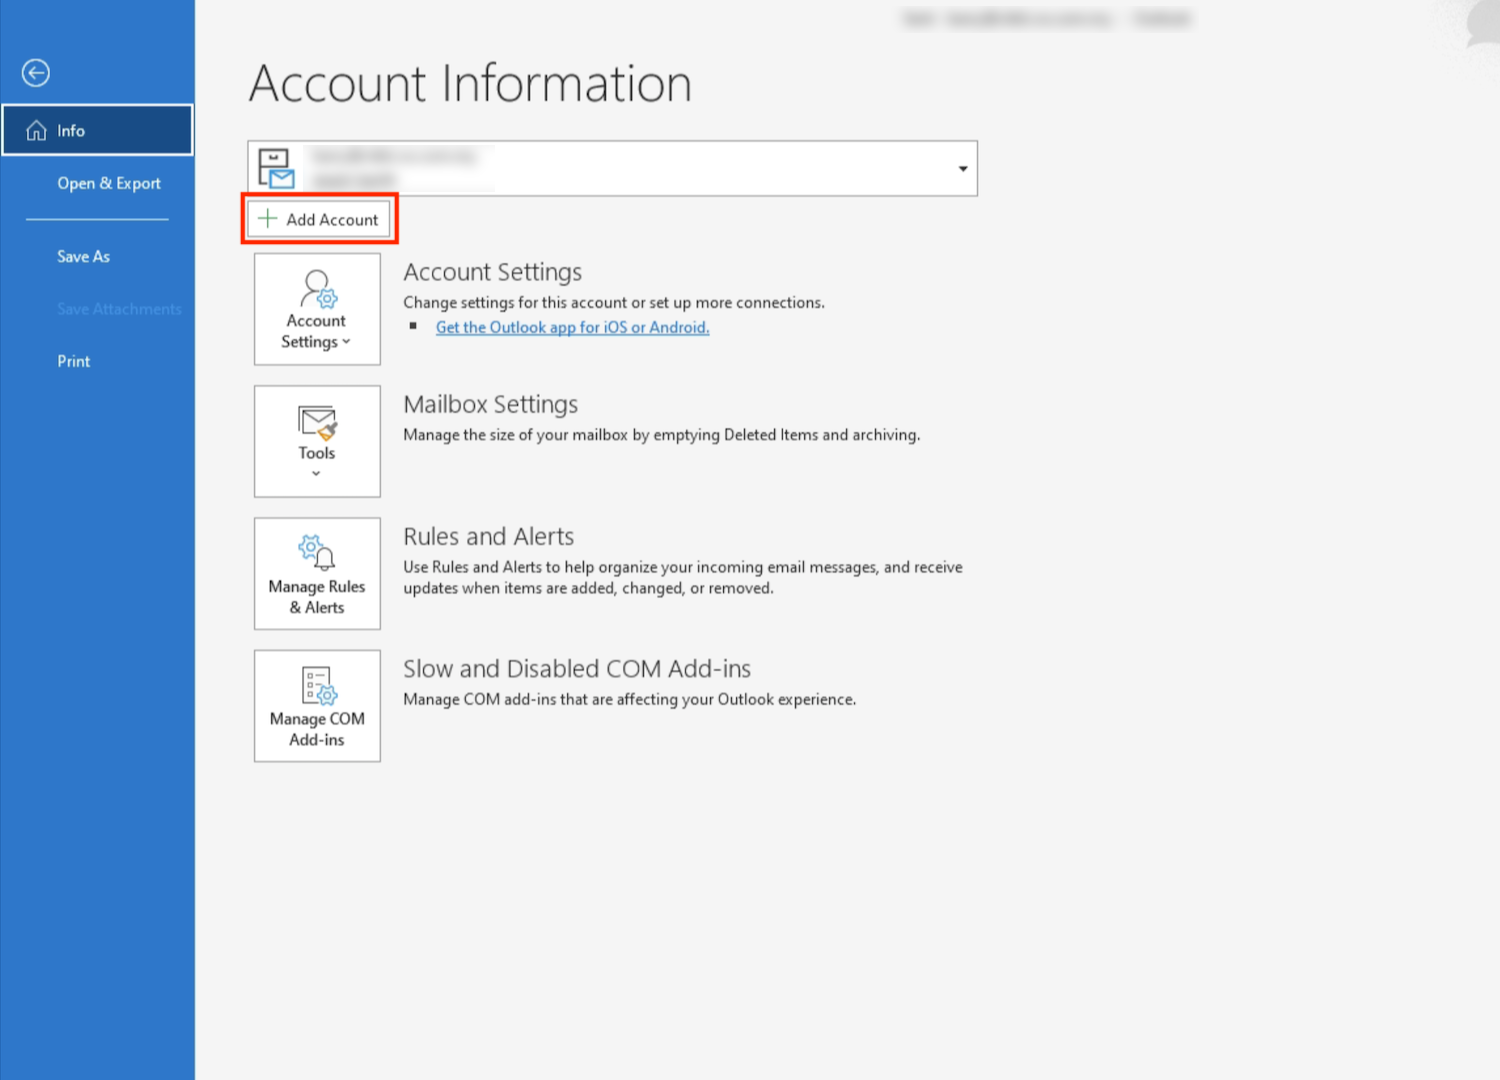
2. Click [+Add Account].
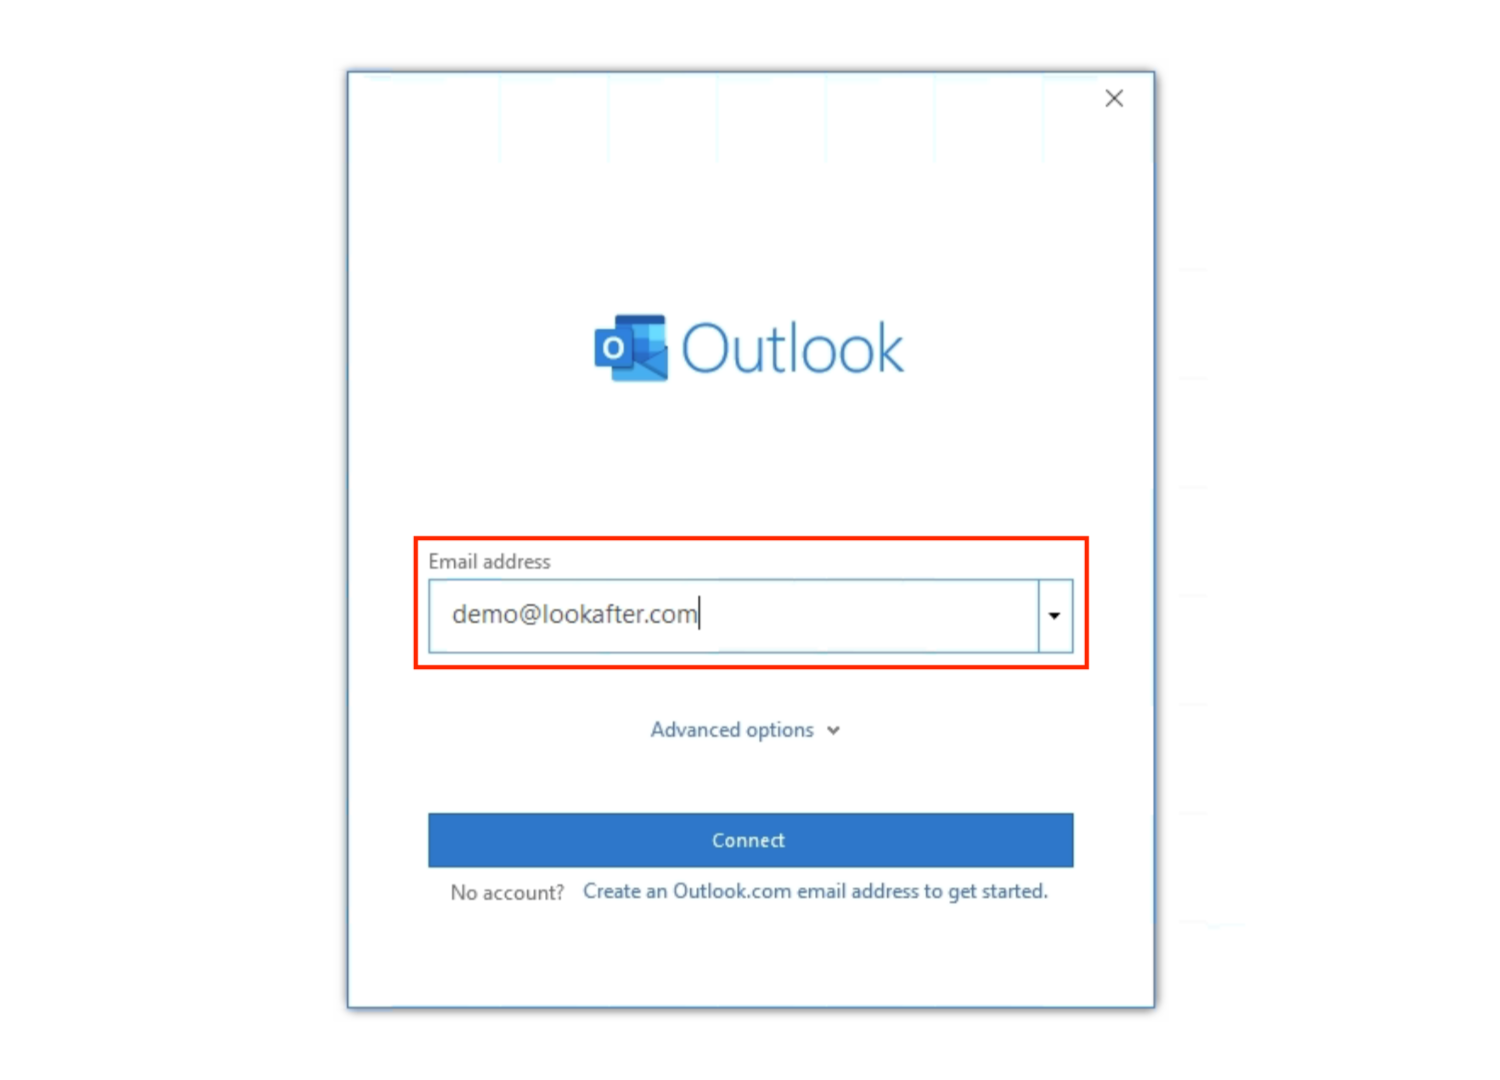
3. Fill in your email address into the given field.
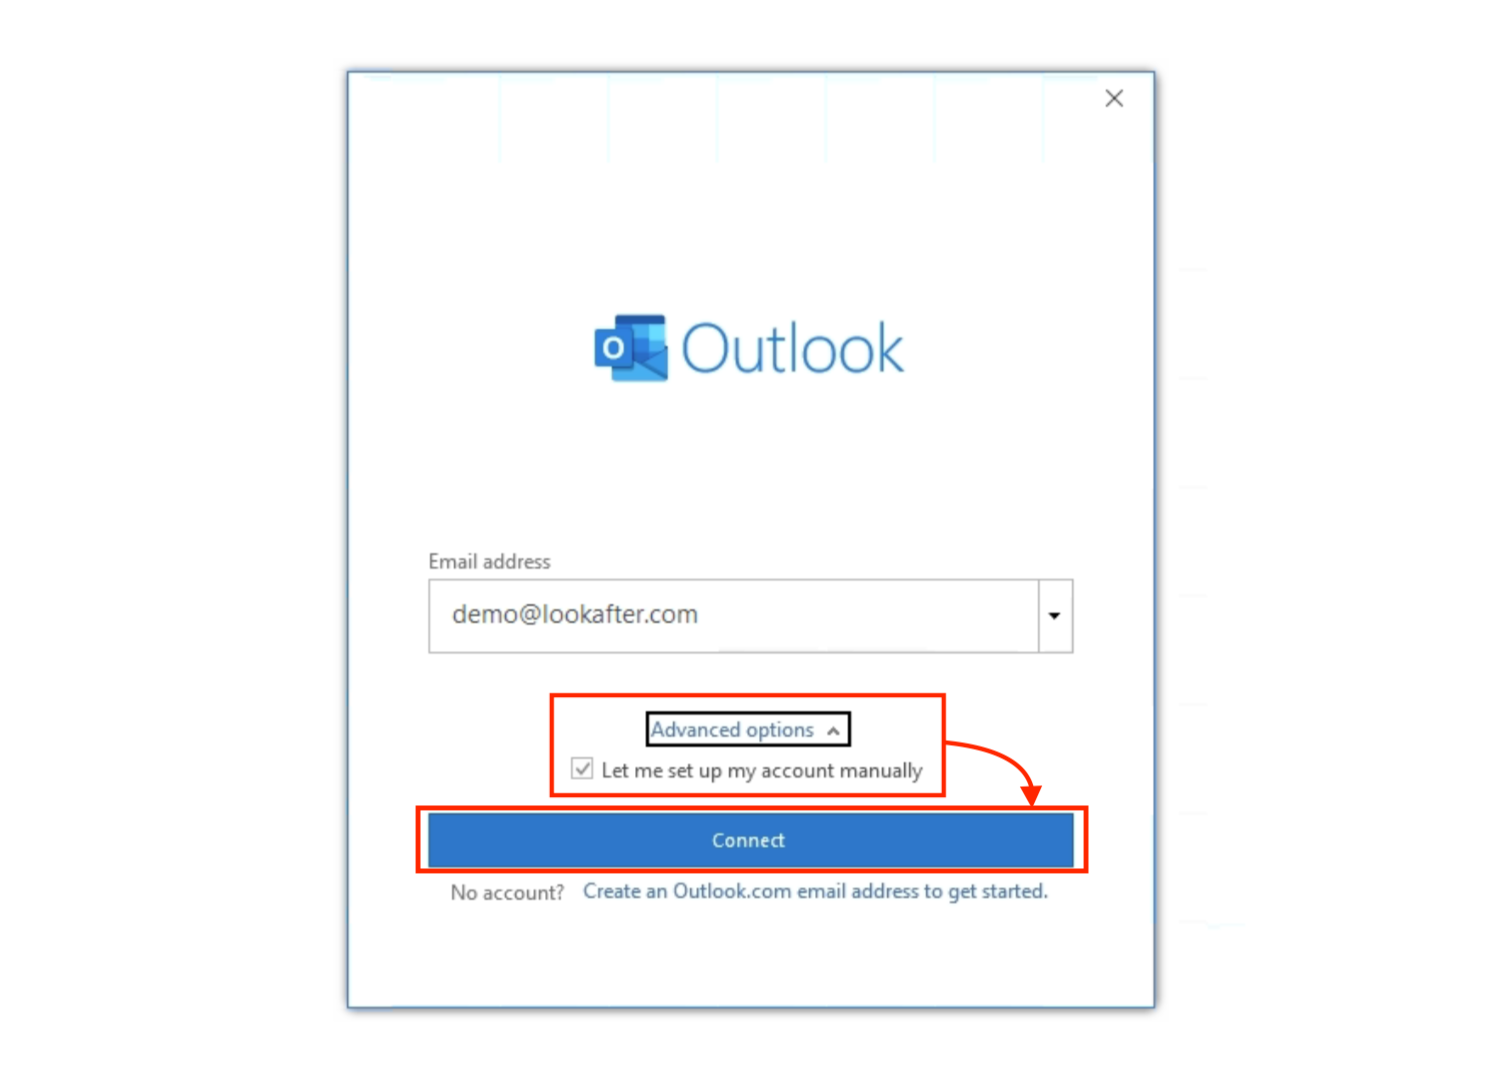
4. Then, click on Advanced options, select Let me set up my account manually and proceed with Connect.
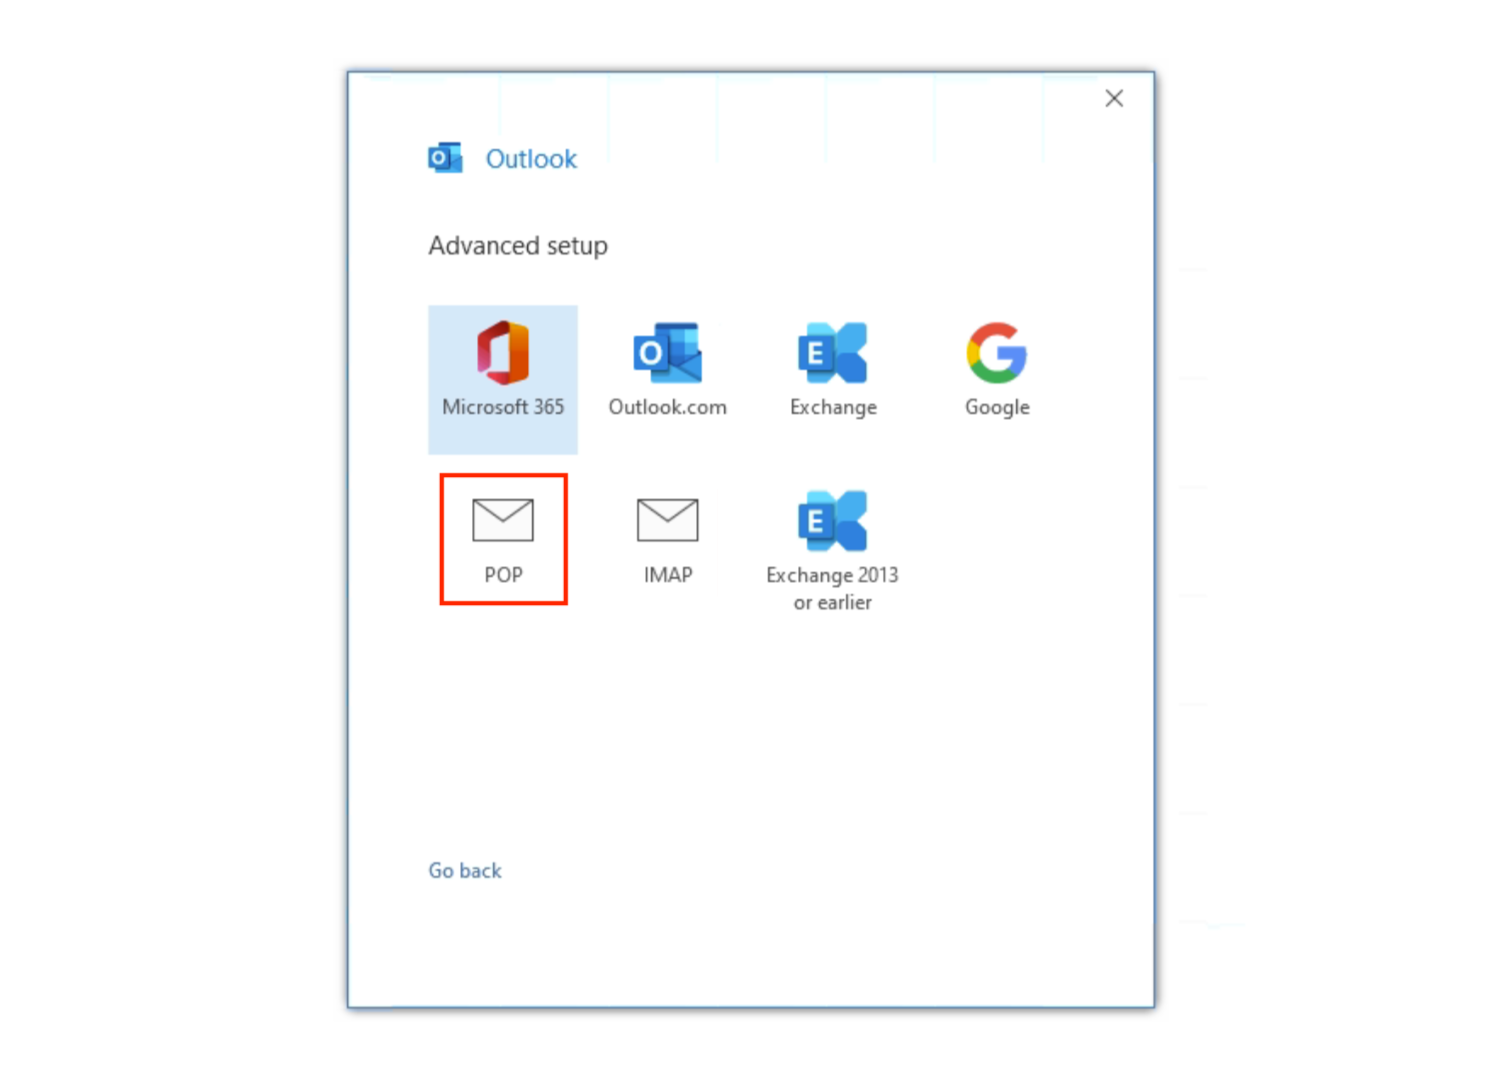
5. Select POP.
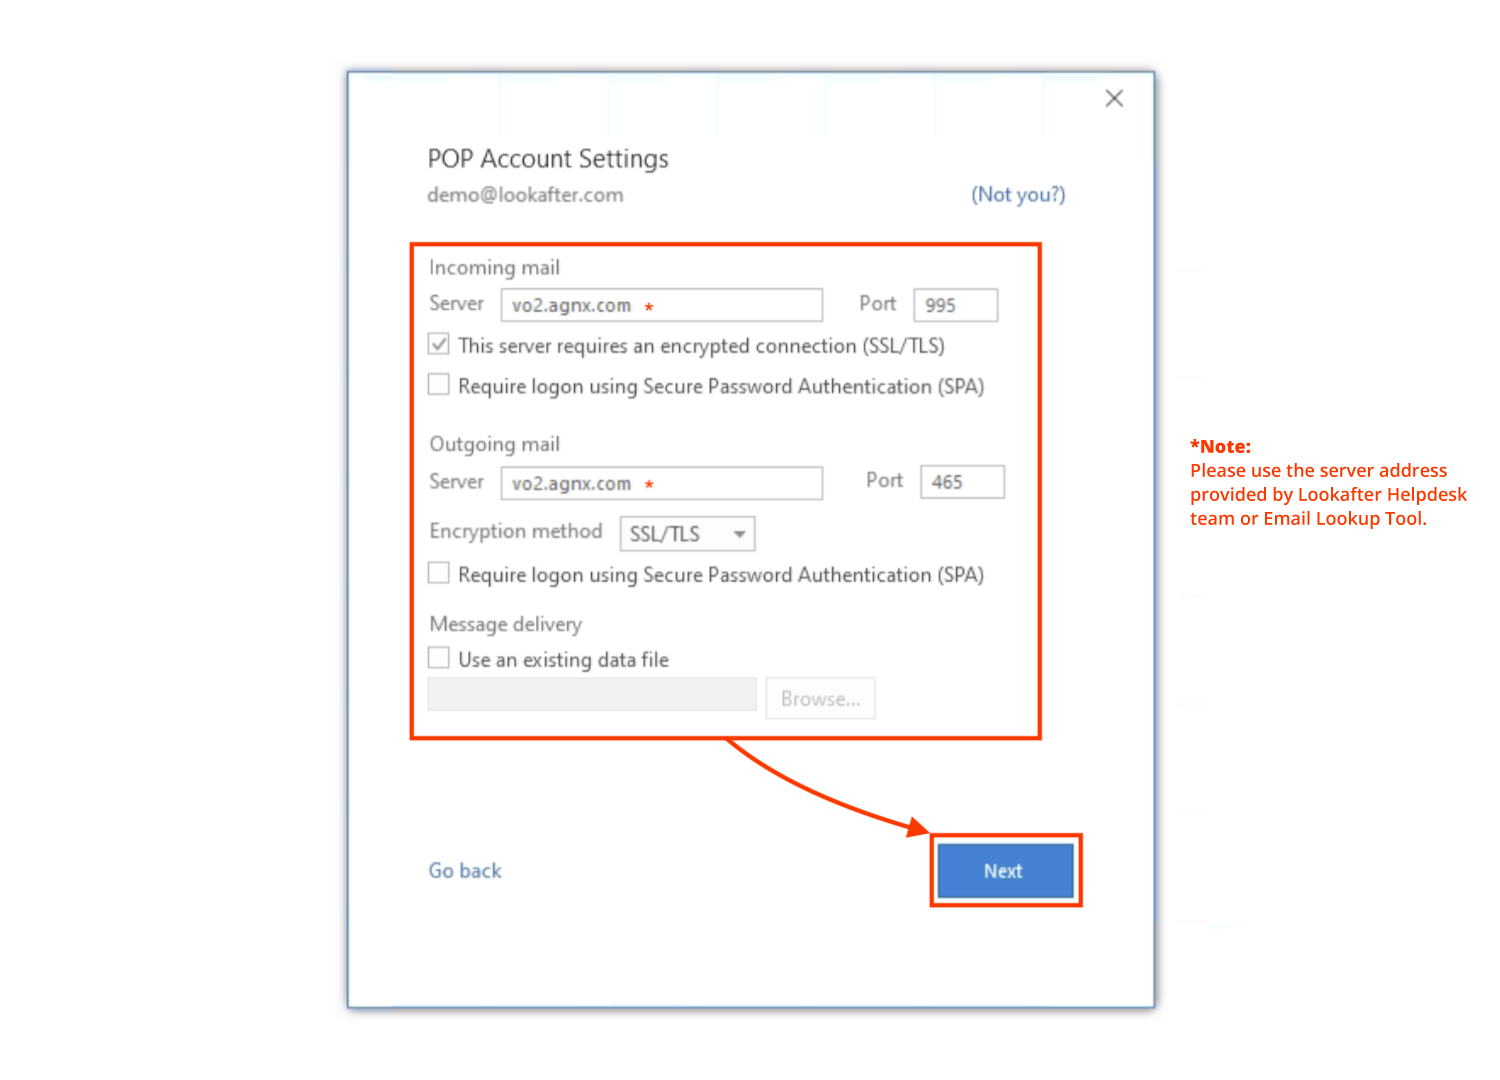
6. Please fill in these details in the POP Account Settings:
| Incoming mail server | vo1.agnx.com / vo2.agnx.com / g1.agnx.com IMPORTANT: To confirm which server to be used for your domain, please use the Email Lookup Tool or consult Lookafter Helpdesk. |
|---|---|
| Port (incoming) | 995 |
| This server requires an encrypted connection (SSL/TLS) | YES (tick) |
| Require logon using Secure Password Authentication (SPA) | Leave untick |
| Outgoing mail server | vo1.agnx.com / vo2.agnx.com / g1.agnx.com IMPORTANT: To confirm which server to be used for your domain, please use the Email Lookup Tool or consult Lookafter Helpdesk. |
| Port (outgoing) | 465 |
| Encryption method | SSL/TLS |
| Require logon using Secure Password Authentication (SPA) | Leave untick |
Once done, click Next.
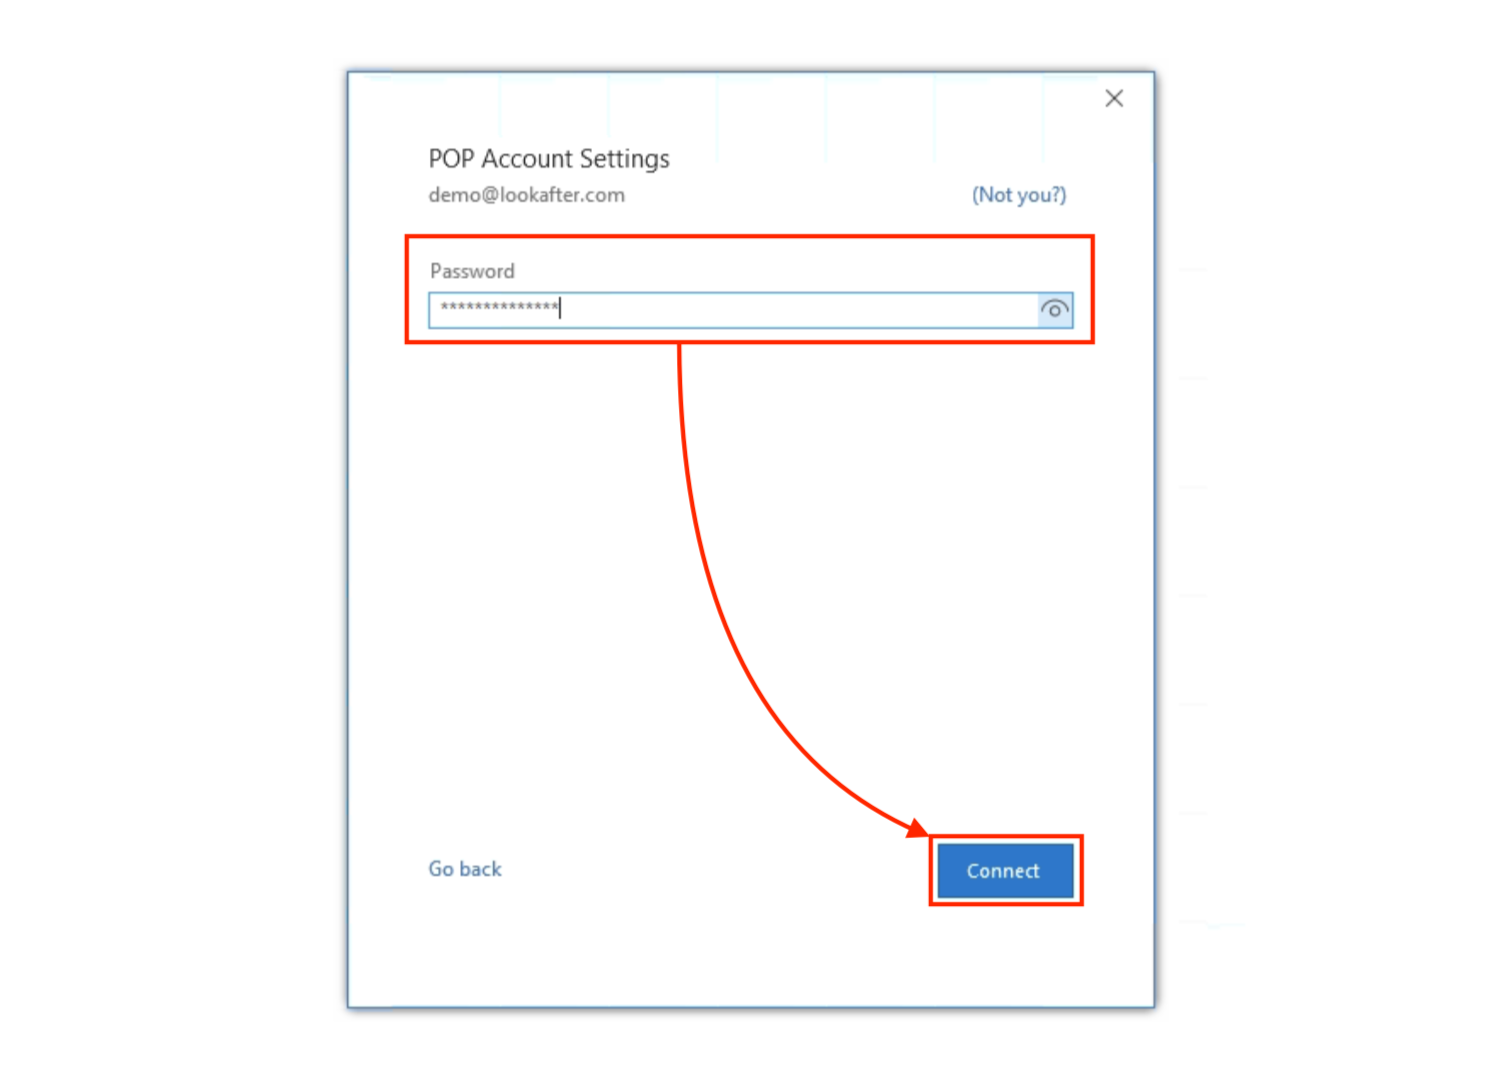
7. Next, enter your email account's password and proceed with Connect.
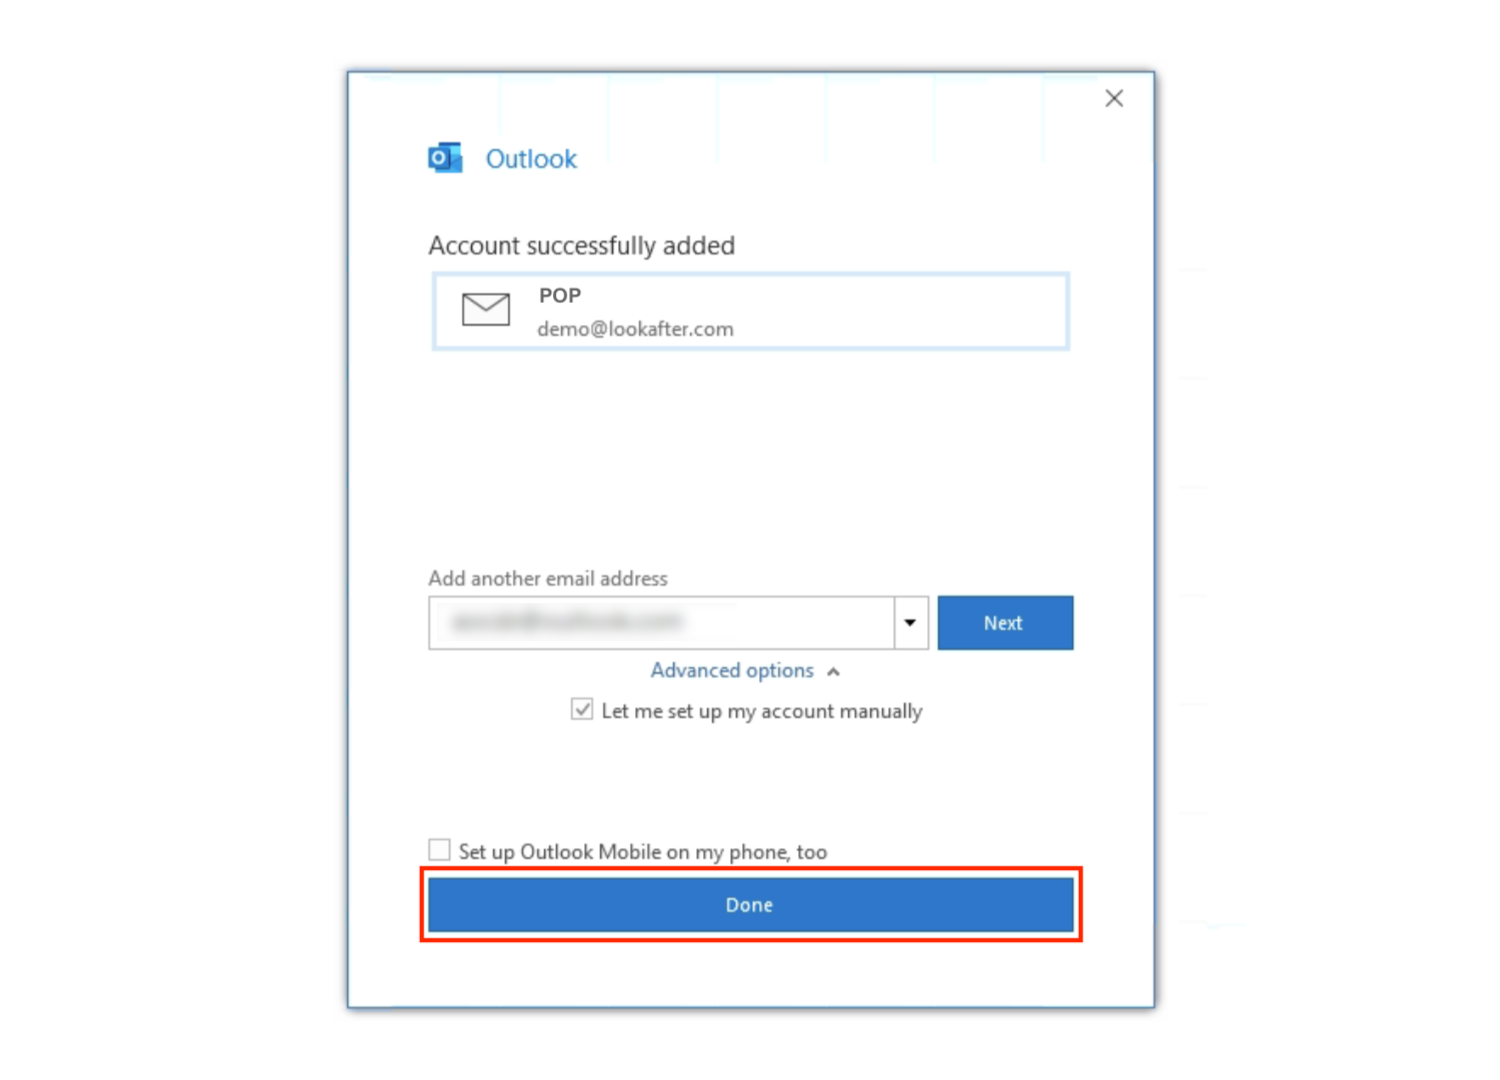
8. Once the IMAP account has been successfully added, you will see this screen. Click Done to finish the setup.
Your Inbox mails will be downloaded. The download process may take a while if your mailbox size is large.
By default, your POP account is set to leave a copy of emails on the server for 14 days. To change this setting, please refer to: Configuring How Much Days Emails are Kept on Server

